150
FTX-N/U, FVXS-N, FDMQ-R Series EDUS091558E
3P510049-1A
3
• When operating, point the transmitting part of the remote
controller in the direction of the receiver.
• The direct transmitting distance of the remote controller is
approximately 23 ft..
• The signal cannot be transmitted if something such as cur-
tains blocks the receiver and the remote controller.
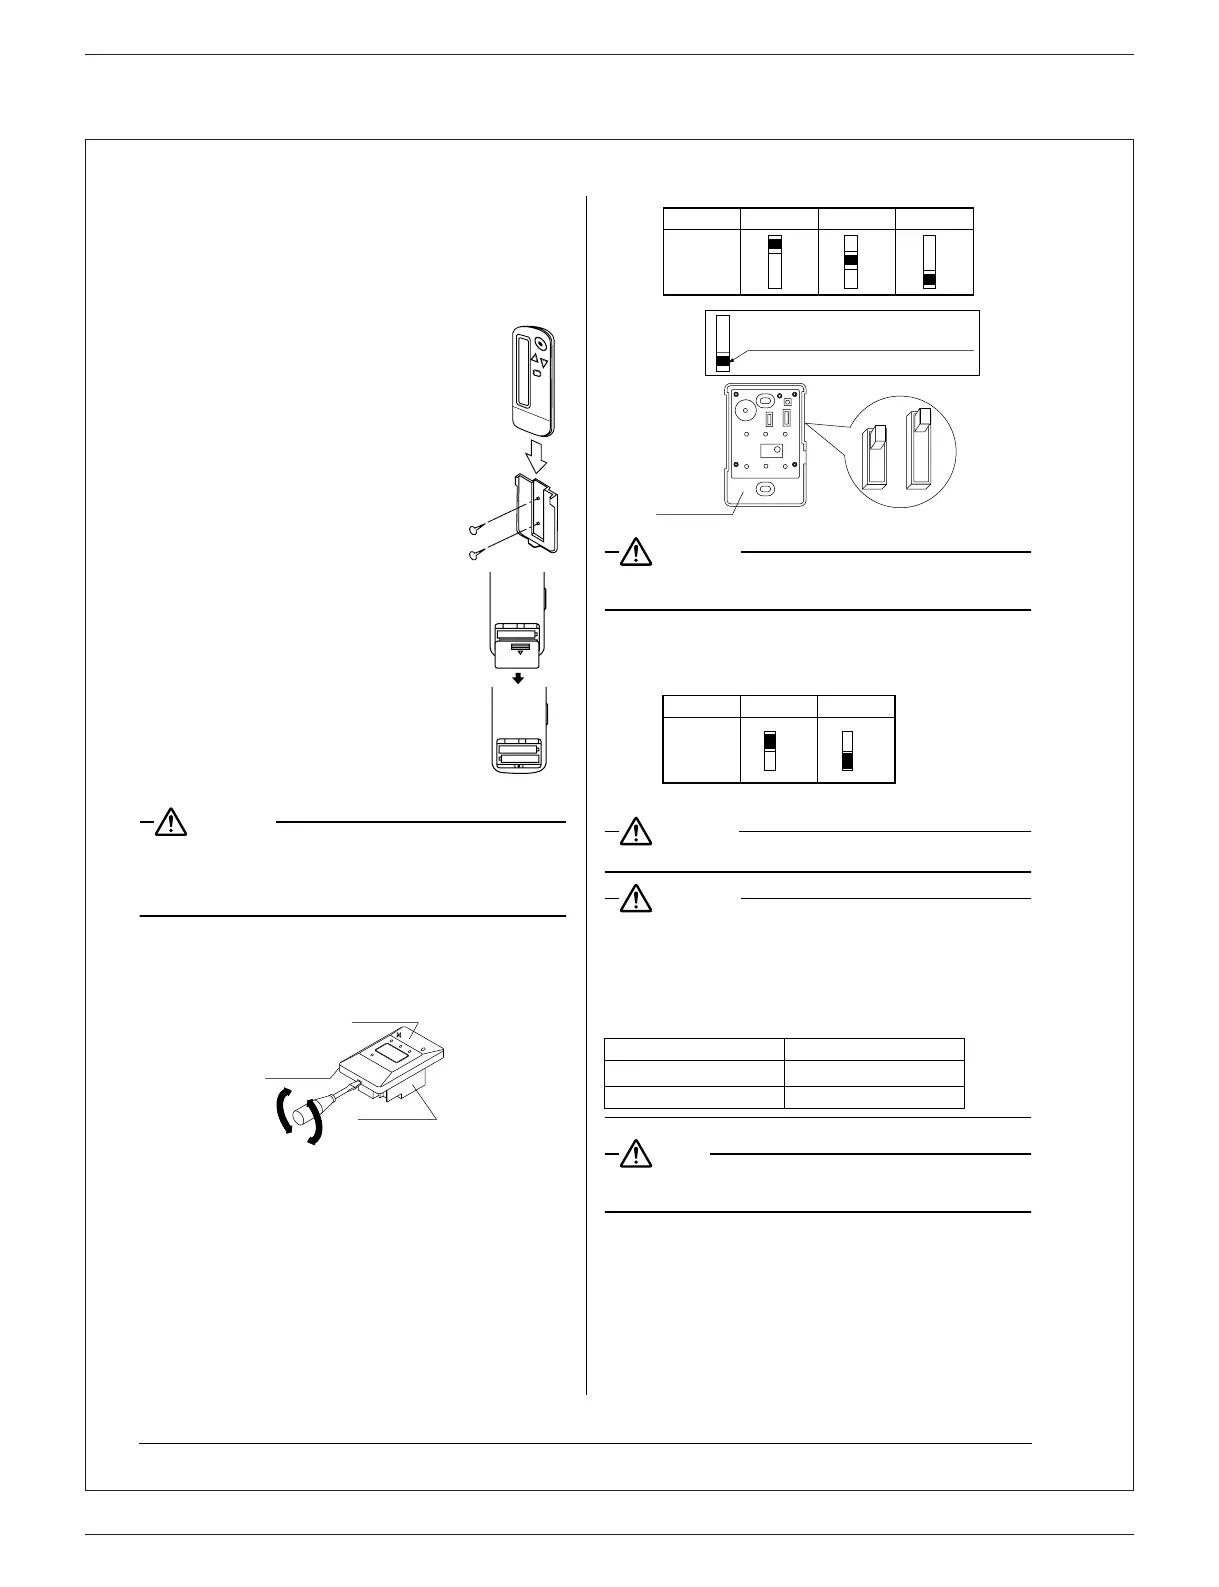
• Installing to a wall or a pillar
1. Fix the remote controller holder (3) with
the screws (6).
2. Slide the remote controller (2) into the
remote controller holder (3) from the top.
• How to put the dry cell batteries
1. Remove the back cover of the remote con-
troller (2) to the direction pointed by the
arrow mark.
2. Put the dry cell batteries.
Use two LR03<AM4> dry cell batteries (4).
Put the dry cell batteries (4) correctly to fit
their (+) and (–).
3. Close the back cover as before.
4. RECEIVER INSTALLATION
CAUTION
• Do not install more than 3 receivers in the vicinity of one
another.
• With 4 or more units, there is always the possibility of mal-
function.
4-1. Preparations before installation
Remove the upper part of the receiver (1).
• Insert the screwdriver (–) here and gently work off the
upper part of the receiver (1).
4-2. Determination of address and MAIN/SUB remote con-
troller
If setting multiple wireless remote controllers to operate in
1 room, perform address setting for the receiver and the
wireless remote controller. If setting multiple wired remote
controllers in 1 room, change the MAIN/SUB switch of the
receiver.
4-3. Setting procedure
• Setting the receiver
Set the wireless address switch (SS2) on the PC-board
according to the table below.
CAUTION
Change the setting so that the internal electronic equipments
are not damaged with a pen etc.
When using both a wired and a wireless remote controller
for 1 indoor unit, the wired controller should be set to MAIN.
Therefore, set the MAIN/SUB switch (SS1) of the receiver
to SUB.
4-4. Receiver installation
WARNING
Be sure to turn off the power before installation.
CAUTION
<Precautions on transmission wiring>
1. When wiring, run the wiring away the power supply wiring in
order to avoid receiving electric noise (external noise).
2. When wiring, refer to the wiring diagram of indoor unit
(attached to indoor unit) as well.
WIRING SPECIFICATION
NOTE
Keep wires to less than 650 ft. total when using 2 remote con-
trollers (wired or wireless) and when not.
Upper part
Lower part
Receiver (1)
Wiring type Sheathed wire (2 wire)
Size
AWG18-16
Wiring length Max 650 ft. (See Note)
Unit No.
Wireless
address
switch
(SS2)
No.1 No.2 No.3
3
2
1
3
2
1
3
2
1
The side painted black indicates
the switch knob position.
1
2
3
M
S
Lower part
MAIN/
SUB
switch
(SS1)
MAIN SUB
M
S
M
S
 Loading...