182
FTX-N/U, FVXS-N, FDMQ-R Series EDUS091558E
3P572321-4B
5
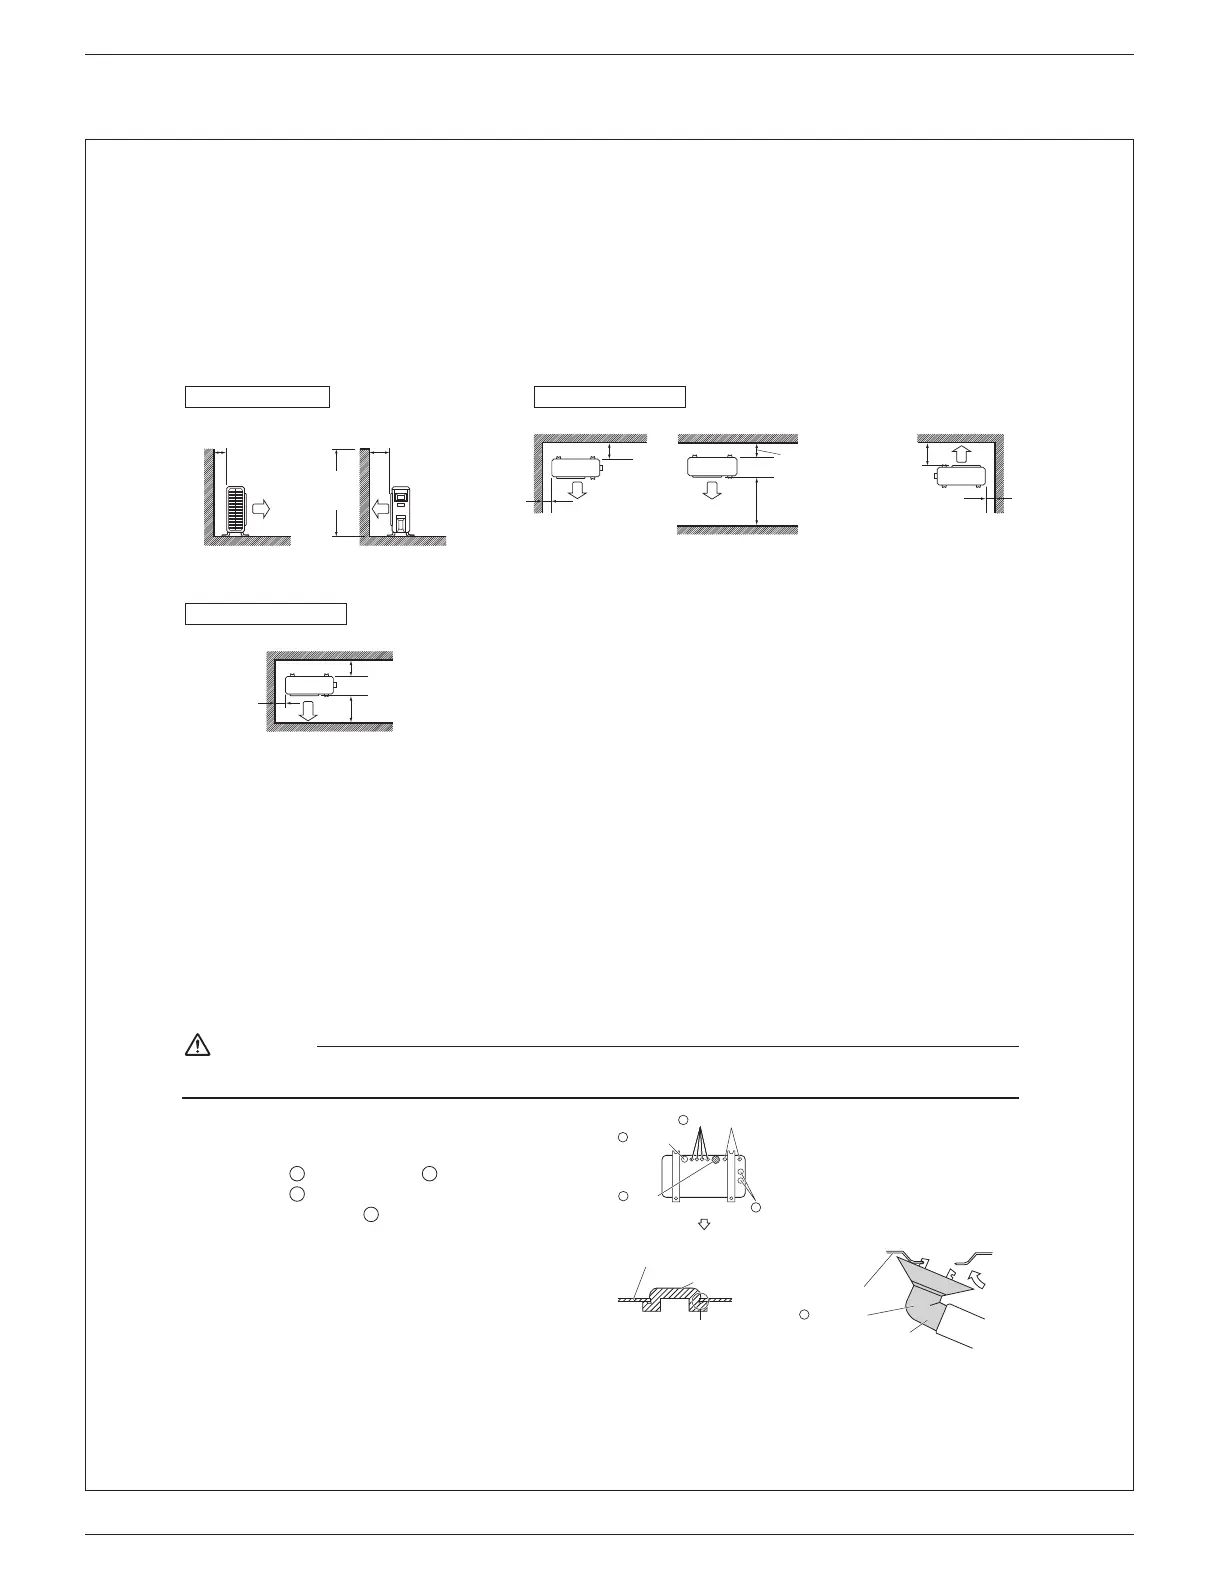
Installation Space Requirements
•
Position the unit on a horizontal surface.
Any tilt in the unit should be 3° or less to the horizontal.
•
Whereawallorotherobstacleisinthepathoftheoutdoorunit’sintakeorexhaustairow,followtheinstallationspace
requirements below.
• For any of the below installation patterns, the wall height on the outlet side should be 47-1/4 inch (1200mm) or less.
More than
3-15/16 (100)
More than
13-3/4 (350)
Walls facing three sides
More than 3-15/16 (100)
More than 13-3/4 (350)
More than
1-15/16 (50)
Wall facing one side
More than
3-15/16 (100)
More than
13-3/4 (350)
Side view
47-1/4
(1200)
or less
Top view
More than
1-15/16 (50)
More
than
3-15/16
(100)
Walls facing two sides
More than
1-15/16 (50)
More than
13-3/4
(350)
Top view
unit: inch (mm)
Wheninstalledasinthefigureontheleft,itisrecommendedtoeither
change the orientation of the outdoor unit outlet side or use the air direction
adjustment grille (sold separately).
Outdoor Unit Installation
1. Installing the outdoor unit
• When installing the outdoor unit, refer to “Precautions for Selecting a Location” and the “Outdoor Unit Installation
Diagram”.
• If drain work is necessary, follow the procedures in
“
2. Drain work
”
.
2. Drain work
CAUTION
• In cold areas, do not use a drain socket, drain caps (1,2) and a drain hose with the outdoor unit. (Drain water may freeze,
impairing heating performance.)
• Ifthedrainportiscoveredbyamountingbaseoroor
surface, place additional foot bases of at least 1-1/4
inch (30mm) in height under the outdoor unit’s feet.
1) Attach
C
drain cap (1) and
D
drain cap (2).
2) Attach
B
drain socket.
• When attaching
B
drain socket to the bottom
frame, make sure to connect the drain hose to the
drainsocketfirst.
Bottom frame
Drain cap
Pinch the bottom
frame in.
Drain cap (1)
Drain cap (2)
D
Drain cap (2)
Air outlet side
B
Drain
socket
C
D
Bottom frame
Drain socket
Hose (available commercially,
inner dia. 5/8 ” (16mm))
B
01_EN_3P572321-4B.indd 5 2019/10/17 14:46:58
 Loading...