444
FTX-N/U, FVXS-N, FDMQ-R Series EDUS091558E
3P124623-5C
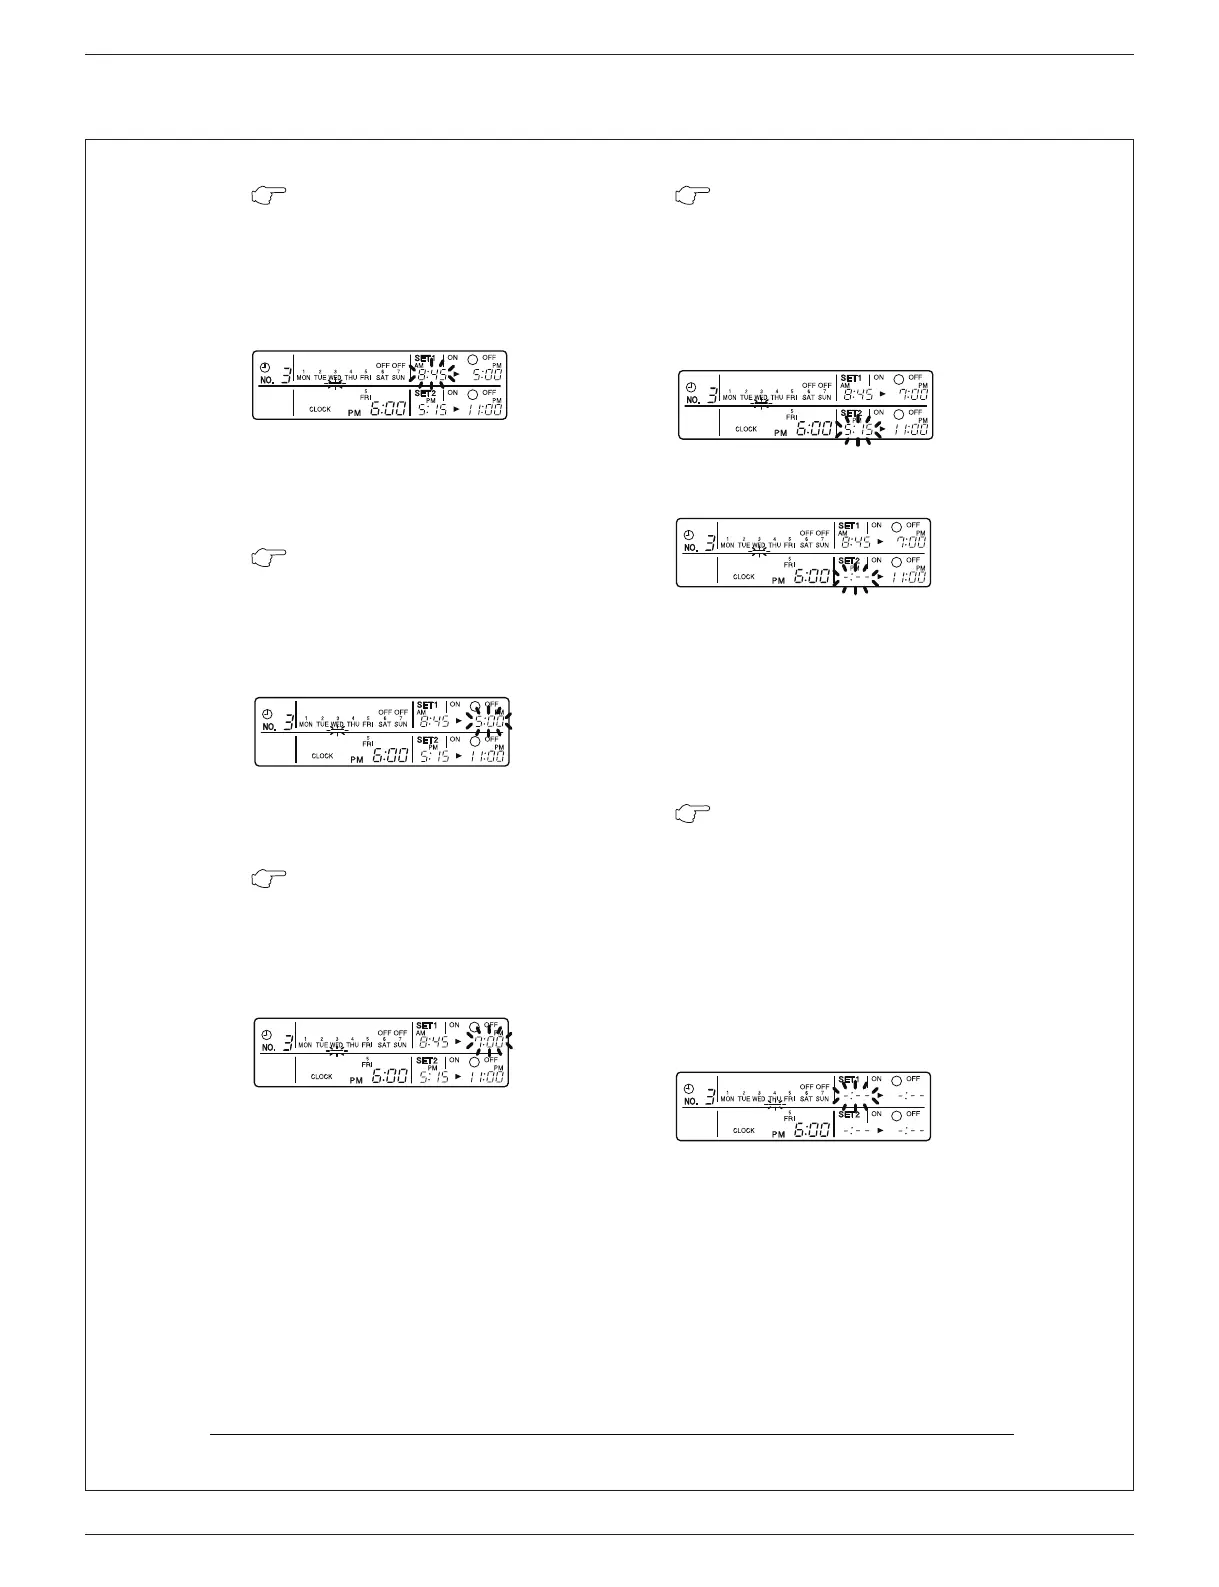
8
3. Press the BUTTON FOR
SELECTING DAYS OF A WEEK,
and set the day of the week to be
changed. The set No. of pro-
grammed time of the day of the
week is displayed.
A. Change/cancel partially
4. Press the TIMER ON BUTTON
and change, and the display of
programmed time flashes. Each
time you press it, the next area to
be set flashes.
5. Press the HOUR/MINU
TE
B
UTTON and change the pro-
grammed time. Press the TI
MER
ON B
UTTON, and finalize the set-
ting of change.
6. Press the PROGRAM CAN-
CELING BUTTON, and cancel th
e
programmed time. If you press it
again, display returns to the origi-
nal state. Press the TI
MER ON
BUTTON to finalize the cancella-
tion.
In the same procedure, cancel the programmed
time of system off 2.
B. Cancel the whole
7. Press the BUTTON
FOR
SELECTING DA
YS OF A W
EEK,
and shift to the day of the week to
be canceled. Then, press the HOL-
IDAY SETTING BUTTON, the dis-
play “ OFF ” appears at the top of
the particular day of the week. The
programmed time is canceled
. If
you press the button again, the
display returns to the original
state.
3
Set the day to Wednesday.
4
Shift to the display “PROGRAMMED
TIME OF SYSTEM OFF 1”.
5
Change the “PROGRAMMED TIME OF
SYSTEM OFF 1” to 7:00 p.m.
6
Shift to the “PROGRAMMED TIME OF
SYSTEM START 2”.
Set the “PROGRAMMED TIME OF
SYSTEM START 2” to program
cancellation.
7
Shift the day of the week to Thursday
to set as a holiday.

 Loading...