RXL-W Series EDUS092213A
91
3P686872-1
10
Installation Tips
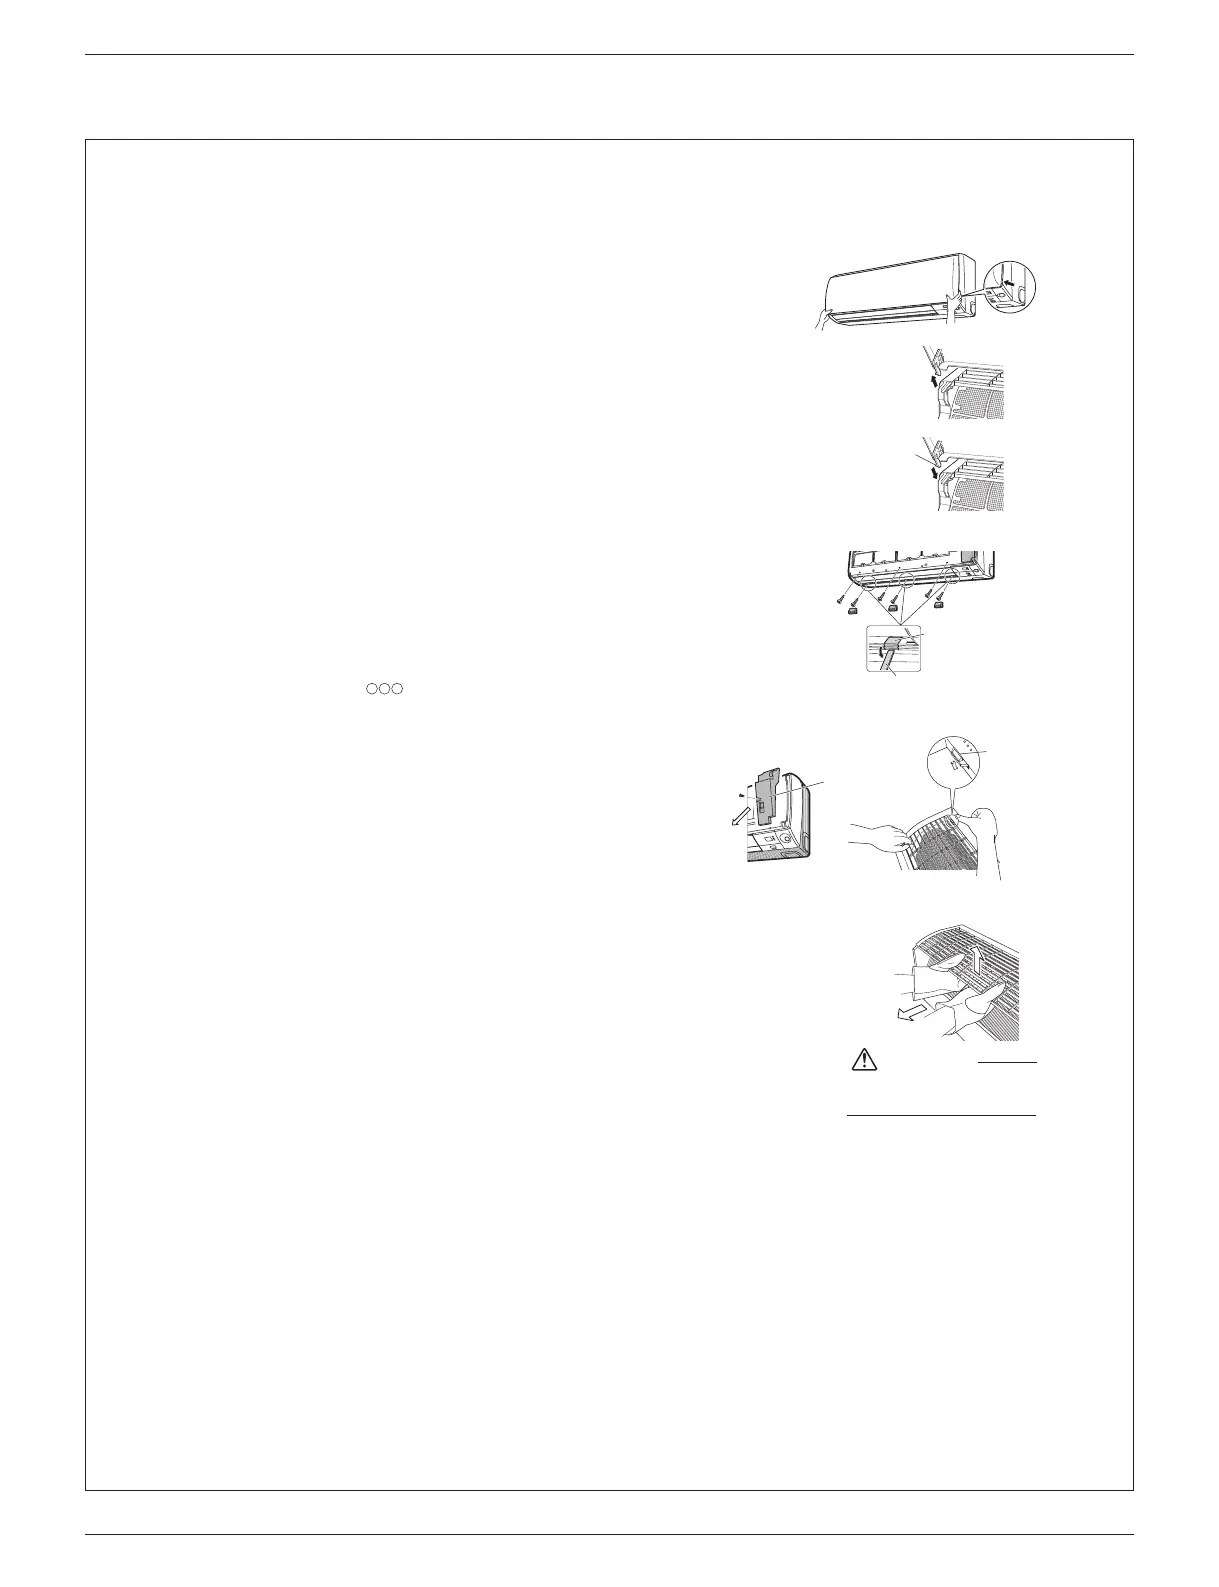
1. Removing and installing the front panel
• Removal method
1) Place your fingers in the indentations on the main unit (one each on the left
and right sides), and open the front panel until it stops.
2) While pushing the left side front panel shaft outward, push up the front panel
and remove it. (Remove the right side front panel shaft in the same manner.)
3) After removing both front panel shafts, pull the front panel toward yourself and
remove it.
• Installation method
Align the tabs of the front panel with the grooves, and push all the way in.
Then close slowly. Push the center of the lower surface of the panel firmly to
engage the tabs.
2. Removing and installing the front grille
• Removal method
1) Remove the front panel and air filters.
2) Remove screw covers (3 pcs.). (See Fig.1)
3) Remove the front grille fixing screws (6 screws). (See Fig.1)
4)
Remove the service lid screw (1 screw) and remove service lid. (See
Fig.2
)
5)
In front of the mark on the front grille, there are 3 upper hooks.
Lightly pull the front grille toward you with one hand, and push down on the
hooks with the fingers of your other hand. (See
Fig.3
)
When there is insufficient work space because the unit is close to
ceiling
Place both hands under the center of the front grille, and while pushing up,
pull it toward you.
• Installation method
1) Install the front grille and firmly engage the upper hooks (3 locations).
2) Install the 6 screws of the front grille and screw covers (3 pcs.).
3) Install the service lid and screw for fixing the service lid (1 screw).
4) Install the air filters and then mount the front panel.
Front panel shaft
Push the front panel
shaft of the front panel
into the groove.
Long flat plate
wrapped in a cloth
Screw cover
Fig.1
Push
down.
Service
lid
• Be sure to wear
protection gloves.
CAUTION
2) Pull toward you.
1) Push up.
01_EN_3P686872-1.fm 10 ページ 2022年5月13日 金曜日 午後5時45分