ESIE16-02K | Part 3. Repair 3.3. Unit specific repair procedures
31/05/21 | Version 1.1 Page 85
RA R32 Split & multi split M-Series
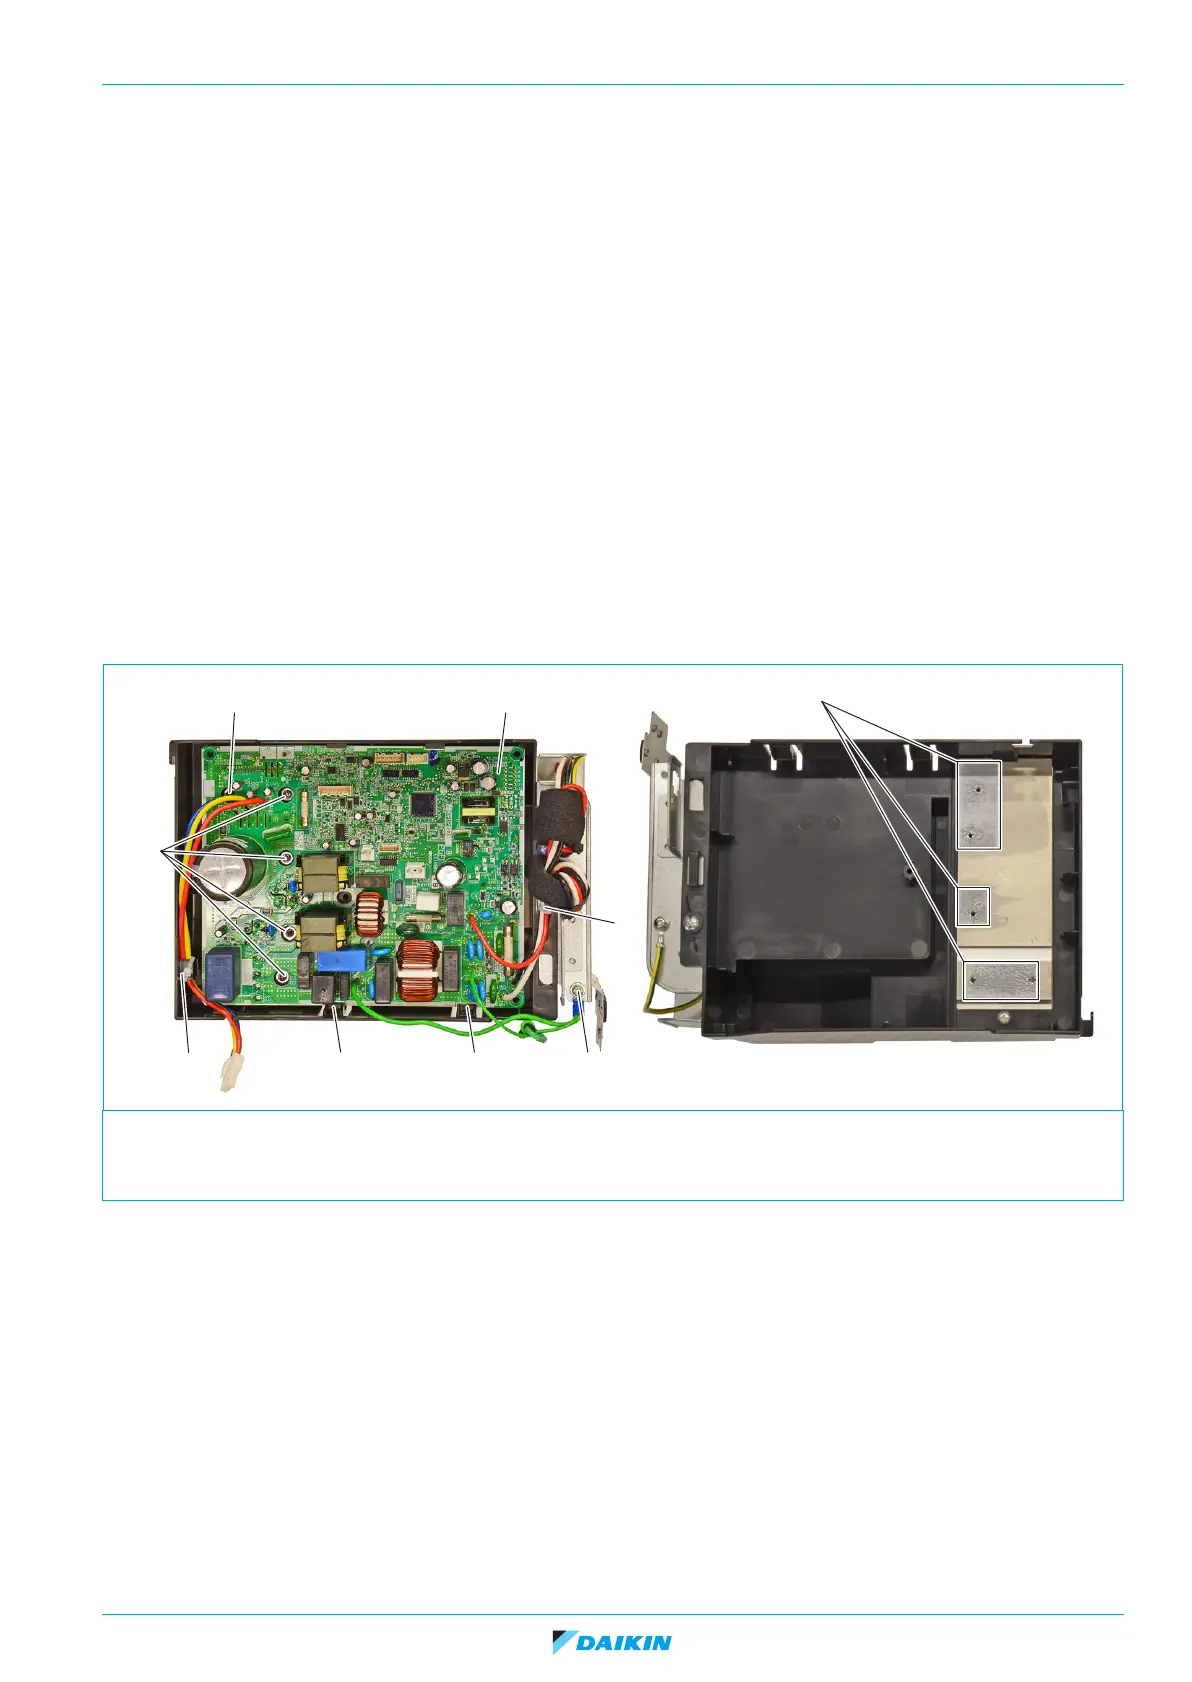
3.3.2.9. Replacing main PCB
PRELIMINARY ACTIONS
1. Switch off the Daikin unit via the user interface.
2. Switch off the Daikin unit with the field supplied circuit breaker.
3. Remove the switch box, refer to "Replacing switch box" on page 72.
PROCEDURE
Removal
1. Cut the 2 cable ties (1).
2. Loosen and remove the screw (2).
3. Loosen and remove the 5 screws (3).
4. Press the 2 latches (5) to unlock and remove the main PCB (4).
Figure 3-19: Removing the main PCB
Installation
1. Apply Heat sink compound (6) before joining the main PCB and the heat sink.
2. Proceed in reverse order.
1. Cable tie 4. Main PCB
2. Screw 5. Latch
3. screw 6. Heat sink compound