Removal of Indoor Heat Exchanger Si041137
32 Removal Procedure
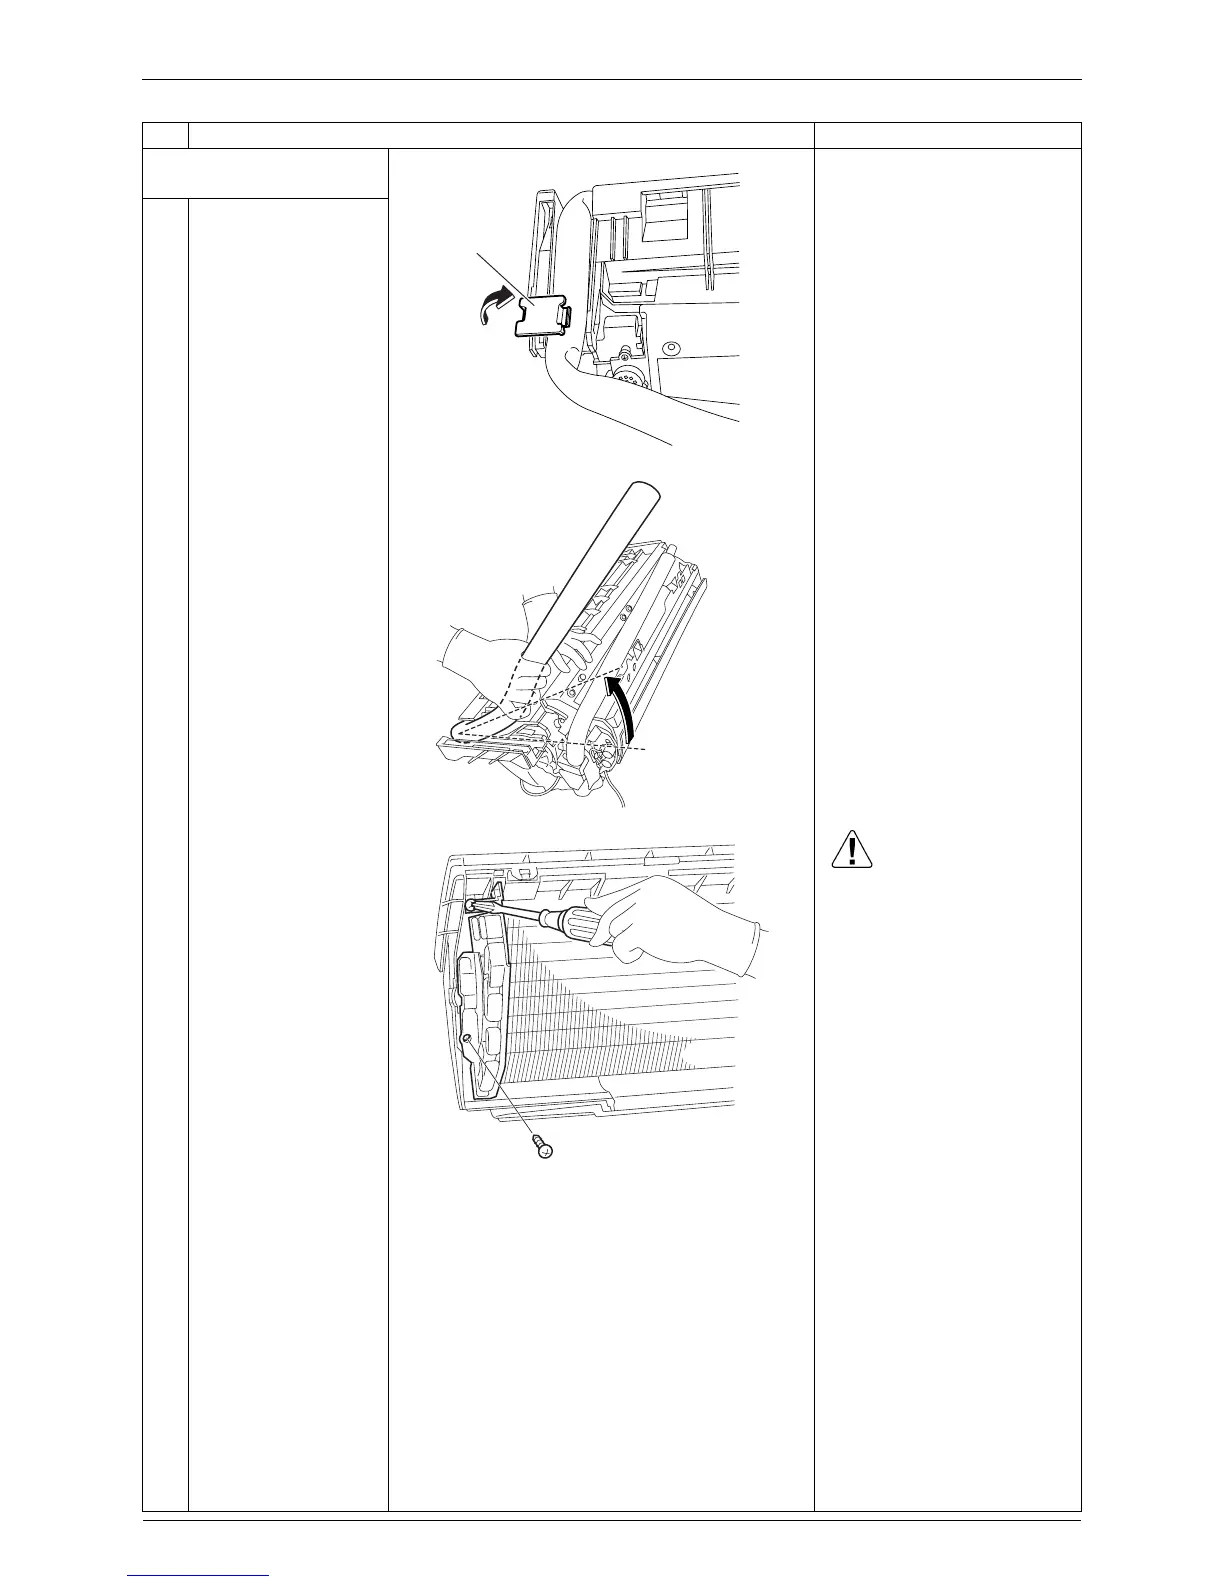
2. Remove the indoor heat
exchanger.
1
Detach the indoor unit
from the installation
plate.
2
Unfasten the hook of
the piping fixture at the
back of the indoor unit.
Remove the piping
fixture.
3
Slightly widen the
auxiliary piping.
4
Remove the 2 screws
on the left side. Caution
When removing or
reassembling the indoor heat
exchanger, be sure to wear
gloves or wrap the indoor
heat exchanger with cloth.
(You may be injured by the
fins.)
Step
Procedure Points
(R10622)
Piping
fixture
(R17120)
(R10546)