4-19
4.8.8 High Pressure Switch (HPS)
Type ACB-LB164
Setting value
OFF 2400kPa(24.47kg/cm
2
)
ON 1900kPa(19.37kg/cm
2
)
●Replacement method
1. Remove cable from inverter box.
2. Remove HPS from joint with check valve.
※ Loosen flare nuts A and B using two wrenches.
(Fig. 1)
※Do not lose push-stick inside the joint. (Fig. 2)
3. Installing of HPS
※ Tighten flare nuts A and B using two wrenches.
(Fig. 1)
4. Make sure no gas leakage after install HPS.
4.8.9 High Pressure Sensor (HPT)
Type NSK-BH030F-391
●Removal of HPT
1. Remove the lead wire from the control box.
2. Remove the HPT from the joint with check valve.
※ Loosen flare nuts A and B using two wrenches.
※ Do not lose the push pin inside the joint with
check valve.
●Installation of HPT
1. Connect the HPT to the joint with check valve.
※Tighten flare nuts A and B using two wrenches.
2. Conduct a gas leakage test to check that no gas
leaks after installing the HPT.
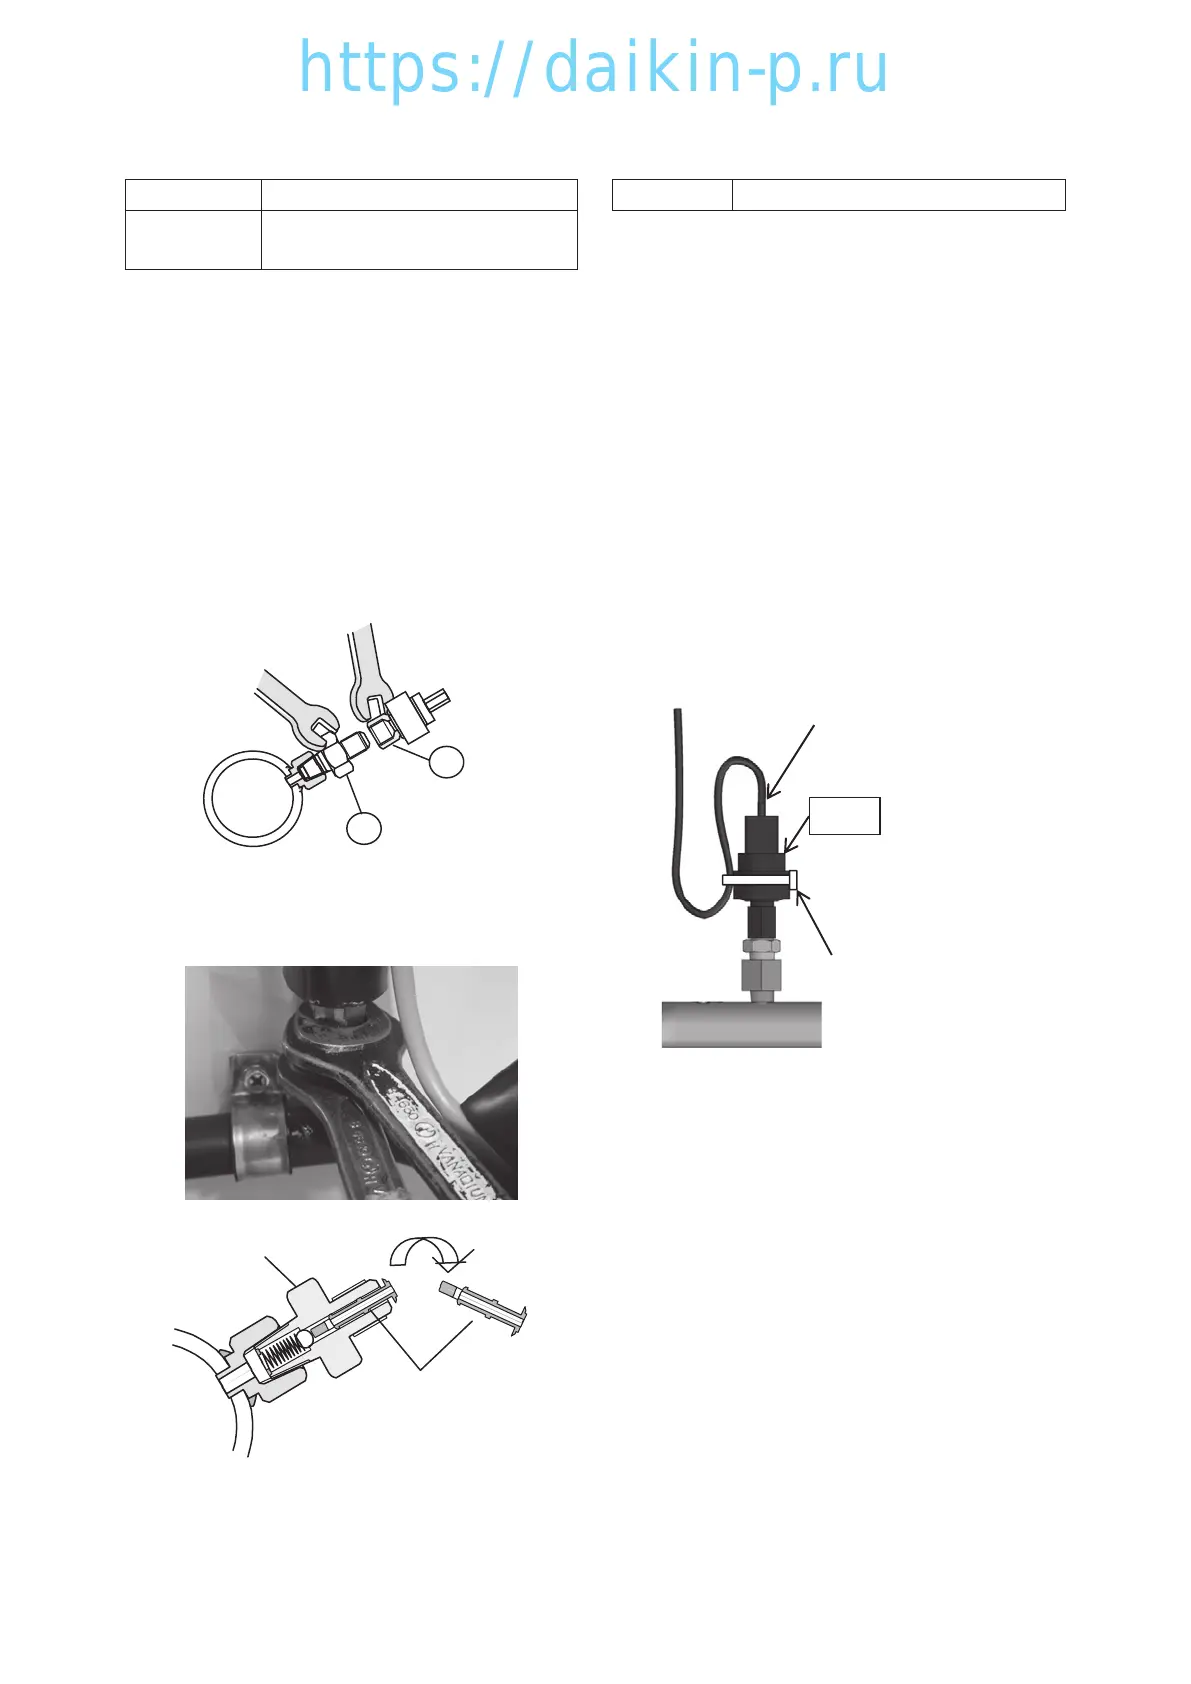
3. Bend the HPT lead wire as shown in Fig. 1, and
then band the lead wire to the HPT body.
HPT
Band the lead wire
to the HPT body.
Do not apply a heavy
stress to the base of the
lead wire.
Fig. 1 Use two wrenches when
removing and installing.
B
Joint with check valve
HPS(or HPT)
A
Two wrenches
Discharge pipe
Fig. 2 Do not lose push-stick.
Joint with check valve
Push-stick
04章LX10F11B3TR16-02En.indd4-1904章LX10F11B3TR16-02En.indd4-19 2016/02/0316:22:122016/02/0316:22:12
 Loading...