4-21
4.8.11
Electronic Expansion Valve (EEV),
Economizer Modulation Valve (EMV),
Discharge Modulation Valve (DMV)
Name Type
Electronic Expansion Valve
EEV
Coil
HCM-MD12DM-2
Socket (Red)
Body
HCM-BD35DM-2
Valve size: 3.5mm
Economizer Modulation Valve
EMV
Coil
HCM-MD12DM-3
Socket (White)
Body
HCM-BD24DM-1
Valve size: 2.4mm
Discharge Modulation Valve
DMV
Coil HCM-MD12DM-4
Body
HCM-BD120DM-2
(1) Replacing the coil
①Remove the cable band securing coil lead wire.
②Disconnect the connector on CPU board.
③Remove the fixing plate and the coil.
④Replace the old coil with a new one.
⑤Attach the coil and the fixing plate.
⑥Plug in coil connector on CPU board.
⑦Fix the coil lead wire with a cable band.
(2) Replacing the body
※
Recover refrigerant at first and proceed following step.
①Remove the cable band fixing the coil lead wire.
② Detach the anti-condensation tube until the
curved part of the pipe.
③Remove the fixing plate and the coil.
④Un-solder valve piping.
⑤Solder in the new valve body.
→
Braze the new valve body while cooling it with a wet cloth.
Maximum body temperature: 120℃ (248F) or less
⑥Mount the coil and the fixing plate.
⑦Install the anti-condensation tube.
⑧Fix the coil lead wire with a cable band.
Curved part of the pipe
Brazed part of the pipe
Anti-condensation tube
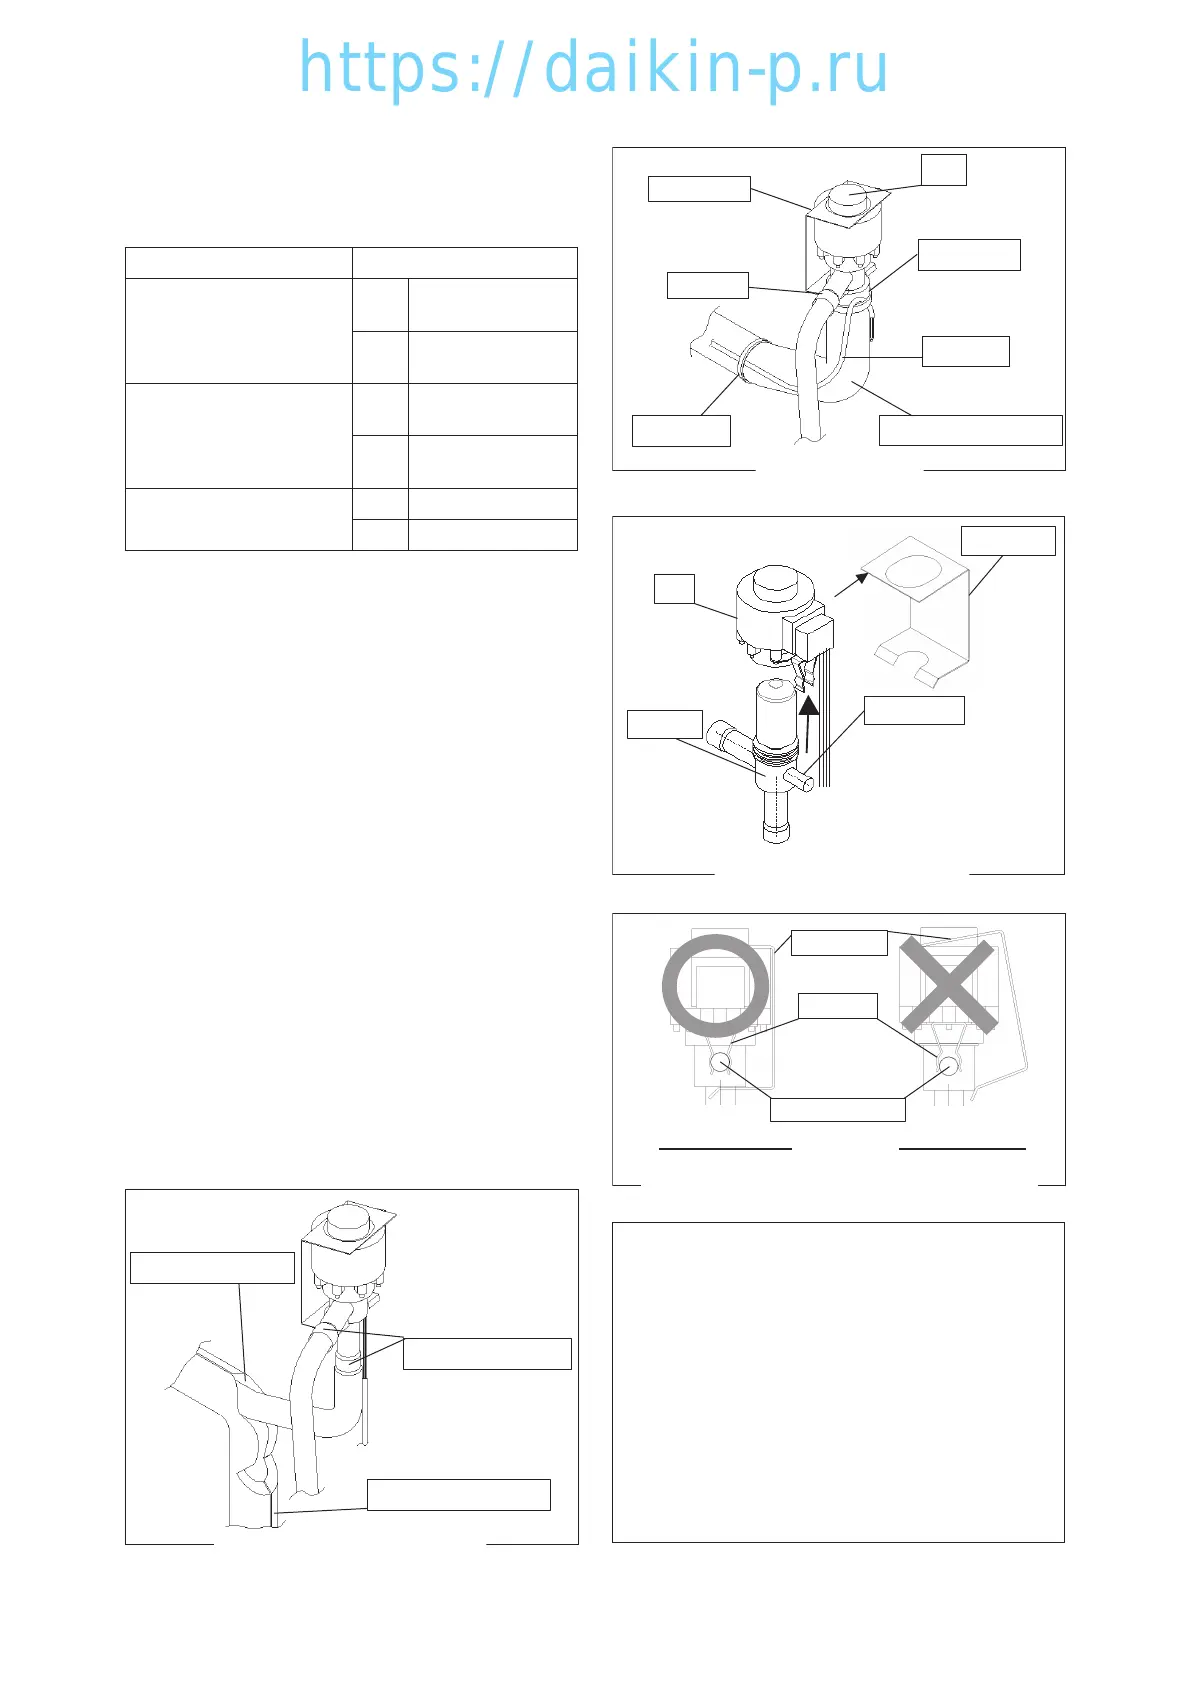
<Replacement of main unit >
Coil
Lead wire
Cable band
Main unit
Cable band
Anti-condensation tube
<Part names>
Fixing plate
Fixing pipe
Valve body
Coil
<Replacement of the coil>
Fixing plate
Correctly installed
* It clicks when installed.
Stopper
Fixing pipe
Wrongly installed
<Confirmation of fixing plate installation>
Fixing plate
Attention (When installing the
coil and the fixing plate)
● Securely attach the coil stopper to the
valve body fixing pipe.
→ If wrongly attached, the expansion
valve may function abnormally,
damaging the compressor.
● Take care not to allow the fixing plate
damage or pinch the lead wire.
→ Malfunction of the expansion valve
may arise.
04章LX10F11B3TR16-02En.indd4-2104章LX10F11B3TR16-02En.indd4-21 2016/02/0316:22:132016/02/0316:22:13
 Loading...