MaInTenanCe
www.DaikinApplied.com 135 IM 893-10 • ROOFPAK SINGLEZONE UNITS
Preferred Replacement
1. Drain the oil.
2. Disconnect the TPTL line.
3. Cut out the failed compressor at the suction and
discharge tubes.
Make the cuts in the straight portions of the replacement
tubes and as near the compressor as possible.
4. Braze couplings on the cut end of the original tubes so
that they t snugly into place.
5. Replace the TPTL oil equalization line.
6. Cut the new suction and discharge tubes to t between
the compressor and the couplings.
7. Assemble the new tubes but do not braze until
everything ts snugly.
8. Braze tubes into place.
Alternative Replacement
1. Drain the oil.
2. Disconnect the TPTL line.
3. Cut out the failed compressor at the suction and
discharge tubes.
4. Remove the compressor.
5. Un-sweat the cut suction and discharge stubs from their
ttings and completely clean the old braze joint.
6. Place the new compressor into position.
7. Replace the TPTL oil equalization line.
8. Place the entire replacement discharge and suction
tubes into position so that the tubes t snugly into place.
9. Braze the tubes into place.
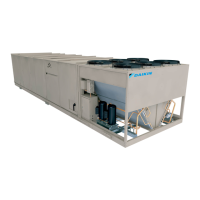
Figure 129: Micro-Channel Coil Cross-Section
All-Aluminum Condenser Coils
The condenser coils are an all-aluminum design including the
connections, micro-channels, ns (an oven brazing process
brazes the ns to the micro-channel at tube), and headers
(Figure 129), which eliminates the possibility of corrosion
normally found between dissimilar metals of standard coils.
During the condensing process, refrigerant in the coil passes
through the micro-channel at tubes, resulting in higher
efciency heat transfer from the refrigerant to the airstream.
In the unlikely occurence of a coil leak, contact Daikin to
receive a replacement coil module.
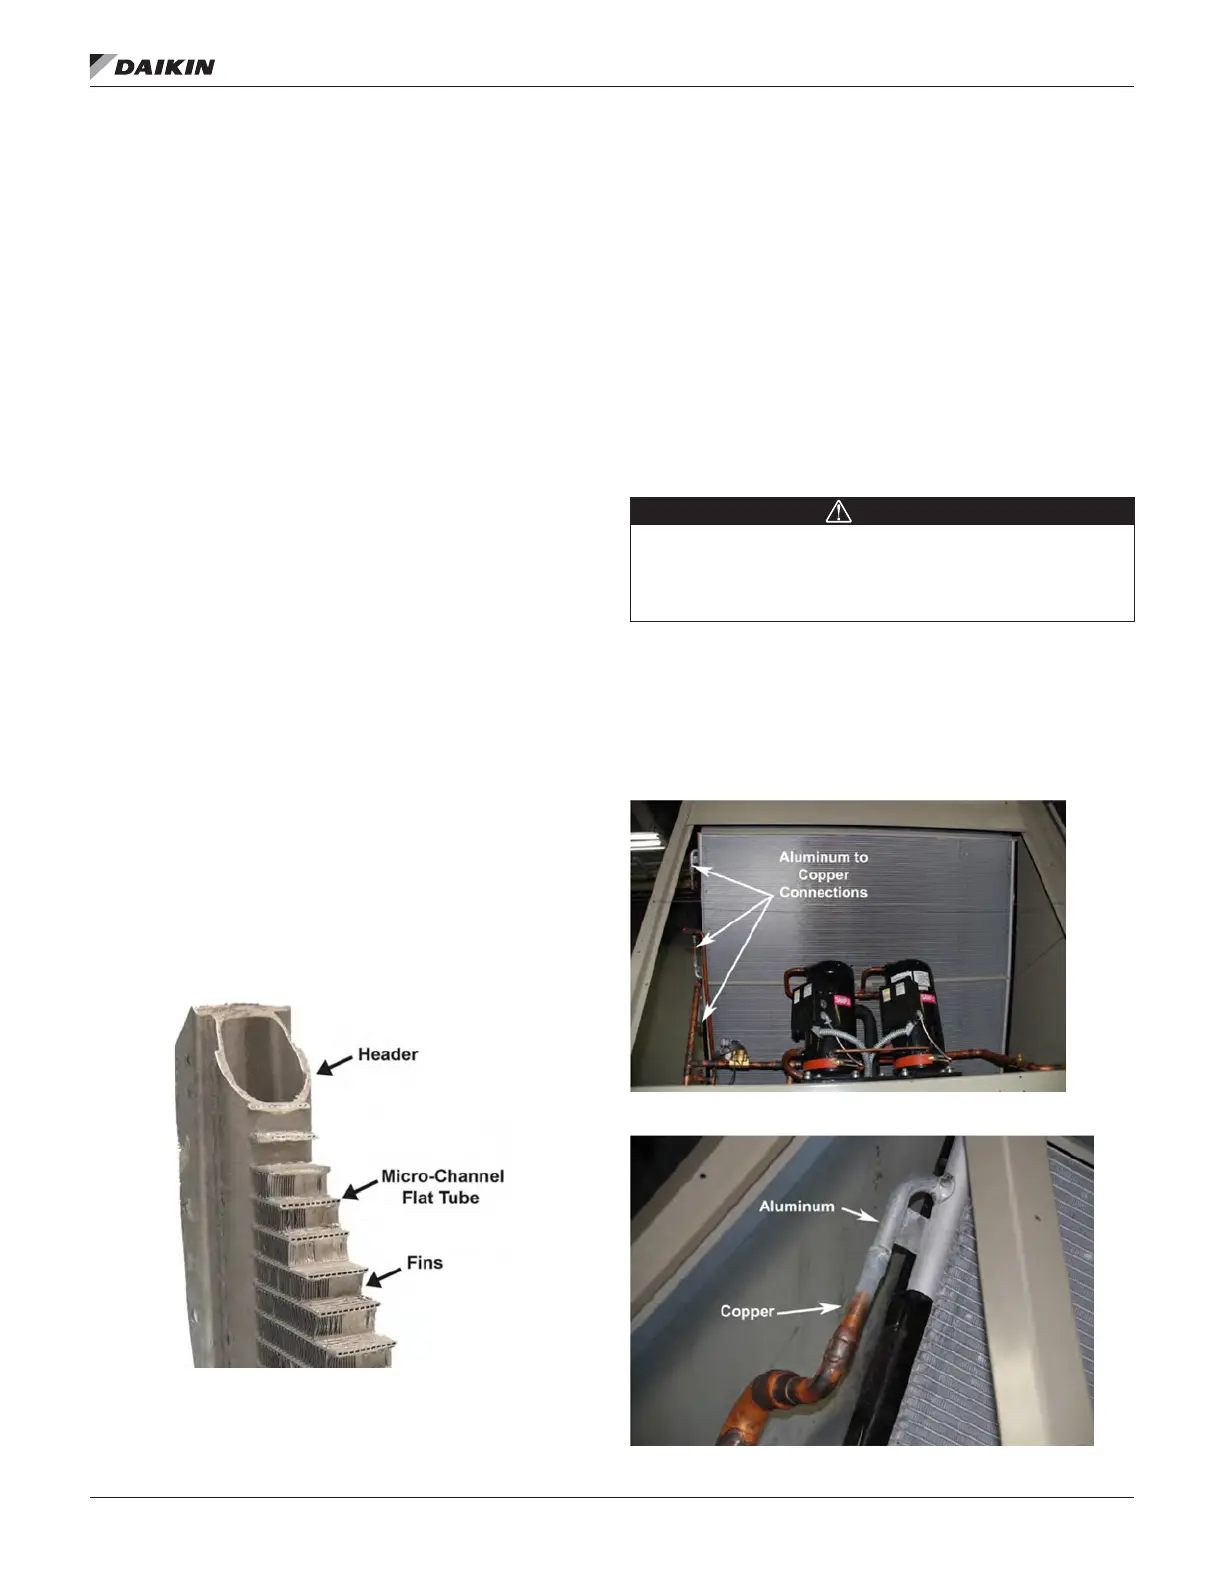
Connecting the Condenser Coil to Copper
Tubing
CAUTION
Potential equipment damage. If a standard copper brazing
process is performed at this joint, the process will damage the
aluminum connection. If a coil needs replacing, contact Daikin
for a coil and copper connection assembly.
Figure 130 and Figure 131 show the aluminum condenser coil
connection(s) to the copper tubing in the unit. Because of the
low melting point of aluminum (1220°F compared to 1984°F for
copper), this brazed joint is performed with a low temperature
brazing process.
Figure 130: Aluminum/Copper Connections
Figure 131: Connection Close-Up
 Loading...