www.DaikinApplied.com 33 IM 1287-6 • REBEL APPLIED ROOFTOP
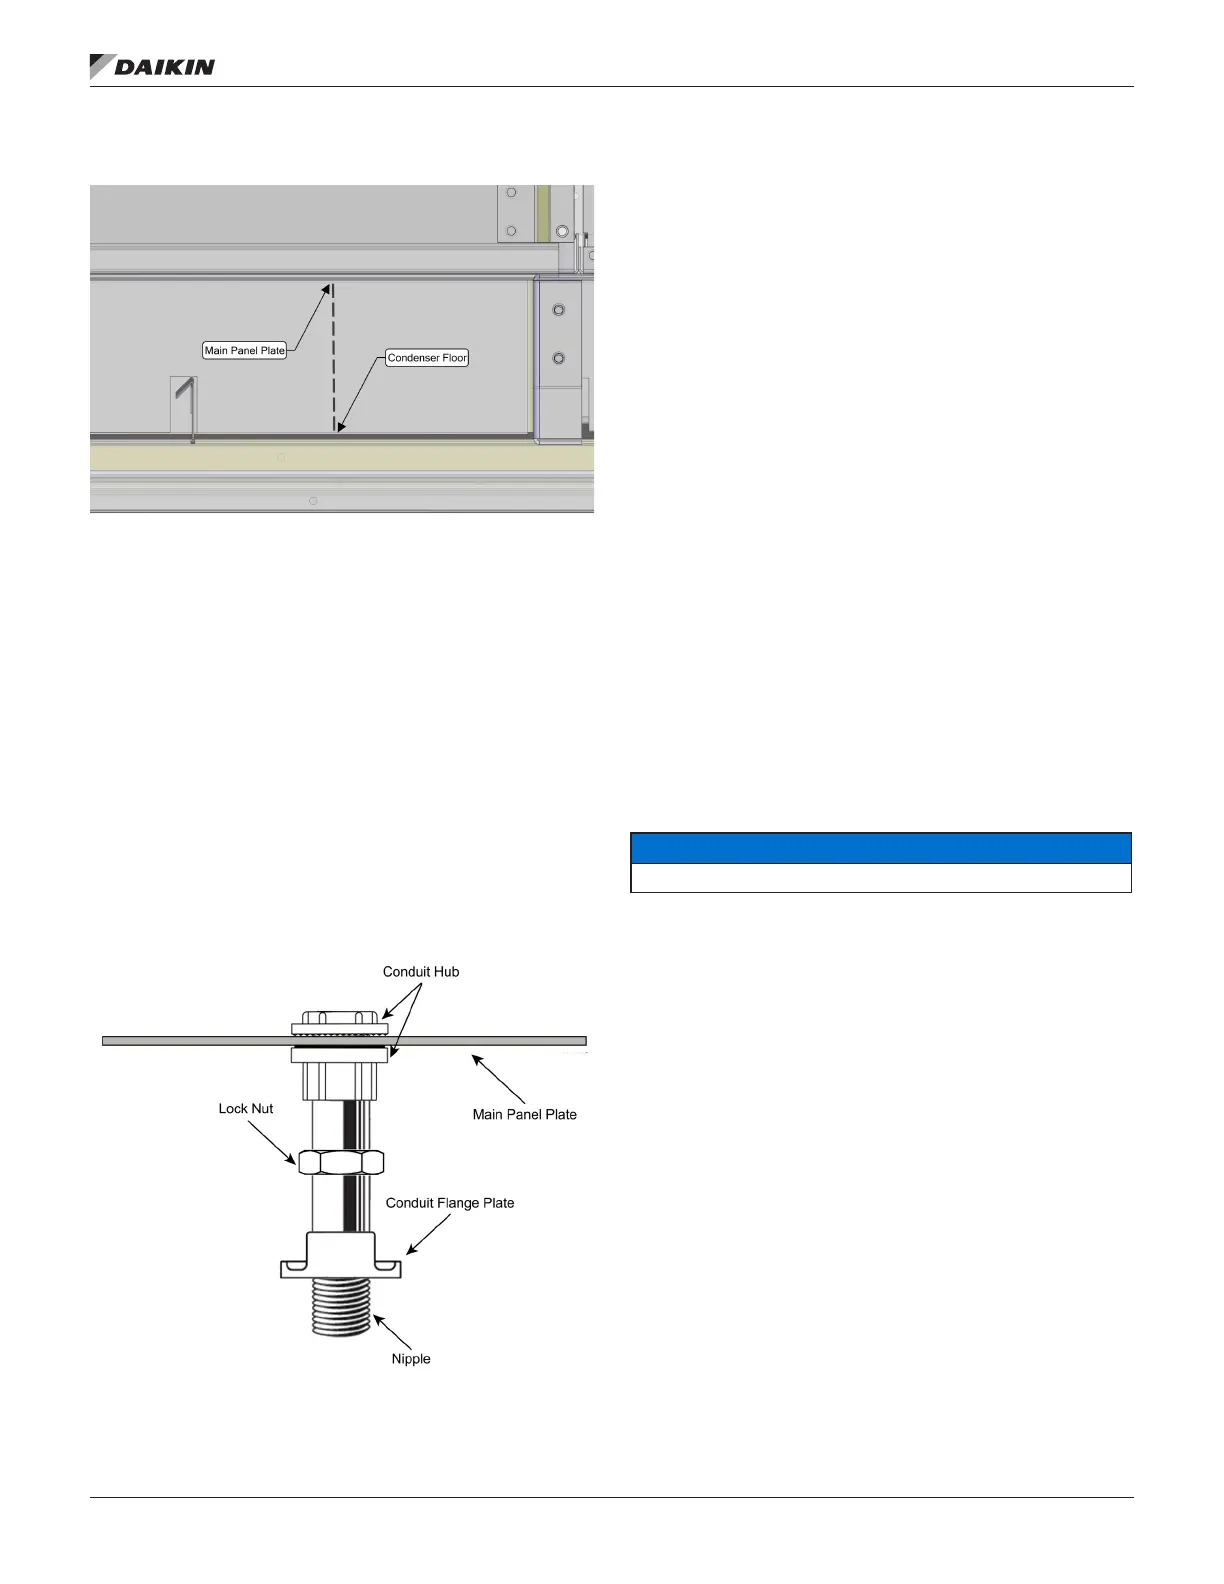
Figure 48: Condenser Floor and Main Panel Plate
Measurement
3. Build Assembly
• Spin the conduit ange plate onto the pipe nipple.
• Spin the lock nut onto the pipe nipple.
• Firmly attach the pipe nipple to the bottom of the conduit
hub.
• Remove the top of the conduit hub to place the main
panel plate into position.
• Hand tighten the top of the conduit hub to the main panel
plate.
• Spin the conduit ange so that the bottom of the ange is
the correct distance from the main panel plate using the
measurement made previously in Step 3 (bottom of plate
to top of condenser oor).
NOTE: It is better for conduit ange placement to be too long
than too short.
Figure 49: Assembly Components
4. Check Placement
• Place assembly into position.
• Ensure that the conduit ange plate is resting on the
condenser oor.
• It is acceptable for the main panel plate to be slightly
above the bottom of the main control panel (no more than
1/8”). This will help when creating the nal seal.
5. Prepare for Sealing
• Remove the assembly from position and remove the top
of the conduit hub to remove the main panel plate.
• Place the assembly back into position.
6. Measure and Drill
• Mark and drill the top of the condenser oor to create
fastener holes for the conduit ange plate.
NOTE: There are two layers of 0.022” steel sheet metal that
need to be drilled through. Between this steel is the
foam insulation of the panels.
7. Seal with Caulk
• Remove the assembly from position.
• Make a complete bead of caulk around the pipe nipple
hole and each of the fastener holes drilled for the conduit
ange plate. This will help prevent water from entering the
building.
8. Align Assembly
• Lower assembly into the condenser oor penetration,
aligning the holes in the conduit ange plate to the holes
in the condenser oor.
9. Secure Conduit Flange Plate
NOTICE
Do not use excessive force when tightening fasteners, or they will strip.
• Secure the conduit ange plate to the condenser oor
using the correct size fasteners. Screw BY HAND to snug
the fasteners to the condenser oor.
10. Fix Position
• Spin the lock nut downward and snug to the conduit
ange plate.
NOTE: Do not allow the nipple to spin while doing this.
11. Repeat Steps 1-10 for Additional Penetrations
• As necessary, repeat Steps 1-10 for additional electrical
penetrations.
• Steps 12-14 dene the nal instructions necessary to
complete each electrical penetration.
12. Position and Secure Main Panel Plate
• Position the main panel plate over the conduit hub.
• Tighten the top of the conduit hub to the assembly.
13. Finalize Assembly
• Attach a conduit coupler to the bottom of the pipe nipple
for each assembly.
• The unit is now ready to have the building conduit
attached and wire pulled.
 Loading...