7 | Installation
Installer reference guide
62
RZAG71~140N
Sky Air Alpha-series
4P695307-1A – 2024.02
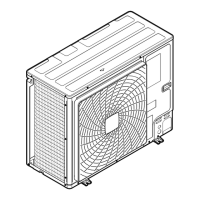
a Interconnection cable
b Power supply cable
c Earth
d Cable tie
4 Fix the cables (power supply and interconnection cable) with a cable tie to the
stop valve attachment plate and route the wiring according to the illustration
above.
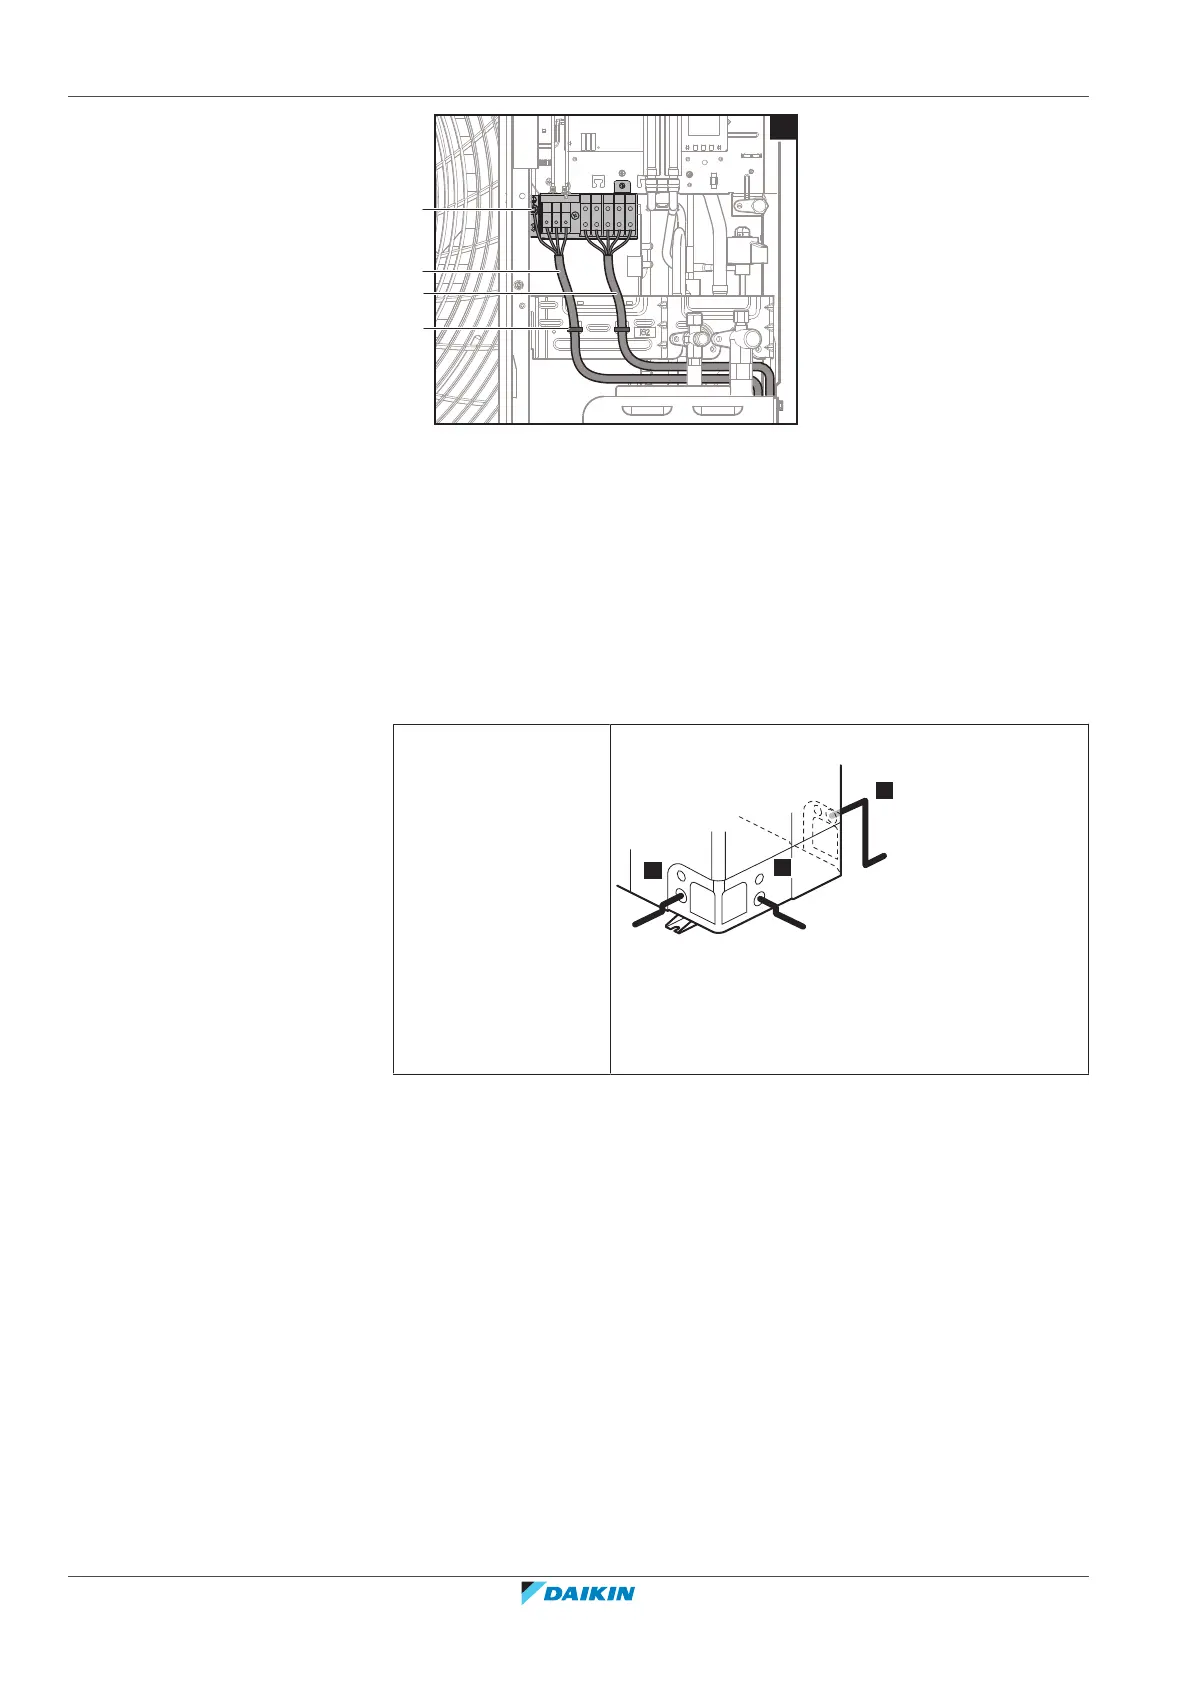
5 Choose a knockout hole and remove the knockout hole by tapping on the
attachment points with a flat head screwdriver and a hammer.
6 Route the wiring through the frame and connect the wiring to the frame at
the knockout hole.
Routing through the
frame
Choose one of the 3 possibilities:
a Power supply cable
Note: Route the interconnection cable together
with the refrigerant piping. See "7.8.1To finish the
outdoor unit installation"[463].
 Loading...