(Note)
•Once you replaced control PCB, auto address of network map will change.
•If you updated map, location of detailed information will move from appropriate place
because detailed info of each unit is stored in the order of auto address. To correct this
situation please re-arrange detailed info as the procedure instructed below.
(auto address and Airnet address are not necessary to re-arrange)
Sample) Below case is a sample of re-arrangement of detailed info of I-1 and I-2.
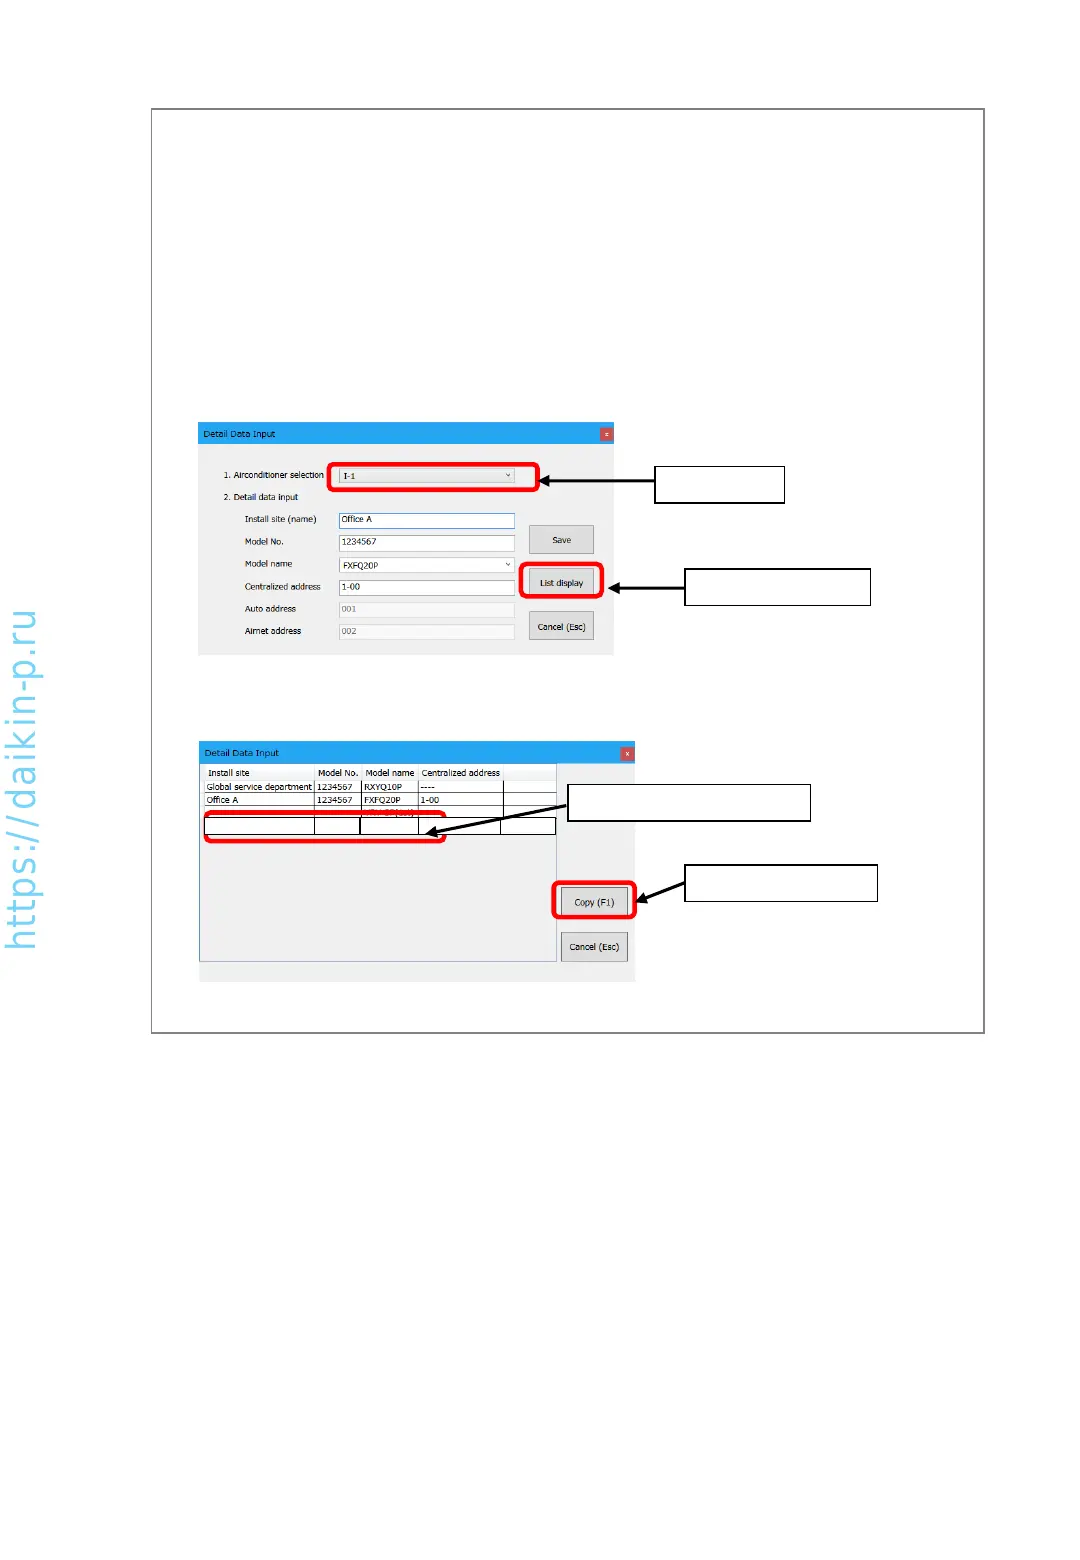
(2) Select [I-2] which is destination and press [Copy] button, detailed info of [I-2] will move
to [I-1]
1. Select “I-1”
2. Press “List display”
2. Press [Copy] button
1. Select detailed info of [I-2]
(3) Press [Cancel (esc)] button to return to [Detail Data Input] screen.
(5) After finishing input, please press [Cancel (esc)] button to return to [Network map display] screen.
(1) In [Detail Data Input] screen, [1. Airconditioner selection], select [I-1] and press [List
display] button. [Detail data list display] screen will be shown.
AS0112-P-DENV
27
Office B 2345678 FXMQ50P 1-01