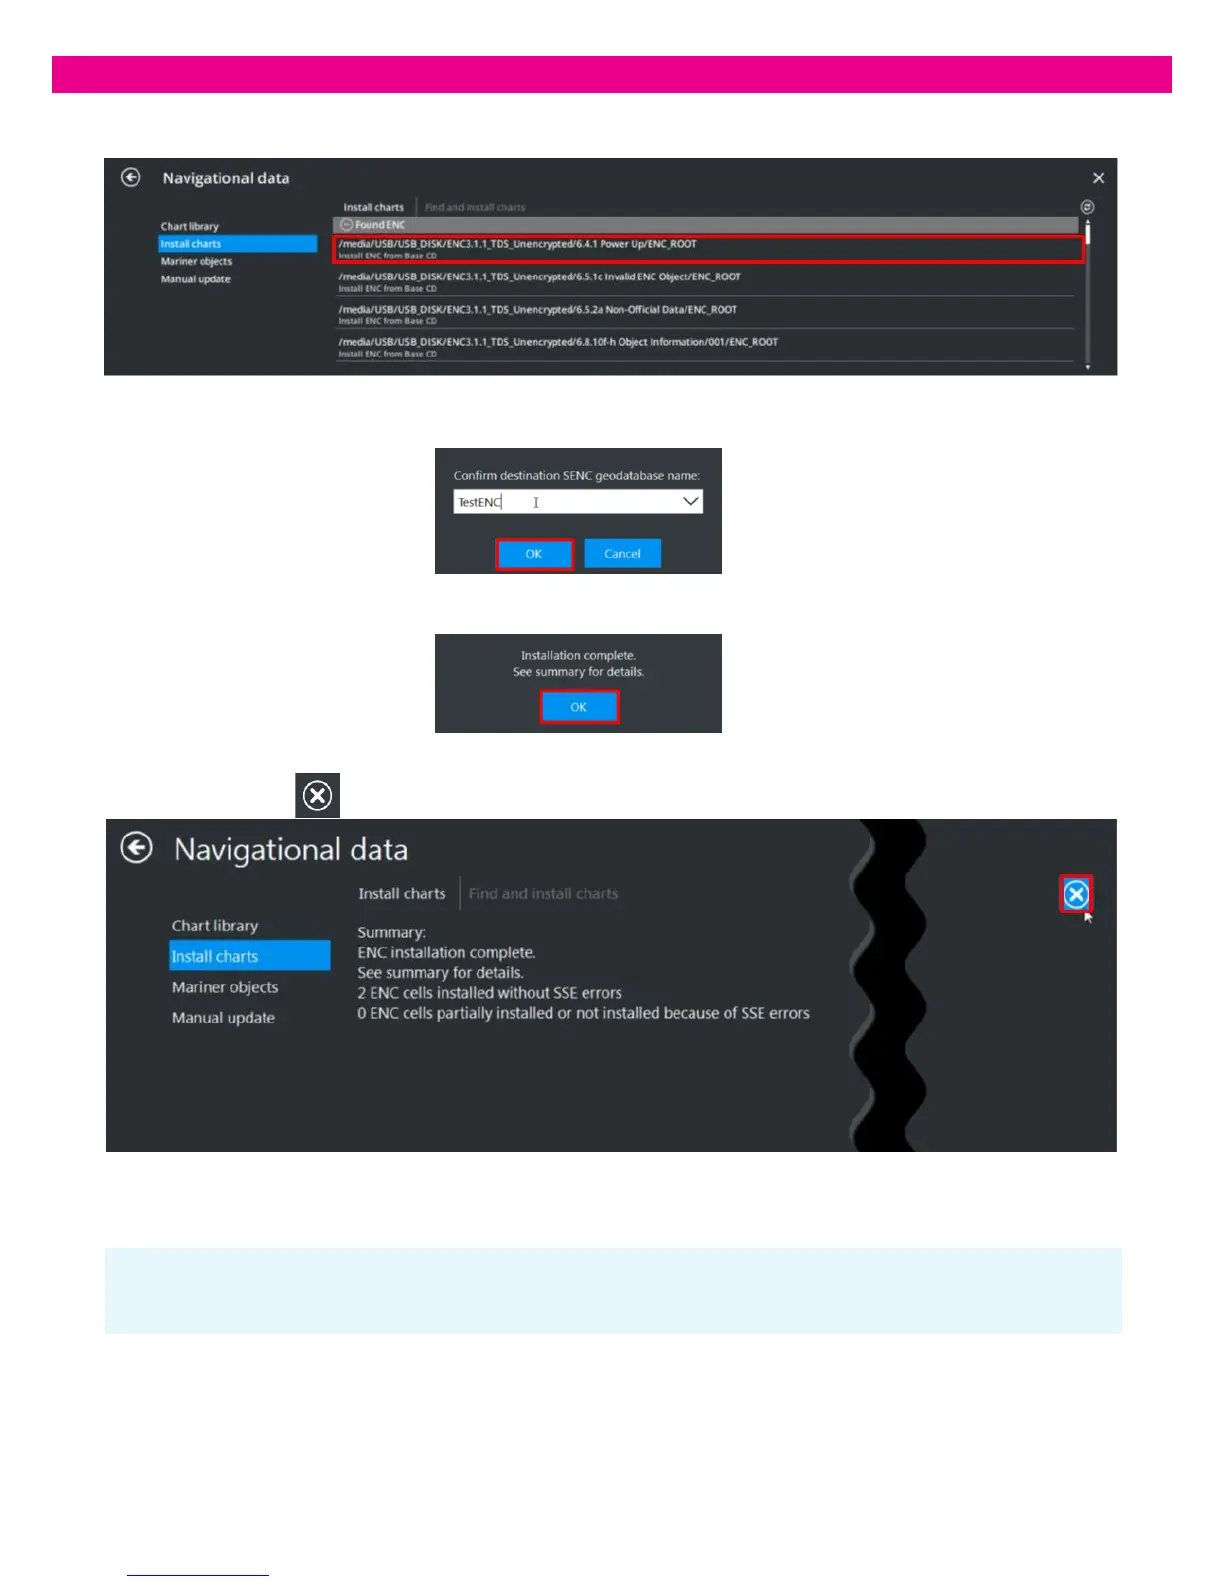
Note: When a new Database is created, it is not open for display. To see the data, set the Display switch of the database to the
‘On’ position.
3. In the ‘Find and Install Charts’ list, find the Exchange Set to install and select it.
4. Enter a name for the new Database and press ‘OK’. The installation starts.
5. At the end of the installation, an information message confirms the completion of the operation: press ‘OK’
6. The installation summary is displayed and the result and warning messages window opens. To close the window,
press the ‘Cancel’ button in the upper-right corner of the window.
7. If the data was successfully converted and installed, the new Database is added to the Chart Library and you can start using
it: