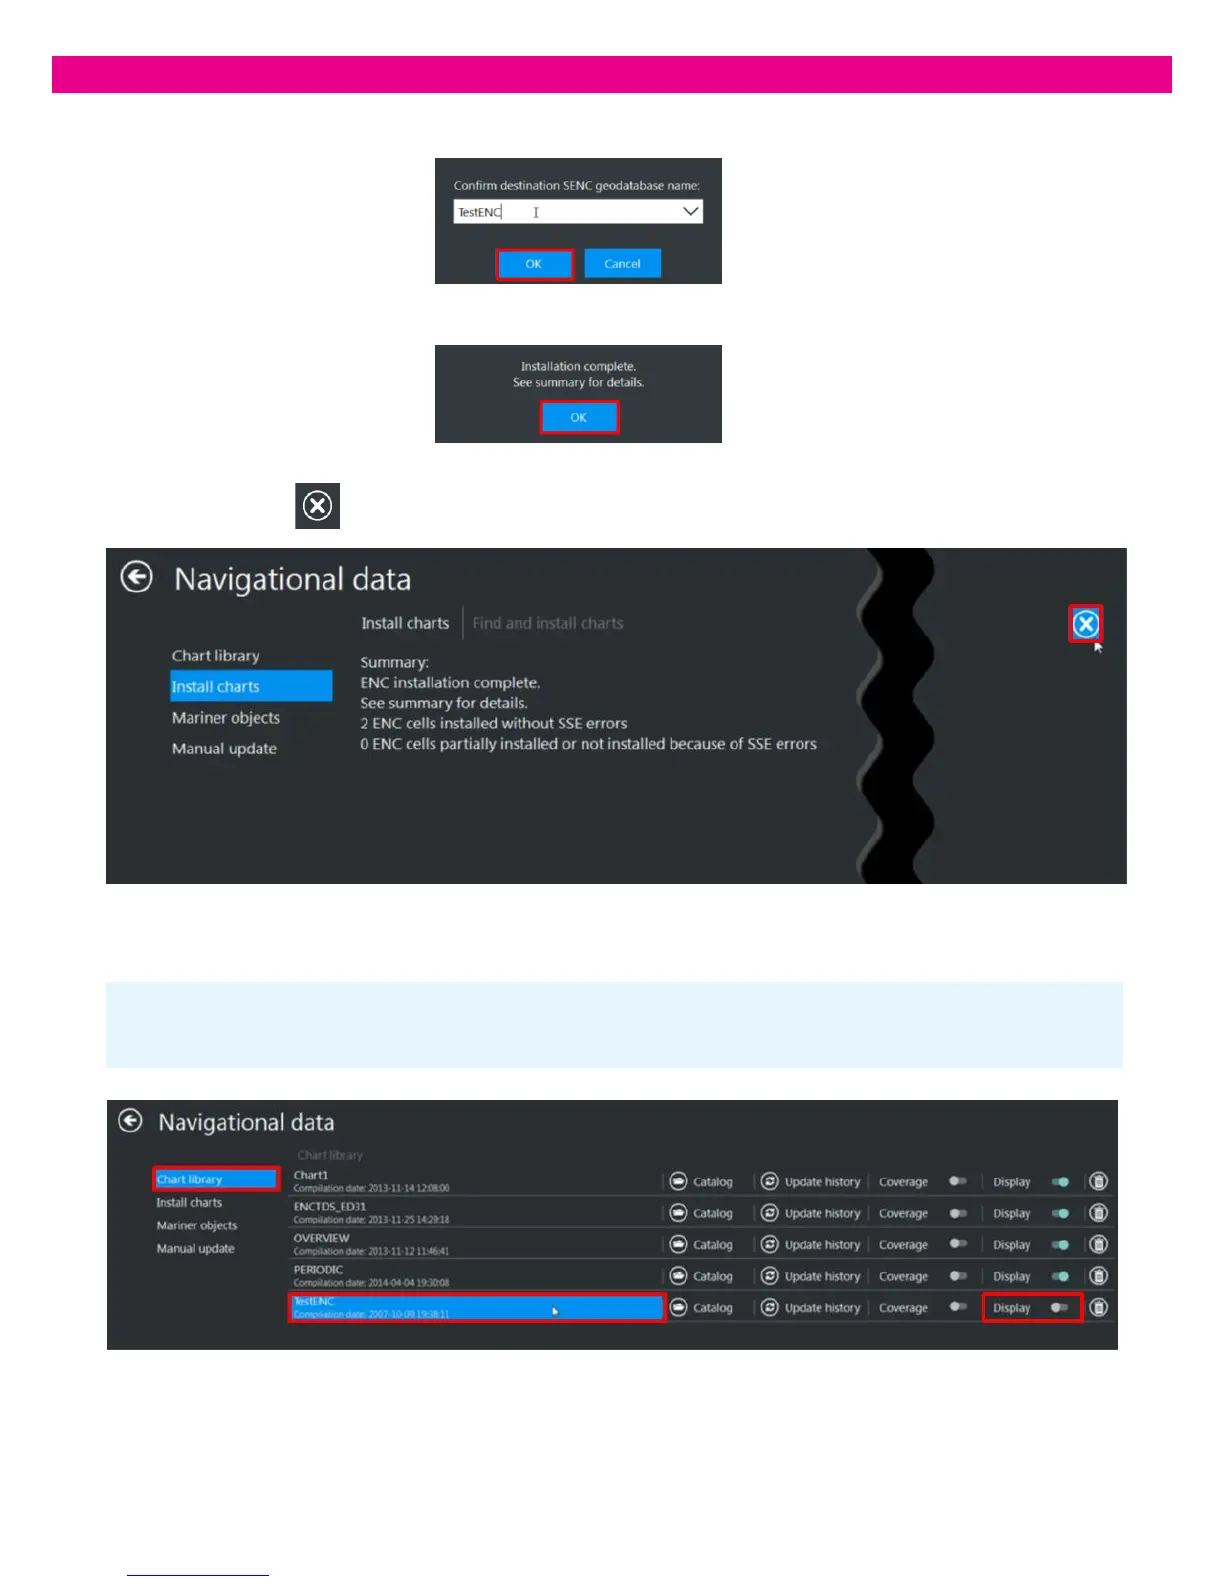
Note: When a new Database is created, it is not open for display. To see the data, set the Display switch of the database to the
‘On’ position.
4. Enter a name for the new Database and press ‘OK’. The installation starts.
5. At the end of the installation, an information message confirms the completion of the operation: press ‘OK’
6. The installation summary is displayed and the result and warning messages window opens. To close the window,
press the ‘Cancel’ button in the upper-right corner of the window.
7. If the data was successfully converted and installed, the new Database is added to the Chart Library and you can start using
it: