EasyManua.ls Logo

Danze Opulence User Manual

Danze Opulence
8 pages
To Next Page IconTo Next Page
Page #1 background imageLoading...
Page #1 background image
Before Your Installation
Antes de Instalar
Avant líinstallation
Tools You Will Need
Herramientas Necesarias
Outils dont vous aurez besoin
Hacksaw
Sierra para metales
Scie à métaux
Phillips screwdriver
Destornillador cruciforme
Tournevis Phillips
Adjustable wrench
Llave ajustable
Clé à molette
Groove joint plier
Pinzas ajustables
Pince multiprise
Check to make sure you have the following parts indicated below:
Verifique que tenga todas las partes indicadas:
Vérifier pour vous assurer que vous possédez les pièces au bas:
Need Help? Please call our toll-free Customer service line at 1-888-328-2383 for additional assistance or service.
Requiere asistencia? Favor llamar a nuestro servicio a clientes sin costo al 1-888-328-2383 para asistencia adicional o servicio.
Besoin d’aide? Veuillez communiquer avec notre service à la clientèle au numéro sans frais 1-888-328-2383 pour obtenir du
service ou de l’aide additionnels.
Valve Only Trim Installation Instructions
Instrucciones para la instalación
únicamente de las piezas exteriores de la válvula
Instructions d’installation de la garniture de robinet seule
Question and Answer IconNeed help?

Do you have a question about the Danze Opulence and is the answer not in the manual?

Danze Opulence Specifications

General IconGeneral
BrandDanze
ModelOpulence
CategoryPlumbing Product
LanguageEnglish

Summary

Valve Trim Installation Preparation

Parts Checklist

Confirm you have all indicated parts before starting the installation process.

Required Installation Tools

List of necessary tools for installing the valve trim.

Escutcheon and Handle Installation

Escutcheon Installation Prep

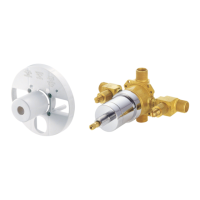
Remove plastic cap from plaster guard and replace valve sleeve/bonnet nut if needed.

Escutcheon and Canopy Trim Installation

Attach escutcheon to valve body using screws; install separate canopy trim if applicable.

Handle Installation

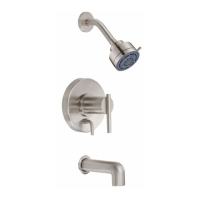
Mount the handle onto the valve stem, ensuring correct orientation and securing it.

Cartridge Installation Procedures

Cartridge Re-assembly

Align and snap together the ceramic control cartridge and pressure balancing spool.

Cartridge Re-installation into Valve Body

Align cartridge pins with valve body holes and gently push into place.

Cartridge Seating Verification

Confirm the cartridge is correctly seated to prevent rotation.

Sleeve and Locking Nut Installation

Thread sleeve over cartridge and install/tighten cartridge locking nut.

Base Nut Installation

Place and hand-tighten the base nut onto the valve.

Cartridge Installation Finalization

Final step confirming the successful re-installation of the cartridge.

Handle Assembly Reference

Handle Disassembly Illustrations

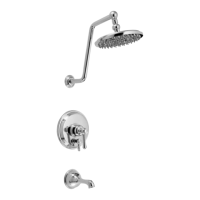
Illustrations showing different handle styles and their disassembly.

Related product manuals