EasyManuals Logo

DataCard SP55 Plus User Manual

DataCard SP55 Plus
30 pages
To Next Page IconTo Next Page
To Previous Page IconTo Previous Page
Page #11 background imageLoading...
Page #11 background image
Page 8
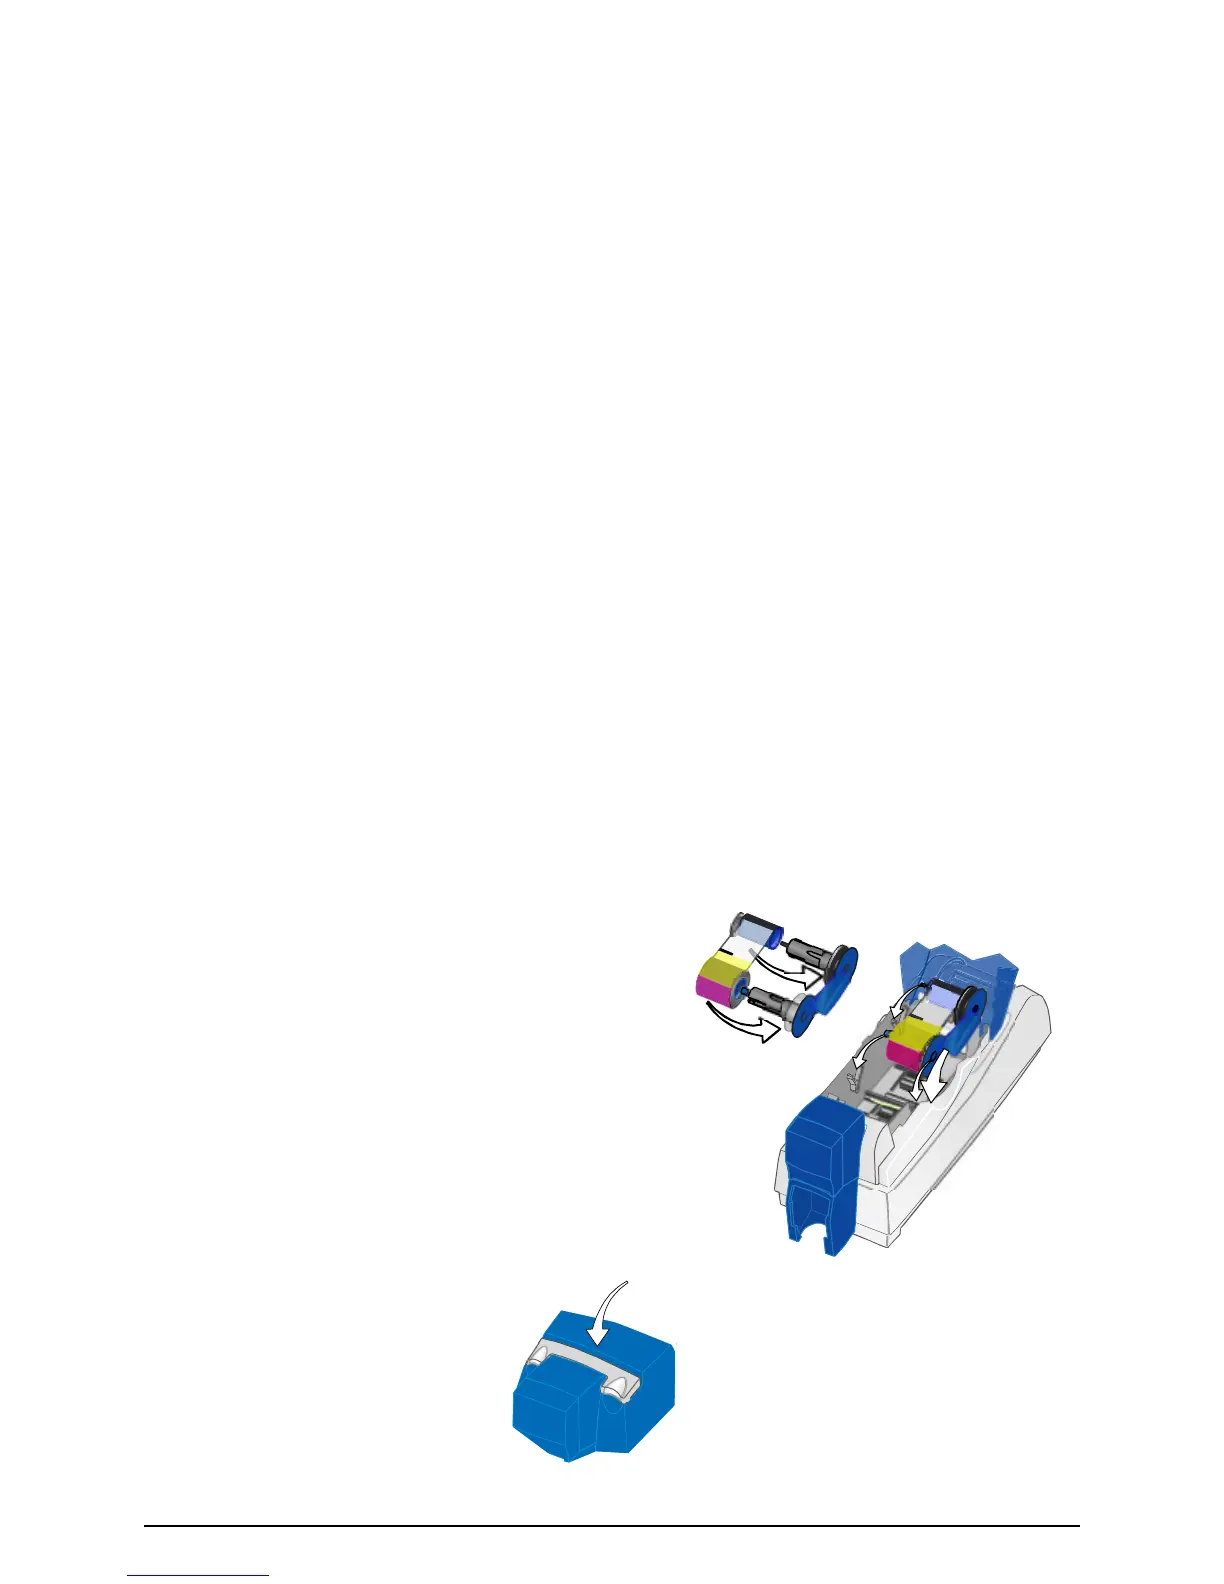
5 Load the new roll of print ribbon on the cartridge.
Put the full spool of ribbon on the supply spindle of the
ribbon cartridge. Push until the spool clicks onto the
spindle.
Put the empty take-up spool on the spindle with the
solid black gear. Push until the spool clicks onto the
spindle.
6 Replace the loaded ribbon cartridge in the printer.
Make sure both spindles rest in the black supports on
the left side of the printer.
Make sure the ribbon cartridge handle rests in the
supports on the right side of the printer.
Make sure to install the full, new spool toward the input
hopper of the printer.
7 Close the printer cover. Press down firmly to latch it.

Other manuals for DataCard SP55 Plus

Questions and Answers:

Question and Answer IconNeed help?

Do you have a question about the DataCard SP55 Plus and is the answer not in the manual?

DataCard SP55 Plus Specifications

General IconGeneral
Print Resolution300 dpi
Card Capacity100 card input hopper
Card SizeCR-80 (85.6 mm x 54 mm)
InterfaceUSB
Print CapabilitySingle-sided
Card Thickness40 mil
Operating System SupportWindows 7

Related product manuals