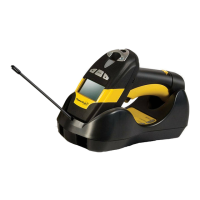
Getting Started
Quick Reference Guide 1-1
Getting Started
Connection
Use the appropriate instructions below to connect the scanner to the ter-
minal, PC or other host device. The scanner kit you ordered to match
your interface should provide a compatible cable for your installation.
The scanner cable connection is secured using the “clamshell” retainer
referenced in the enlarged area of
Figure 1. Fit and clamp the retainer
over the cable connector as shown in the illustration, then fully seat the
cable assembly into the scanner, aligning both the connector and the
retainer boss with their respective openings. Secure the captive screws.
RS-232 Serial Connection —
Turn off power to the terminal/PC
and connect the scanner to the terminal/PC serial port via the RS-232
cable as shown in
Figure 1. If the terminal will not support POT (Power
Off the Terminal) to supply scanner power, use the approved power sup-
ply (AC Adapter). Plug the AC Adapter barrel connector into the socket
on the RS-232 cable connector and the AC Adapter plug into a standard
power outlet.
Figure 1
. RS-232 Serial Connection
Captive
Screws
Retainer Boss
Cable Connector
 Loading...
