2
Setup and Configuration
The Scanner is setup at the factory to read the bar codes on most labels. And, in most cases, further setup
will not be required.
However, if you need to modify the setup to meet your application, this section details the operational
settings of the unit.
To access these menu items, use the printer’s front panel, enter ‘MENU MODE’ and go to ‘PRINTER
OPTIONS’ ‘SCANNER’ (see the I-Class Operator’s Manual for menu system navigation details).
‘MODE’ is used for Scanner detection. The settings have differing functions, as follows:
Enabled – Upon power-up, the printer will attempt to detect the Scanner. If not detected, a
“Scanner Fault” occurs.
Disabled – Upon power-up, the printer will not attempt to detect the Scanner. No scanning will
occur.
Auto – Upon power-up, the printer will attempt to detect the Scanner. If detected, the printer
will function normally with the scanning function.
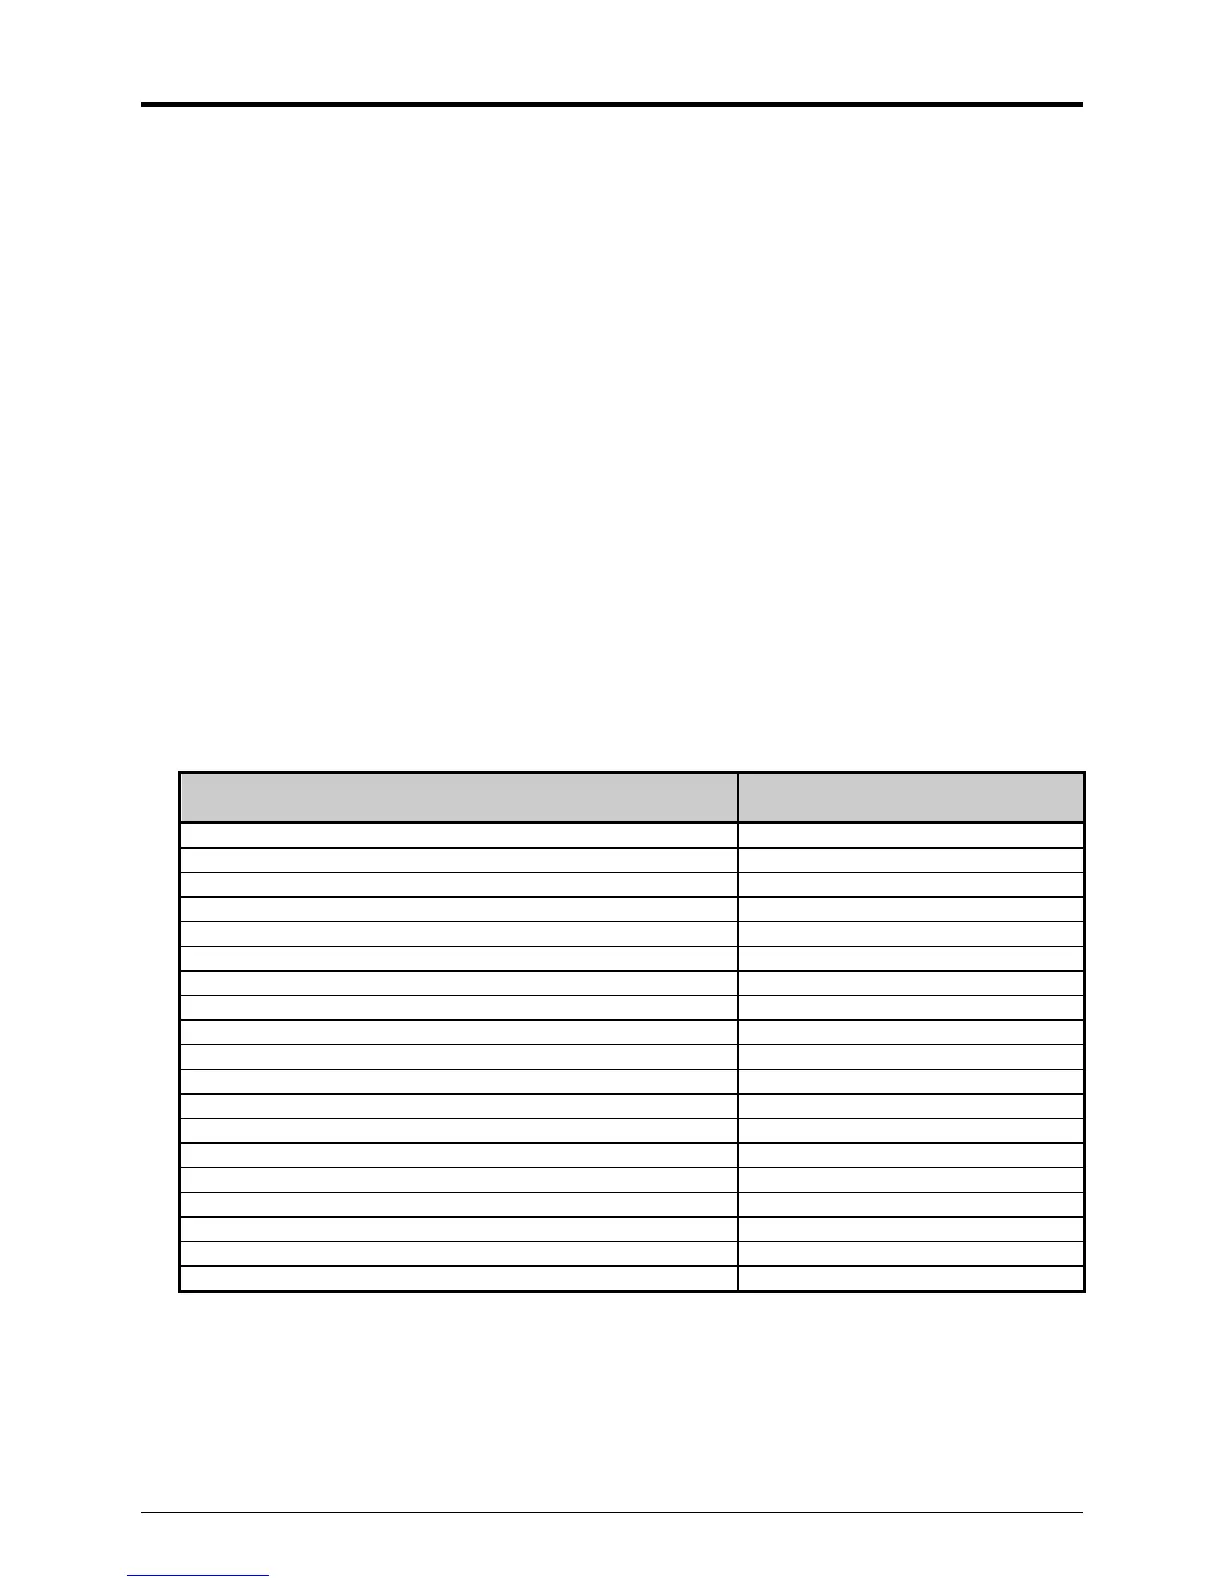
‘BARCODES’ is used to enable the reading of a particular bar code symbology. The default setting
enables the reading of all bar codes, except IATA. The table below lists the supported symbologies.
Symbology
Linear Scanner Supported
Code 39
UPC-A
UPC-E
Interleaved 2 of 5 (I2 of 5)
Code 128
EAN-13
EAN-8
HBIC
Codabar
Interleaved 2 of 5 with a modulo 10 checksum
Interleaved 2 of 5 with modulo 10 checksum & bearer bars
IATA [1]
Plessey
2 digit UPC addendum [1]
5 digit UPC addendum [1]
Code 93
UCC/EAN 128
UCC/EAN 128 K-Mart non-EDI
UCC/EAN 128 Random Weight
[1]
Readable only when using the ‘Barcode Count’ menu parameter (see below).