1
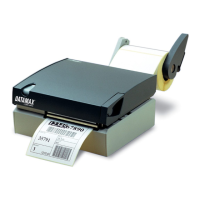
Contents of the Internal Ethernet Print Server Kit (DPO78-2538-01)
This kit contains the following items:
c Internal Ethernet Print Server PCB, P/N 51-2361-00
d Standoff, P/N 17-3047-01
e Ribbon Cable, P/N 32-2546-01
1
2
3
Follow the steps listed below to install this option.
)
Note: Only qualified service personnel should install this Option.
Tools Required
To install this option you will need a #2 Phillips head screwdriver.
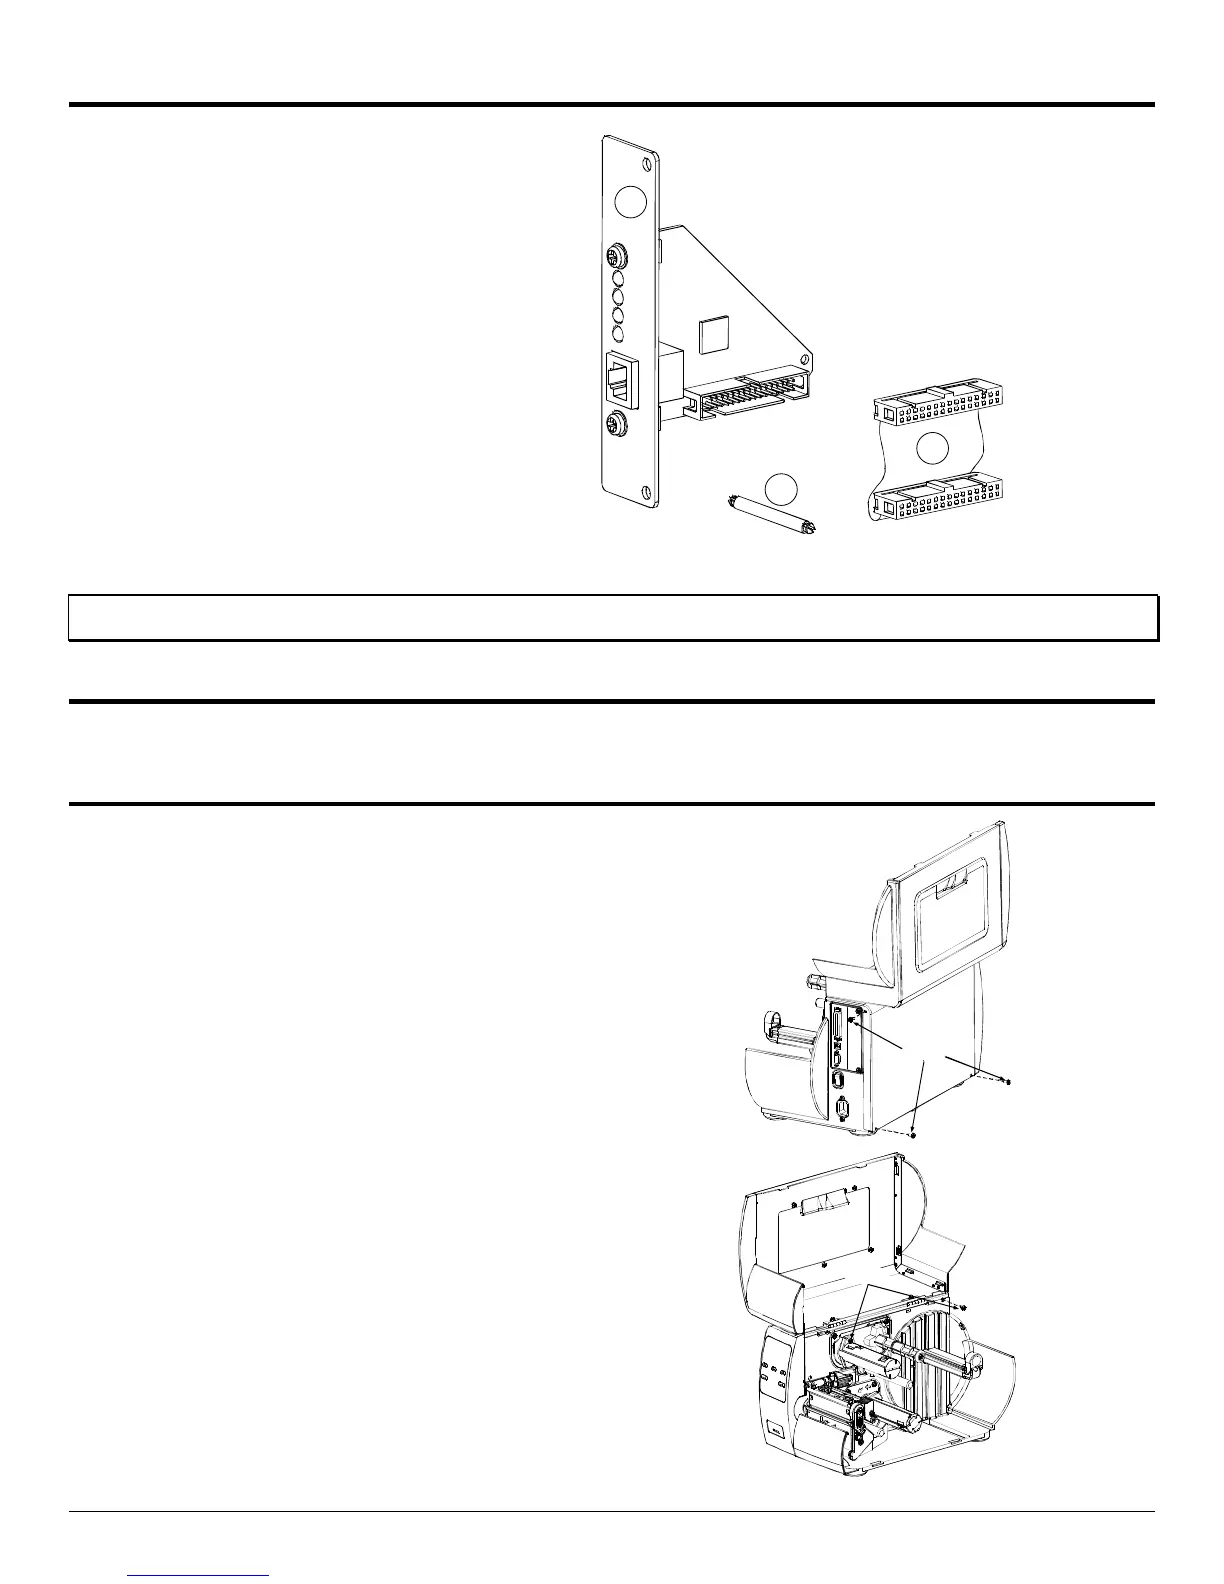
Preparing the Printer
Metal Cover Removal:
1. Turn ‘Off’ the power switch and unplug the printer.
2. Open the cover. Remove any installed media/ribbon
from the printer.
3. Remove the single Screw on the rear of the printer and
remove the two Screws securing the side cover.
Screws
4. Open the cover, remove the two Screws from the inside
of the printer as shown.
Screws
 Loading...