EasyManua.ls Logo

Datamax M-Class Mark II M-4206 - User Manual

Datamax M-Class Mark II M-4206
76 pages
Print Icon
To Next Page IconTo Next Page
Loading...
M- 4206
Operator’s Manual

Table of Contents

Questions and Answers

  • N
    Nicolas GuzmanJul 25, 2025
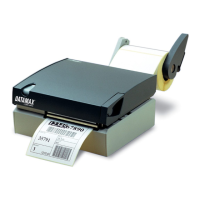
    How to fix no paper movement during Label Alignment on my Datamax M-Class Mark II M-4206?
    • K
      Kimberly RichardsonJul 26, 2025
      If your Datamax Printer doesn't move paper when performing Label Alignment, it might be because the Present Sensor is enabled, but a Label Length hasn't been set. To resolve this: * Set Label Alignment to AUTO, press and hold FEED until media moves for the automatic length measurement. * Alternatively, re-measure the Label Alignment Length. Use Printer Setup mode to enter the new length. Print a Database Configuration label to ensure the new length has been set.
  • M
    megan65Jul 30, 2025
    What to do if labels stop too far forward in Tear Mode on my Datamax M-Class Mark II M-4206?
    • P
      Patrick MitchellJul 30, 2025
      If Tear Mode is selected on your Datamax Printer but the label stop position is too far forward, it's either because another present position has been determined, or the Present Adjust value is incorrect. Here’s how to address it: * Ensure the host computer is not providing a Present Distance longer than is required for the Tear Bar. * Use the Setup Menu to modify the Present Adjust value.
  • M
    Mary HernandezAug 3, 2025
    Why aren't labels stopping far enough forward in Tear Mode on my Datamax M-Class Mark II M-4206?
    • S
      Susan ReyesAug 3, 2025
      If Tear Mode is selected on your Datamax Printer, but the label stop position isn't far enough forward, it could be due to one of the following reasons: * Another present position has been determined. Enabling the Present Sensor causes the label stop position to be approximately 0.1” behind the peel bar. * The Present Adjust value is not correct. To solve this: * Disable the Present Sensor. * Ensure the host computer is not providing a Present Distance shorter than is required for the Tear Bar. * Use the Setup Menu to modify the Present Adjust value.
  • B
    Brian BakerAug 7, 2025
    Why does my Datamax Printer produce short labels when pressing FEED?
    • L
      Linda FletcherAug 7, 2025
      If the Label Alignment Length is incorrect on your Datamax Printer, pressing FEED results in a short, one-inch label length because the default Label Alignment Length is 1.00”. To fix this: * Set Label Alignment to AUTO by pressing and holding FEED until paper moves for automatic Label Alignment Length measurement. * Alternatively, measure the label length and use the Setup Menu to set the new length. Print a Database Configuration label to ensure the new length has been set.
  • K
    kingjenniferAug 16, 2025
    Why does my Datamax M-Class Mark II M-4206 Printer produce long labels when pressing FEED?
    • A
      Aaron RodriguezAug 16, 2025
      If the Label Alignment Length is incorrect on your Datamax Printer, pressing FEED results in a label length longer than actual because the default Label Alignment Length is 1.00”. To fix this: * Set Label Alignment to AUTO by pressing and holding FEED until paper moves for automatic Label Alignment Length measurement. * Alternatively, measure the label length and use the Setup Menu to set the new length. Print a Database Configuration label to ensure the new length has been set.
  • S
    Sharon WrightAug 20, 2025
    Why does the ERROR light turn on during label alignment on my Datamax Printer?
    • D
      Dawn FisherAug 20, 2025
      If the ERROR light illuminates on your Datamax Printer during label alignment, it means the label supply is empty. Load media to resolve this issue.
  • S
    Susan KingNov 10, 2025
    What to do if my Datamax M-Class Mark II M-4206 wastes the first label during alignment?
    • S
      Sierra HahnNov 10, 2025
      If your Datamax Printer wastes the first label during alignment, it might be because the Alignment Length is too long, or the labels stop between labels on the media sensor. To resolve this: * Set Label Alignment to AUTO by pressing and holding FEED until paper moves for automatic Label Alignment length measurement. * Alternatively, re-measure Label Alignment Length, use Menu Setup to set new length, and ensure the desired length has been set. * You can also try to obtain a slightly different label Alignment Length measurement by using the Label Alignment AUTO mode, hold the FEED button to force an alignment and label measurement. Ensuring slack in the label stock may result in a slightly different measurement. The Alignment Length may also be set manually via the Setup Menu. Increa...

Summary

Chapter 1 Printer Overview

1.0 Introduction

Provides a brief overview of the M-4206 printer's capabilities and manual scope.

1.1 About this Printer

Details the standard and optional features of the M-4206 printer.

Chapter 2 Getting Started

2.0 Before Using the Printer

Instructions for unpacking, inspecting, and preparing the printer for initial use.

Chapter 3 Setting Up the Printer

3.1 Connecting the Printer

Details how to connect the printer to a host system via power and interface cables.

3.2 Loading Media

Instructions for properly loading media rolls into the printer.

3.3 Media Sensor Adjustment

Guide on positioning the media sensor for accurate media detection.

3.4 Loading Ribbon

Steps for loading ribbon for thermal transfer printing.

Chapter 4 Using the Front Panel

4.1 Lights

Explains the meaning of different indicator light states on the printer.

4.2 Buttons

Describes the function of the PAUSE, FEED, and CANCEL buttons in various modes.

4.3 Normal Mode Button Functions

Details button operations for pause, feed, and cancel in normal printer mode.

4.4 Express Setup Mode Button Functions

Explains how to quickly access and change common printer settings.

4.5 Printer Setup Mode Button Functions

Guide to navigating and modifying printer operational settings via button controls.

4.6 Label Alignment

Explains how to ensure proper print alignment on labels for optimal results.

4.7 Calibration Mode Button Functions

Describes how to use buttons to perform media calibration automatically or manually.

4.8 Internal Labels

Explains how to print internal configuration and test labels.

Chapter 5 Maintenance and Adjustments

5.1 Cleaning the Printhead

Step-by-step instructions for cleaning the printer's printhead to maintain print quality.

5.2 Media Width Adjustment

How to adjust the printhead-leveling cam for even pressure distribution with different media widths.

5.3 Printhead Burn Line Adjustment

Procedure to adjust the printhead burn line for optimal print quality on various media.

5.4 Printhead Pressure Adjustment

Instructions for adjusting printhead assembly pressure for better imaging.

5.5 Printhead Replacement

Detailed steps for removing and replacing the printer's printhead.

5.7 Resetting Factory Defaults

Procedure to reset printer settings to their original factory default values.

Chapter 6 Troubleshooting

6.1 Troubleshooting Tips

A table listing common printer symptoms and their corresponding causes and solutions.

Chapter 7 Specifications

Mechanical Specifications

Provides physical dimensions, weight, operating temperature, and voltage requirements.

Printing Specifications

Details print method, speed, resolution, and memory capacities.

Media and Ribbon Specifications

Lists media types, width, thickness, and ribbon supply details.

Communications Specifications

Outlines interface types, baud speed, handshaking, parity, and data bits.

Font Specifications

Information on available bit map fonts and scalable fonts.

Embedded Bar Codes

Lists supported barcode symbologies and their character sets.

Appendix A ASCII Control Code Chart

ASCII Control Code Chart

A table mapping ASCII characters to their decimal and hexadecimal codes.

Appendix B Embedded Fonts and Barcodes

Embedded Fonts and Barcodes

Describes character fonts and barcode types available for printer programming.

Appendix C Limited Warranty Statement

Datamax Barcode Products Limited Warranty Statement

Outlines the warranty terms for the printer and its thermal printhead.

Warranty Service Procedures

Instructions on how to return a defective unit for warranty service.

General Warranty Provisions

Standard terms and conditions related to Datamax product warranties.

Limitation of Liability

Specifies limitations on Datamax's liability for damages related to product use.

Datamax M-Class Mark II M-4206 Specifications

General IconGeneral
Print Resolution203 dpi
Print MethodThermal Transfer and Direct Thermal
Max Print Width4.25 inches
Max Print Speed6 ips
Memory8 MB Flash
InterfacesSerial, Parallel, USB
Media SensorReflective and Transmissive
Media TypesLabels, Tags
Label Roll Diameter8 inches
Label Thickness0.0025 to 0.01 inches
Maximum Print Length99 inches

Related product manuals