19
5. Firmware Update Procedure
From time to time Datavideo may release new firmware to either add new features or to fix
reported bugs in the current MCU-200S firmware. Customers can update the firmware themselves
if they wish or they can contact their local dealer or reseller for assistance should they prefer this
method.
This page describes the firmware update process and it should take approximately 20 minutes
total time to complete. Once started the update process should not be interrupted in any way as
this could result in a non-responsive unit.
As well as a working MCU-200S you will need:
The latest firmware update for the AD-1S units and the MCU-200S.
USB 2.0 cable (USB A type-to-Micro USB).
A Windows computer (Vista / 7) with USB 2.0 port.
Note: It is best to update the firmware of the AD-1S unit(s) at the same time as the MCU-200S.
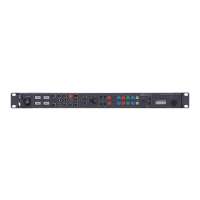
5.1 How to update the MCU-200S firmware
1. Turn off the MCU-200S powe r.
2. Connect the MCU-200S to the PC via a USB cable.
3. Set the five switches on the MCU-200S unit to their middle
position.
4. Move switch up towards (AWB) and at the same time also press the shutter select button
in. Hold both in place.
5. Turn on the MCU-200S power.
6. MCU-200S LED display will show “L-x.x”, and the PC will find MCU-200S by USB 2.0.
7. Open “MCU-200S_U1” disk on PC.
8. Delete the bootcode.bin file in “MCU-200S_U1” disk.
9. Copy new xxxxxxxxx.bin file to the “MCU-200S_U1” disk. Do not worry about the new file
name, the MCU-200S will amend the file name automatically after reboot.
10. Reboot MCU-200S.
Note: It is best to update the firmware of the AD-1S unit(s) at the same time as the MCU-200S.
5.2 How to update the AD-1S firmware
1. Connect AD-1S to the PC via a USB cable (USB A Type – Micro USB)
2. Power on PC
3. Copy the firmware binary file to AD-1S from the PC.
Note:
1: It is best to update the firmware of the AD-1S unit(s) at the same time as the MCU-200S.
2: Please use win7 or earlier operating system.
 Loading...