Local Computer Installation
10
Local Computer Installation
The following instructions contain the basic procedures for connecting and
setting up a local or remote connection between your Weather Envoy and a
computer. Additional setup not described in this manual is required for all
Weather Envoy, Vantage Pro and Vantage Pro2 consoles. See the WeatherLink
Getting Started Guide for complete instructions on connecting the data logger
to your computer. Also, see WeatherLink Online Help for additional setup
instructions.
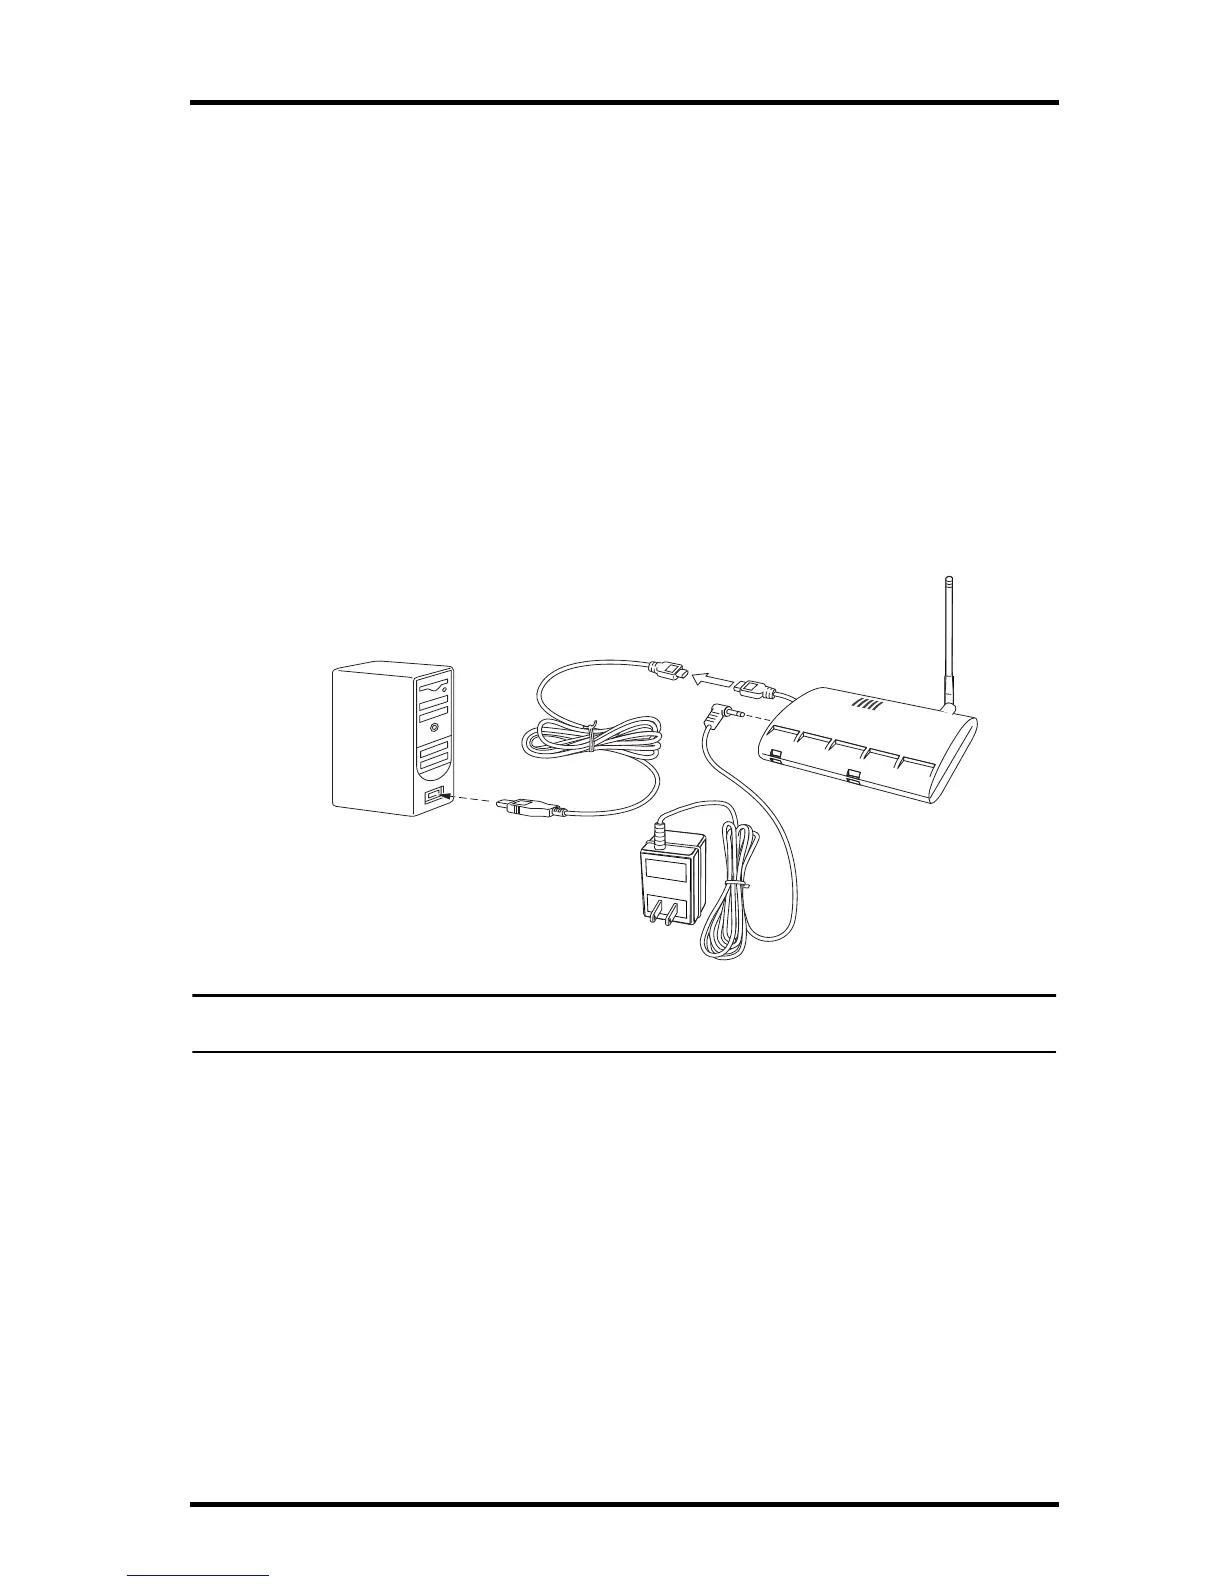
USB Connection
Locate a free USB port on your computer and connect the USB connector of
the 8’ cable to the port., and connect the Mini-B connector to the data logger.
The connection between the Envoy and the computer can be extended up to
16' (5 m) using a Mini-B-to-USB connector cable.
Note: Do not attempt to use more than a 16' extension cable, or the data logger may have
difficulty communicating with the computer.
IP Connection
1. Locate the Weather Envoy with the WeatherLinkIP data logger attached.
2. Remove power, both AC and battery.
3. Connect one end of the Ethernet cable to the WeatherLinkIP data logger.

 Loading...