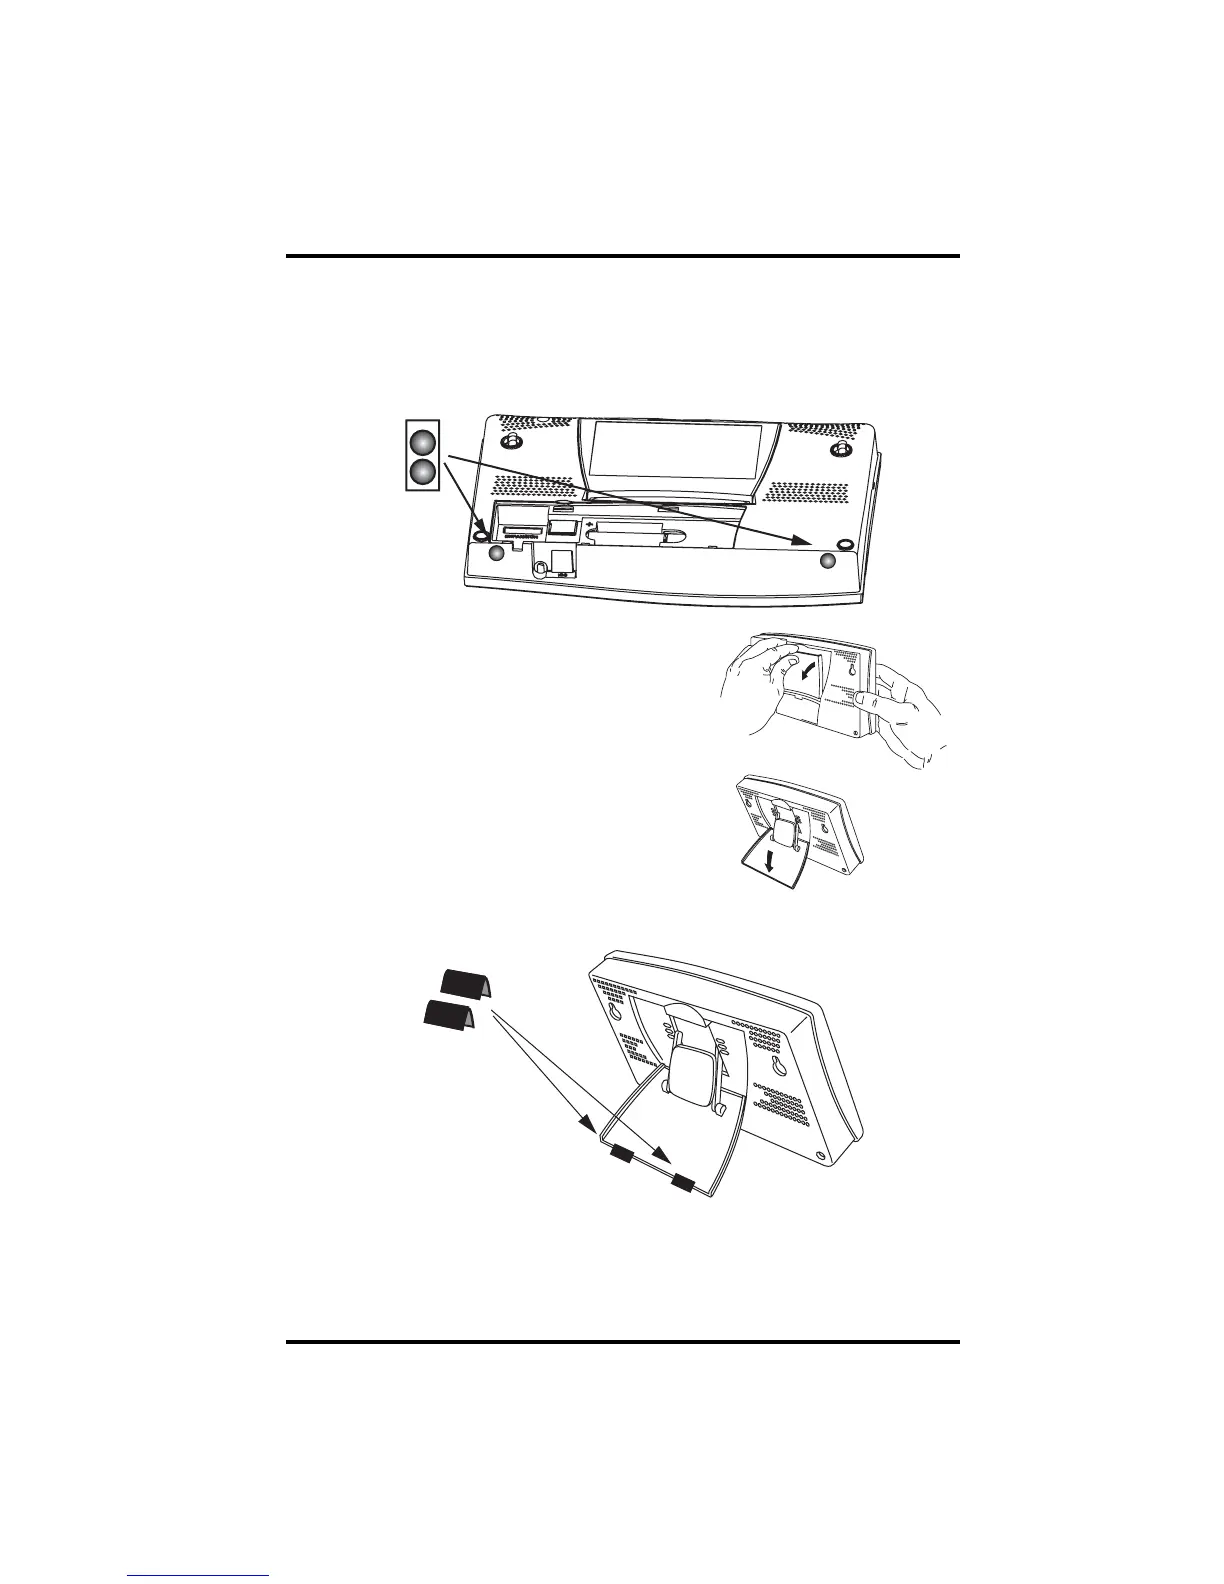
EasyManuals Logo

DAVIS Vantage Pro2 Console Manual

DAVIS Vantage Pro2
56 pages
To Next Page IconTo Next Page
To Previous Page IconTo Previous Page
Page #10 background imageLoading...
Page #10 background image
Console Location
7
Table & Shelf Placement
The console kickstand can be set to three different angles allowing five differ-
ent display angles.
1. Install the two round rubber feet on the bottom of the console. The rubber
feet help prevent damage to furniture and surfaces.
2. Lean the kickstand out by pulling on its top
edge
You’ll see the indentation for your finger at
the top edge of the console.
3. Slide the catch to rest the kickstand in the
appropriate angle.
Choose low angles for display on a coffee
table or other low area. Choose higher
angles for display on a desk or shelf.
4. Install the two rubber channel feet on the
kickstand.
If necessary, pull up on the stand to close it. It will be a little tight, so it’s okay
to push hard enough to get it to slide.

Other manuals for DAVIS Vantage Pro2

Questions and Answers:

Question and Answer IconNeed help?

Do you have a question about the DAVIS Vantage Pro2 and is the answer not in the manual?

DAVIS Vantage Pro2 Specifications

General IconGeneral
Update Interval2.5 seconds
Temperature Accuracy±1°F (±0.5°C)
Barometric Pressure Range16.00 to 32.50 inHg (540 to 1100 hPa)
Rain Collector TypeTipping bucket
Wind Speed Range0 to 200 mph (0 to 322 km/h)
Wind Speed Accuracy±2 mph (±3 km/h) or ±5%, whichever is greater
Wind Direction Resolution
Wind Direction Accuracy±3°
Solar Radiation Range0 to 1800 W/m²
Solar Radiation Sensor Accuracy±5%
UV Index Range0 to 16
UV Index Accuracy±5%
Wireless Transmission RangeUp to 1000 ft (300 m)
Temperature Range-40°F to +150°F (-40°C to +65°C)
Humidity Range0 to 100%
Humidity Accuracy±3%
Rain Collector Resolution0.01 in (0.2 mm)
Rain Measurement Accuracy±4%
Wind Direction Range0 to 360°
Power SupplySolar powered with battery backup

Related product manuals