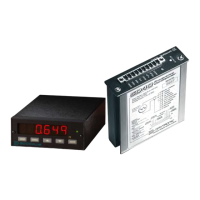
3KP64 - 1.8
3000PLUS WITH 5D64 INSTRUCTION MANUAL V. SB.2
Daytronic Corporation
2211 Arbor Blvd. Dayton, OH 45439 • (800) 668-4745
Tel: (937) 293-2566 • Fax: (937) 293-2586 • www.daytronic.com
being displayed). The three limit zones are defined by
the 3000PLUS instrument’s current
HIGH LIMIT (“HIL”)
and
LOW LIMIT (“LOL”) settings:
• HI (or “GREATER THAN”)—Channel 2’s reading is
greater than the current high limit value
• OK (or “BETWEEN”)—Channel 2’s reading is greater
than or equal to the current low limit value and less
than or equal to the current high limit value
• LO (or “LESS THAN”)—Channel 2’s reading is less
than the current low limit value
When limit monitoring is disabled, none of the limit indi-
cators will light.
For a complete discussion of limit monitoring, including
definition of limit setpoints, limits
LATCH MODE (“LAT”),
relay contact
POLARITY (“POL”), and both high-limit
and low-limit
HYSTERESIS deadbands (“LHY” and
“HHY”), see Section 5.E.
RUN-TIME LIMITS DISPLAY
When the 3000PLUS instrument’s LIMITS SECURITY
(LMS)
is OFF, the local operator is able to use the front-
panel buttons (as explained in Sections 1.E and 5.E) to
quickly view and adjust the operating limit values
during
normal run-time operation, without having to enter
Setup Mode
. This is the case even when limit monitor-
ing is currently disabled (Section 5.E).
When limits security is ON, the operator can view and
modify the limits values for monitoring the “auxiliary”
DAC output only by following the standard front-panel
setup procedure given in Section 3, which may require
entry of a security code.
SETUP STAGE INDICATION
Each of the seven front-panel setup indicators shown in
Fig. 2 will light when the 3000PLUS enters the corre-
sponding stage of the
FRONT-PANEL SETUP PROCE-
DURE
, as listed below and described in detail in
Section 3. Except for
ST (“SETUP”), each indicator will
remain on only as long as the meter is in that setup
stage;
ST will remain on until the operator exits setup
mode.
1.
ST (“SETUP”)—security and module identification
2.
RG (“RANGE”)—input range and scaling information,
including (for the 5D64 module) full-scale VDC
range, desired full-scale reading in units, and
desired decimal-point resolution
3. FL (“FILTER”)—analog and digital filter settings
4.
CL (“CALIBRATION”)—including desired calibration
method and all cal-point values applicable to that
method
5.
LM (“LIMIT”)—parameters relating to the limit moni-
toring of the “auxiliary” output (Channel 2), including
limit enable, latch mode, relay polarity, setpoint val-
ues, and hysteresis windows*
6.
PK (“PEAK”)—parameters relating to the further pro-
cessing of the “auxiliary” output (Channel 2), includ-
ing peak mode, “defeat” threshold, “backout”
threshold, decay rate, and tare offset
7.
AN (“ANALOG OUTPUT”)—full-scale voltage output,
followed by entry a new security code, if desired
MODULE STATUS INDICATION
Shown in Fig. 3, the status indicator light of the installed
5D64 Conditioner module serves to monitor the mod-
ule’s power, input, communications, and general health
condition. The condition(s) represented by the light’s
three possible colors and color combinations are given
below.
NOTE: As long as the module is properly communicat-
ing with the 3000PLUS meter (and the meter is pow-
ered up), the indicator light will be
flashing.
• if the flashing light is constantly GREEN, the mod-
ule’s input signal is OK
• if the flashing light is constantly YELLOW, the mod-
ule’s input signal is over 20% out of range
• if the flashing light is constantly RED, a serious input
condition has been detected (e.g., excessive cur-
rent, overvoltage); it could indicate a transducer
short or faulty cabling
• if the flashing light is alternating YELLOW AND
GREEN
, the module has received a mnemonic
command from the 3000PLUS meter (the yellow
light will continue for about a second after receipt of
the command-terminating carriage return)
• if the flashing light is alternating RED AND GREEN,
a significant internal software error detected; contact
the Daytronic Service Department
1. INTRODUCTION
* Also on when viewing limits in run-time (see above).