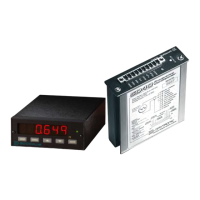
3KP64 - 3.1
3000PLUS WITH 5D64 INSTRUCTION MANUAL V. SB.2
Daytronic Corporation
2211 Arbor Blvd. Dayton, OH 45439 • (800) 668-4745
Tel: (937) 293-2566 • Fax: (937) 293-2586 • www.daytronic.com
3. FRONT-PANEL CONFIGURATION
AND CALIBRATION
NOTE: If you fail to press the ENTER button (or either
the
UP or DOWN button) within two minutes after you
first press
ENTER for a given parameter, the 3000PLUS
display will alert you to this fact by alternating the para-
meter’s current VALUE with its NAME.
USING THE UP/DOWN BUTTONS TO ADJUST A
NUMERICAL PARAMETER
To increase a given parameter’s displayed numerical
value—in the
positive direction, regardless of sign—you
should press and hold down
using the method explained below, until the desired
value is obtained.
To
decrease a given parameter’s displayed numerical
value—in the
negative direction, regardless of sign—you
should press and hold down
until the desired value is obtained.
Changing an existing number to a new (“target”) num-
ber requires that you create each digit of the target
number separately, starting with the MOST SIGNIFI-
CANT DIGIT (the leftmost digit of the number) and work-
ing back to the LEAST SIGNIFICANT DIGIT (the
rightmost digit).
The best way to see how the
UP and DOWN buttons
work is to use an example: suppose that you want to
change the instrument’s
HI LIMIT setpoint from its cur-
rently displayed value of “5.0” to a value of “1230.8.”
1. Press and hold down the
UP button until a “1”
appears in the
thousands place (fifth digit from the
right).
This is what you will see when you first press and
hold the button:
• The displayed number’s LEAST SIGNIFICANT
DIGIT (LSD)—initially the “0” of “5.0”—will begin
to rapidly and continuously increment by the
“count” value determined by its current scaling
(see Section 1.D). It will do this until it cycles
from its highest value back to “0,” at which
point…
• The digit in the ones place (second from the
right, initially “5”) will immediately begin to incre-
ment by a count of “1.” It will do this until it
cycles from “9” back to “0,” at which point…
You can set up and calibrate your 3000PLUS complete-
ly via the instrument’s front-panel push buttons and dis-
play (as detailed in the following section). For setup
and calibration using the
3KP Configurator software
supplied with the meter, see Section 4.
ENTERING A SETUP PARAMETER
The general sequence for entry of any given setup
parameter is as follows:
1. The two-to-six-character NAME of the parameter
will first be displayed (e.g.,
ID, RANGE, LO LIM).
2. You will press
to “acknowledge” the parameter.
3. The currently stored value of the parameter will be
displayed (this will initially be its “factory default”
value).
4. If you want to
keep the currently displayed value for
this parameter, you need only press
ENTER once
more to step to the next parameter in the setup
sequence.
5. If you want to
change the value of the parameter,
what you do will depend on the type of parameter:
a. If there are two or more
discrete selections for
the parameter, you will press
repeatedly to cycle through the sequence of
allowed values.
b. If the parameter can take any
numeric value
within a given range, you will use the
or
button to increment or decrement the currently
displayed value (respectively) within that range
(see below for details).
When the desired parameter value is displayed,
press
once more to accept the value and step to the next
parameter in the setup sequence.