AUTO-EQ WIZARD
Once you have completed the Setup wizard, you can now proceed to EQ your system. The
Auto-EQ Wizard automatically adjusts the response of the system by producing pink noise
and adjusting the Graphic EQ until the RTA matches a selected response. (The Auto-EQ
TM
Wizard can be initialized at any time by pressing and holding the <EQ> button.) The
display will look like this:
DriveRack PX
Auto EQ WIZARD
<NEXT PG> to advance
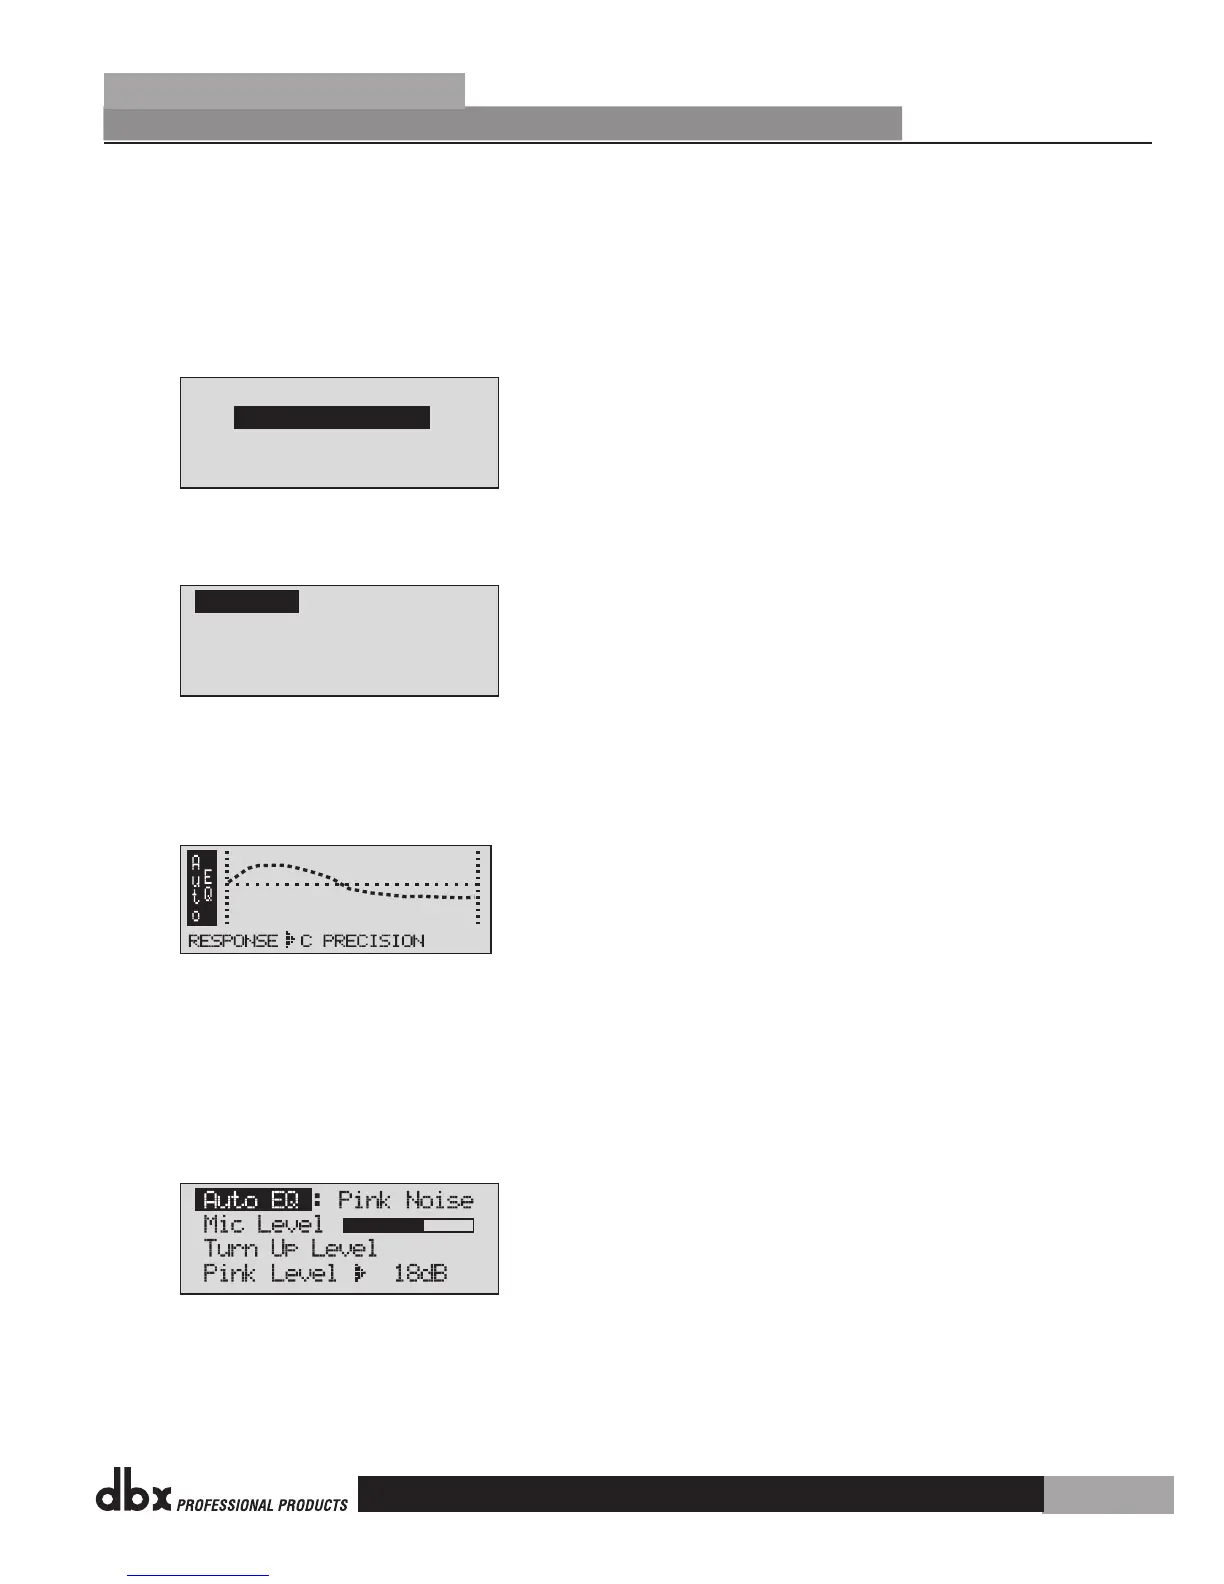
Press the <NEXT PG> button and the display will read:
Connect mic to RTA
input. Press RTA
input button.
Auto EQ
The display is prompting you to connect an RTA-specific microphone to the front-panel
RTA XLR input, and press the <RTA Input> button. It is recommended that you use the
included dbx M2 RTA microphone. The display will appear something like this:
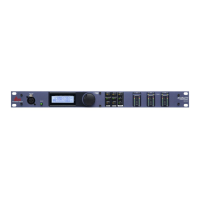
You can now select any one of the several different Frequency responses for the Auto-EQ.
The options are: Flat (0), and Responses A-D. You can also select Low, Medium and High
Precision. Press the <Data Wheel> to toggle between selecting Response and Precision.
Turn the <Data Wheel> to scroll through the available options. Once you have selected
your desired EQ Frequency response, press the <Next pg> button and the display will
appear as follows:
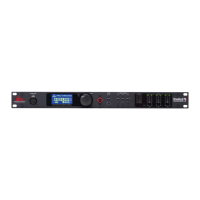
You will now proceed to “Pink” the room by adjusting the Pink level. The range of bar
graph is –INF to +20dBu. Be certain to raise the pink noise level to the level of loudness
intended during the performance. Once the Pink level has been adjusted to the desired
volume, press the <Next pg> button and the Auto-EQ sequence will begin. The display will
•
•
•
•
•
DriveRack
®
PX
Section 2
Getting Started
11