33
info@debem.it
Pour remplacer l’échangeur pneuma-tique de la pompe
MICROBOXER:
ATTENTION: si vous de-vez expédier la pompe au
constructeur ou dans un service après-vente, une
vidange préala-ble du produit s’impose. En cas de
produits toxiques, nocifs ou dangereux pour la santé, la
pompe doit être opportunément traitée et lavée avant son
expédition.
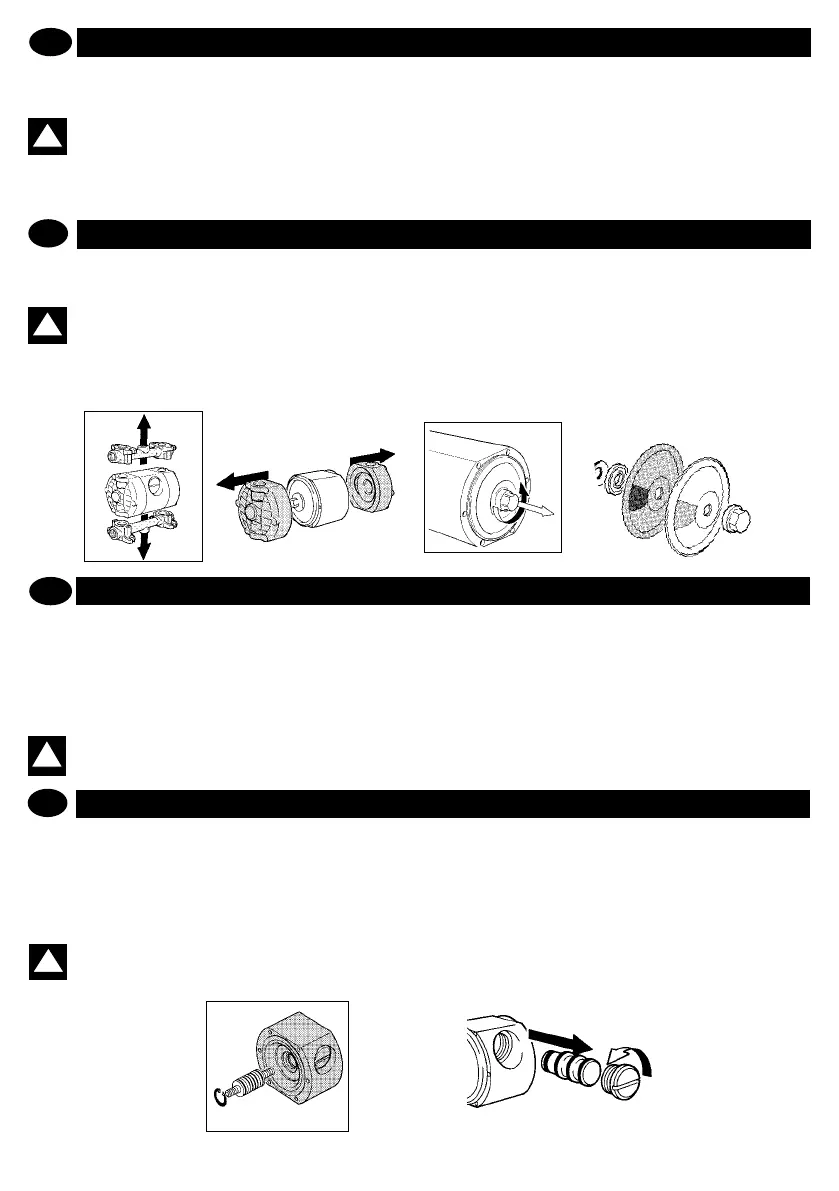
A1. Démonter les collecteurs d’aspi-ration et de refoulement
en retirant les éléments de xation
A2. Démonter les deux corps de la pompe et retirer les vis
de xation
A3. Retirer le capuchon de blocage des membranes dans les
deux cir-cuits.
A4. Dégager les membranes des deux côtés de la pompe.
!
A. REMPLACEMENT DE L’ECHANGEUR PNEUMATIC MICROBOXER
A1
A2
A3
A4
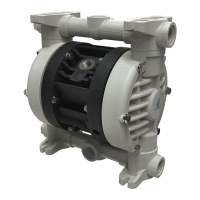
A5. Faire sortir la douille de commande pneumatique du corps
central.
A6. Dévisser les boughon et extraire le distributeur monostable
de l’air.
A7. Remplacer la douille de commande avec l’arbre de rac-
cordement et le dis-tributeur monostable avec une pièce de
rechange originale ayant les mêmes caractéristiques.
ATTENTION Les échangeurs pneumatiques ne
doveint pas être ouverts afn d’éviter de les re-mon-
ter incorrectement ce qui peut causer le dysfonctionnement
de la pompe.
A8. Remonter la pompe en suivant la marche inverse de la
dépose et serrer uniformément les boulons de xation.
Le remplacement de l’échangeur pneumatique de la
MICROBOXER est terminé, vous pouvez ainsi met-tre
en place la pompe et la brancher commeillustré dans les
chapitres précédents.
!
A5
A6
F
F
To replace the pneumatic exchanger in MICROBOXER pumps
you must:
WARNING: Should the pump be returned to the
manufacturer or to the service center, you must
empty it out completely. If toxic, noxious or other
types of dangerous products have been used, the pump
must be suitably treated and washed before it is sent.
A1. Disassemble the intake and delivery manifolds by removing
their xing elements.
A2. Disassemble the two pump casings by removing the rel-
evant xing screws.
A3. Remove the external diaphragm locking cap from both
the circuits.
A4. Remove the diaphragms from both sides of the pump.
GB
!
A. REPLACING THE MICROBOXER PNEUMATIC EXCHANGER
A5. Remove the pneumatic command bushing from the central
body.
A6. Unscrew the plug and withdraw the monosyable air
distributor.
A7.
Replace the command bushing with the connection shaft and the mono-
stable distributor with original spare parts having the same characteristics
.
WARNING To avoid incorrect reassembly and sub-
seguent malfunction of the pump the air exchang-
ers must not be open.
A8. Reassemble the pump according to the previously de-
scribed sequence but in reverse order and tighten the xing
bolts evenly.
Replacement of the pneumatic exchanger of a MICROBOX-
ER pump nishes here. You can now reposition the pump
and reconnect it as described in the previous sections.
GB
!