6
Installation (continued)
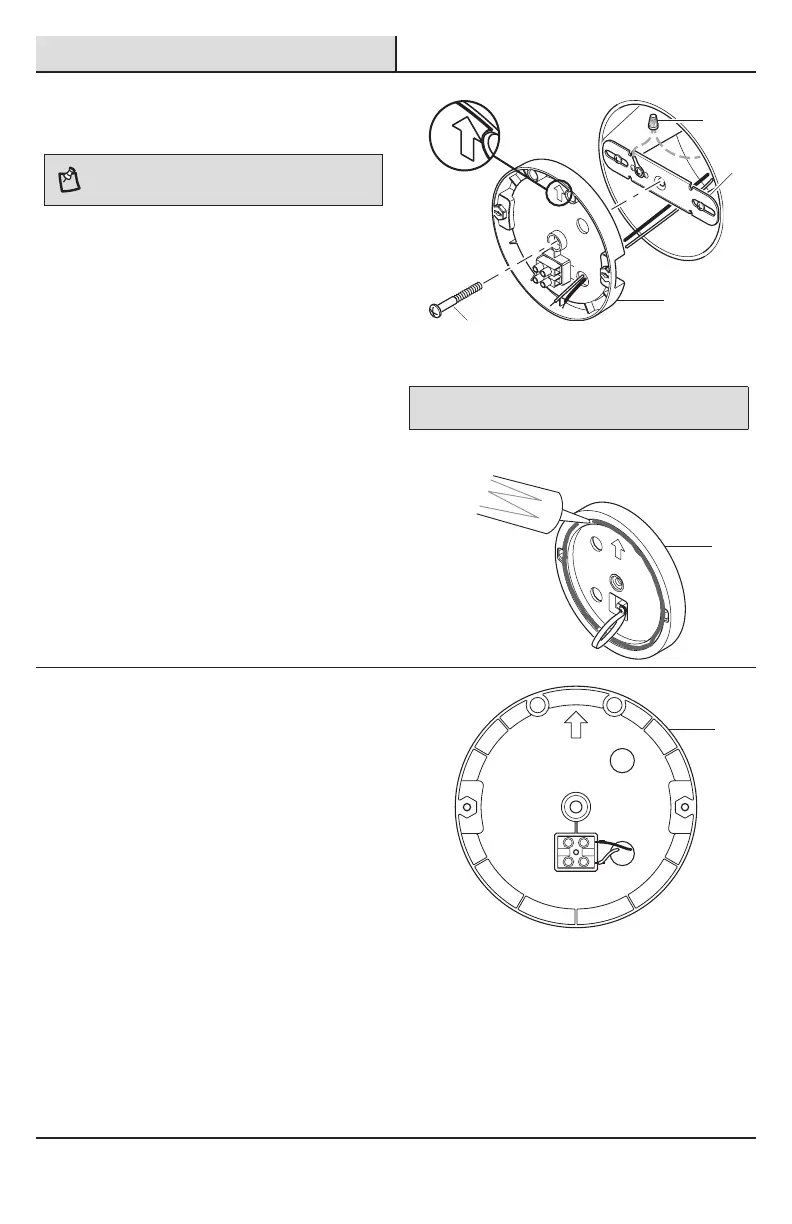
4
Installing the mounting plate
NOTE: The center mounting plate (D) hole is for the
mounting bolt (DD). The other two holes in the mounting
plate (D) are for routing the house wiring.
□ Connect the ground wire on the mounting
bracket (FF) to the house ground wire using a
wire connector (EE).
□ Route the black and white junction box wires
through a hole in the mounting plate (D).
□ Place the mounting plate (D) against the
junction box.
□ When mounting to a wall, the “UP” arrow
must point upward.
□ When mounting to an eave, the “UP” arrow
must point toward the building.
□ Insert the mounting bolt (DD) through the
center mounting plate (D) hole and thread it
into the center hole of the mounting bracket
(FF). Tighten the bolt (DD) securely.
□ Firmly pull on the mounting plate (D) to
verify it is securely attached to the mounting
bracket(FF).
Black
Noir
Negro
L
N
White
Blanc
Blanco
Black
Noir
Negro
L
N
White
Blanc
Blanco
NOTICE: When attaching this light to an external, surface mount
junction box, caulk the rear of the mounting plate (D) before mounting.
5
Making the electrical
connections
□ Insert the junction box wires into the side of
the terminal block. Tighten terminal block
screws to secure the wires.
□ Insert the white wire from the junction box
into the terminal marked “N (White)”.
□ Insert the black wire from the junction box
into the terminal marked “L (Black)”.
Black
Noir
Negro
L
N
White
Blanc
Blanco
D
D
D
DD
FF
EE
 Loading...