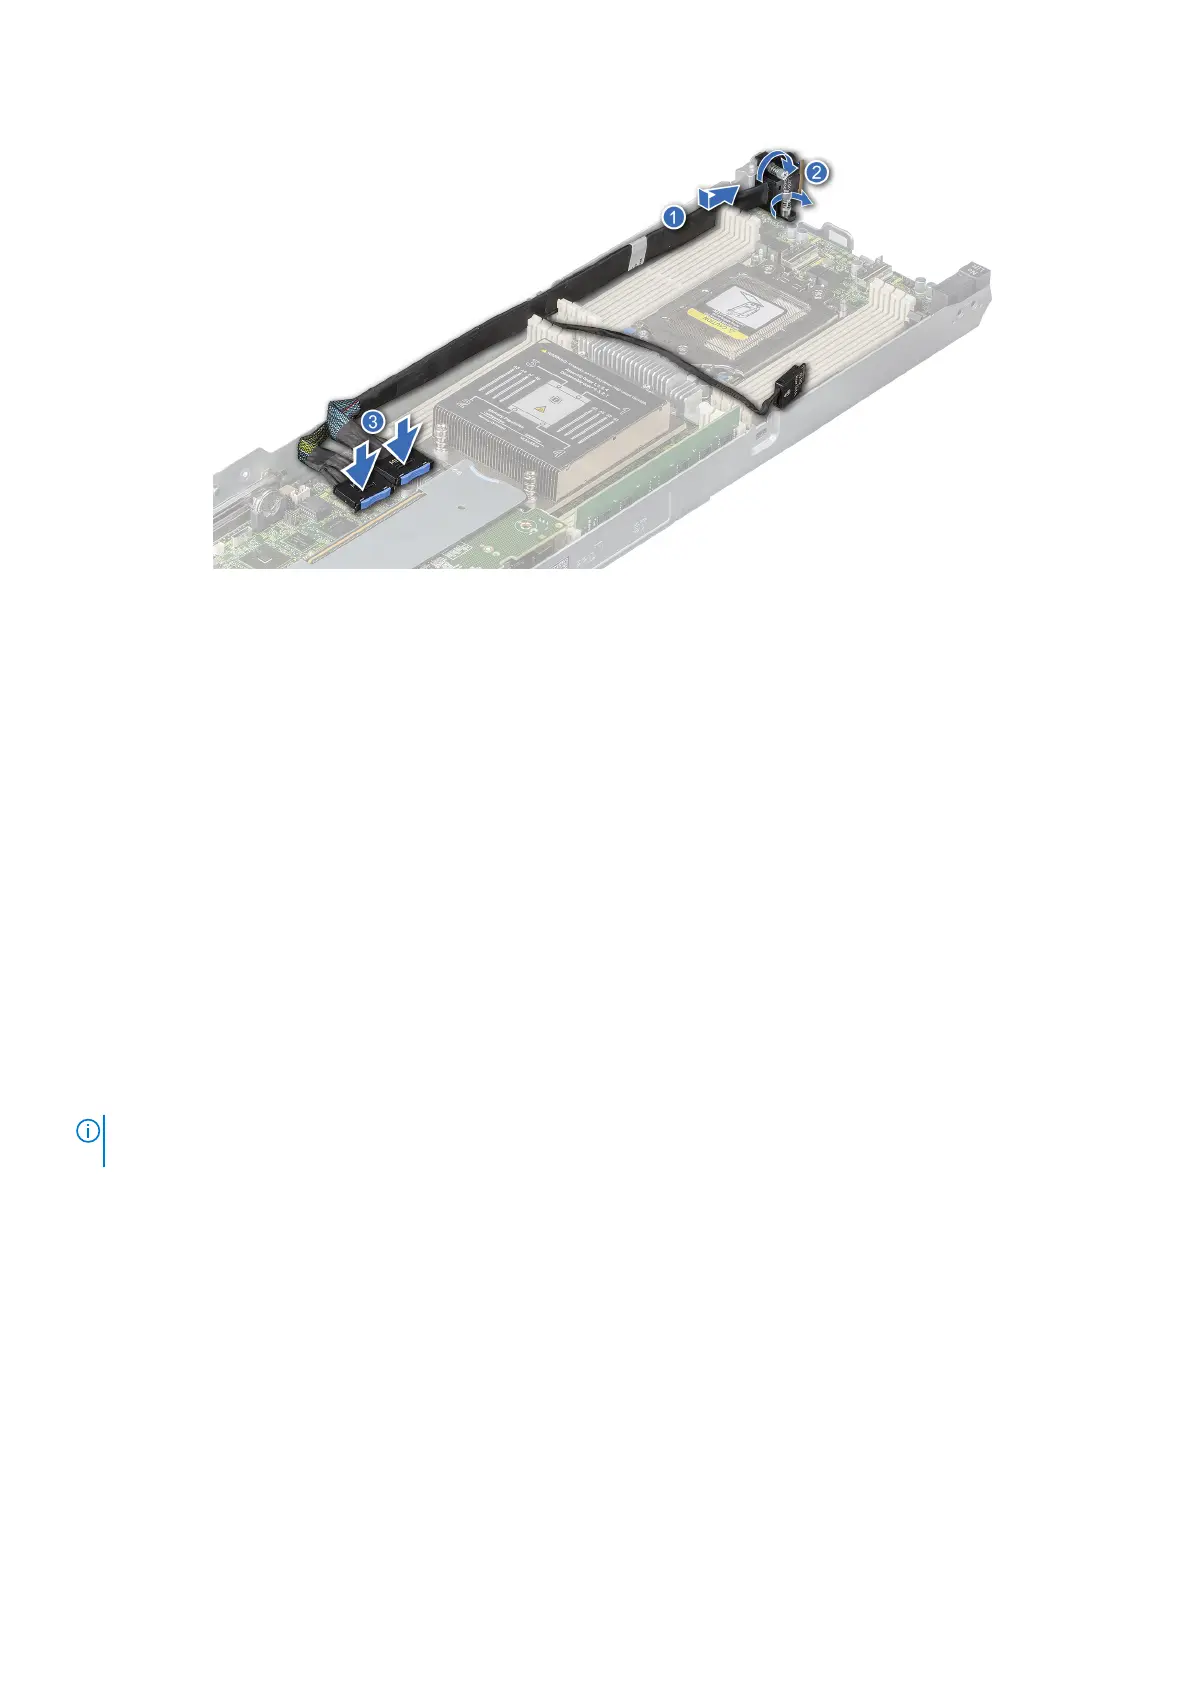
Figure 43. Installing the linking board and SATA cable
4. If applicable, connect the M.2 riser data cable to the M.2 riser.
Next steps
1. Install the expansion card riser 1.
2. Install the support bracket.
3. Install the air shroud.
4. Follow the procedure listed in After working inside your system.
Processor and heat sink
Removing the heat sink
Prerequisites
1. Follow the safety guidelines listed in the Safety instructions.
2. Follow the procedure listed in the Before working inside your system.
3. Remove the air shroud.
NOTE:
The heat sink and processor are too hot to touch for some time after the system has been powered down. Allow the
heat sink and processor to cool down before handling them.
Steps
1. Using a Torx #T20 screwdriver, loosen the captive screws in the order mentioned on the heatsink:
a. Partially loosen the captive screws 4 and 3(approximately 3 turns).
b. Partially loosen the captive screws 2 and 1 (approximately 3 turns).
c. Loosen the captive screws 4 and 3 completely.
d. Loosen the captive screws 2 and 1 completely.
2. Lift the heat sink from the system.
Installing and removing system components
49

 Loading...


