EasyManuals Logo

Dell Inspiron 13 5310 User Manual

Dell Inspiron 13 5310
70 pages
To Next Page IconTo Next Page
To Previous Page IconTo Previous Page
Page #36 background imageLoading...
Page #36 background image
Steps
1. Peel the tape that secures the display-cable bracket to the system board.
2. Remove the screw (M2x3) that secures the display-cable bracket to the system board.
3. Lift the display-cable bracket off the system board.
4. Peel the tape that secures the display-cable connector latch to the system board.
5. Lift the latch and disconnect the display-cable from the connector on the system board.
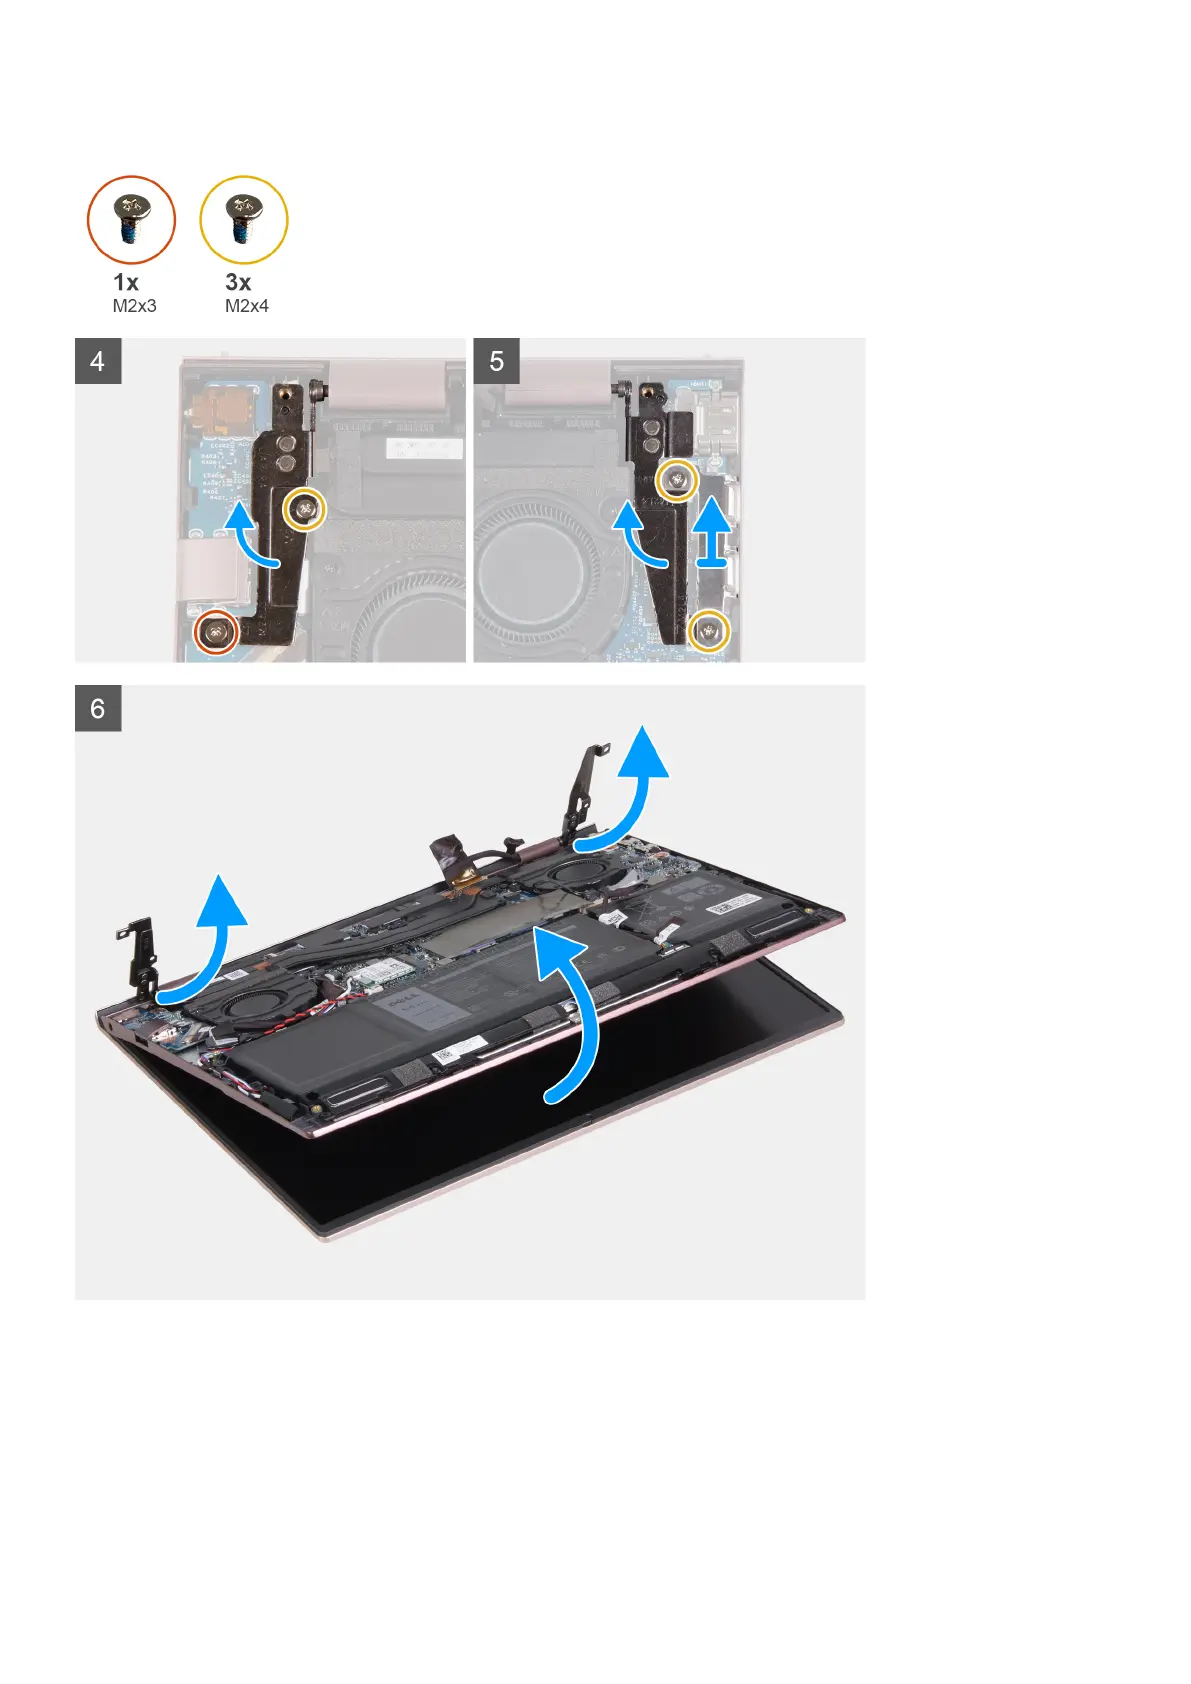
6. Remove the screw (M2x3) that secures the left-display hinge to the palm-rest and keyboard assembly.
36
Removing and installing components

Table of Contents

Other manuals for Dell Inspiron 13 5310

Questions and Answers:

Question and Answer IconNeed help?

Do you have a question about the Dell Inspiron 13 5310 and is the answer not in the manual?

Dell Inspiron 13 5310 Specifications

General IconGeneral
Display Size13.3 inches
GraphicsIntel Iris Xe Graphics
Battery4-Cell, 54 WHr
WirelessWi-Fi 6 (802.11ax)
BluetoothBluetooth 5.1
KeyboardBacklit Keyboard
Processor11th Gen Intel Core i5/i7
RAM8GB/16GB LPDDR4x
Storage256GB/512GB/1TB SSD
Operating SystemWindows 10 Home / Windows 10 Pro
Webcam720p HD
AudioStereo speakers with Waves MaxxAudio Pro
Ports2x Thunderbolt 4, 1x USB 3.2 Gen 1 Type-A, 1x HDMI 1.4, 1x headphone/microphone combo
Resolution2560 x 1600
Weight1.25 kg

Related product manuals