Steps
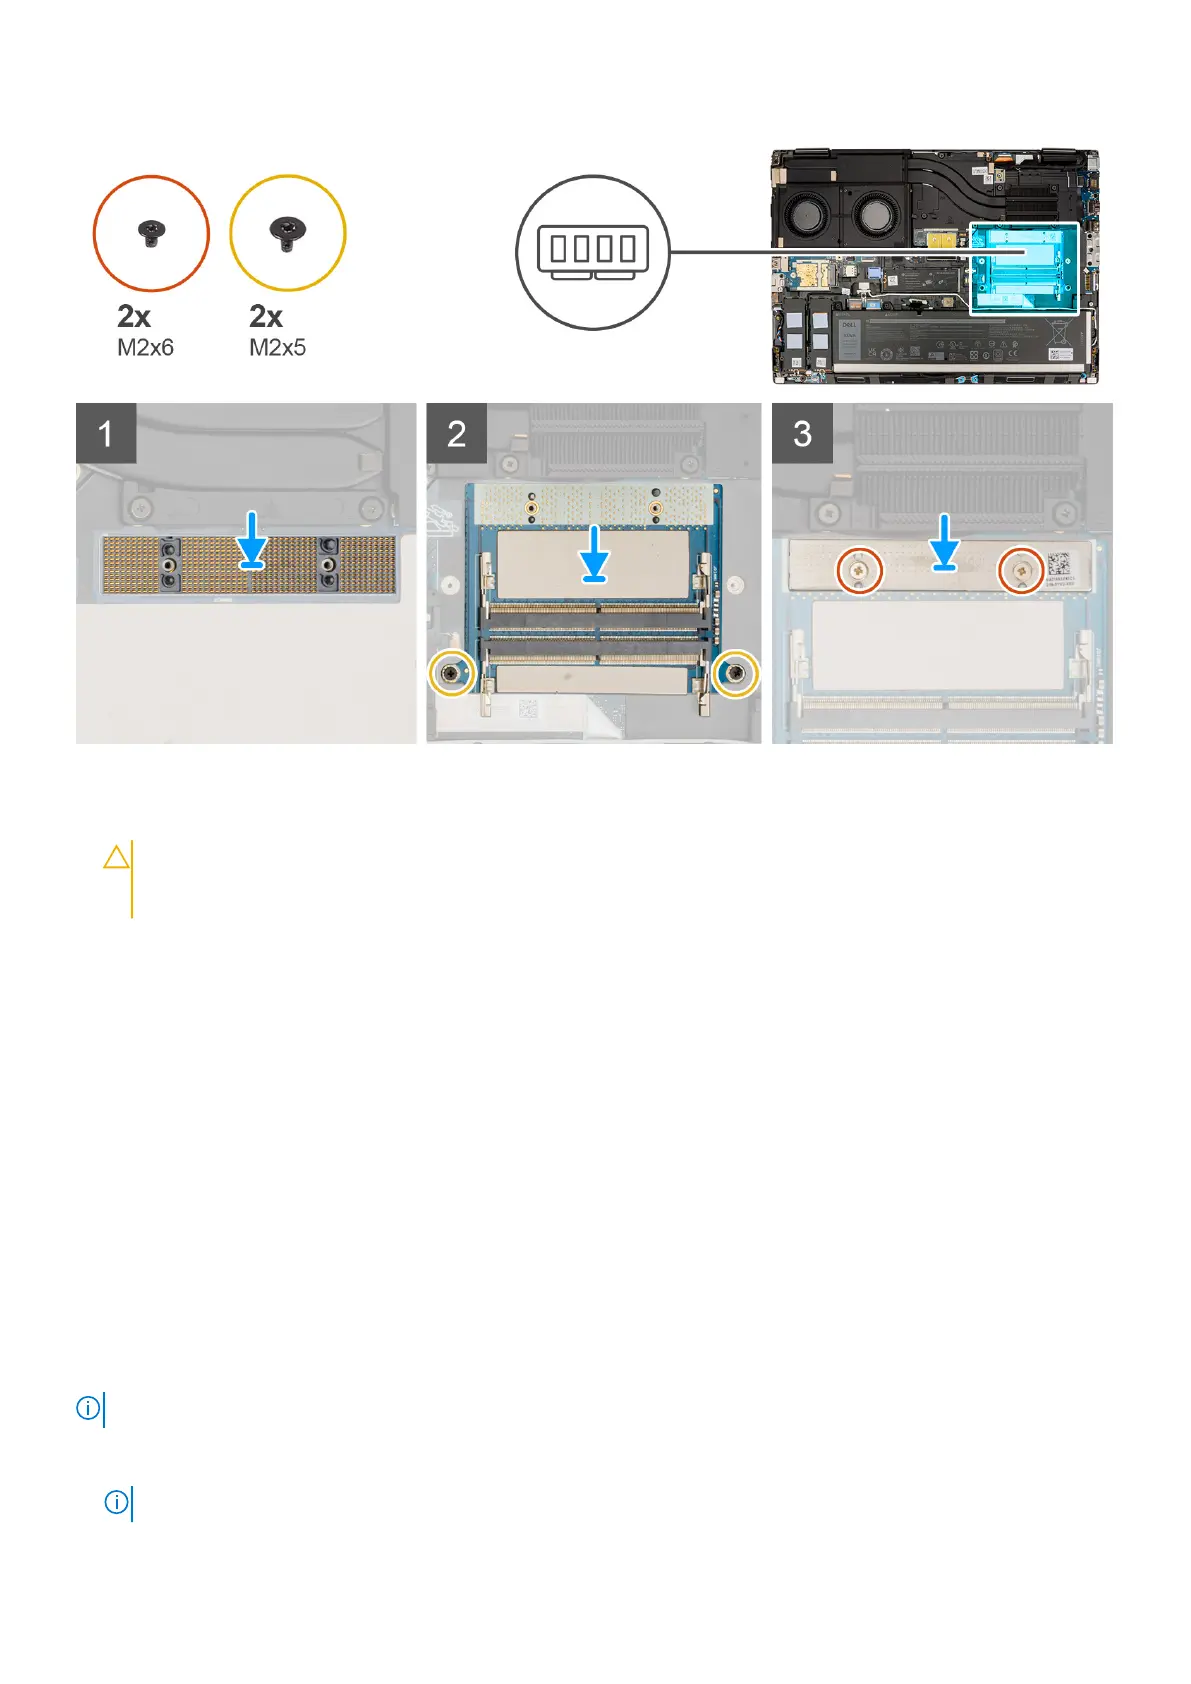
1. Place the DIMM connecter module on the system board.
CAUTION:
When handling the memory connector DO NOT touch the pins on the connector module, the pins
are fragile and any direct contact with the pins may damage them. Only hold the connector from the sides to
avoid contact with the pins.
2. Place the memory interposer board on the system board.
3. Replace the two (M2x5) screws to secure the memory interposer board to the system board.
4. Place the memory bracket on the memory interposer board.
5. Replace the two (M2x6) screws to secure the memory bracket to the memory interposer board.
Next steps
1. Install the memory module.
2. Install the base cover.
3. Follow the procedure in after working inside your computer.
Solid State Drive
Removing the primary M.2 Solid-state drive
Prerequisites
NOTE: For computers shipped with M.2 2280 or 2230 Solid-state drive in slot 3.
1. Follow the procedure in before working inside your computer.
2. Remove the base cover.
NOTE: Follow this procedure only if the computer is shipped without SSD door configuration).
Removing and installing components 37

 Loading...