Power-adapter port
Removing the power-adapter port
Prerequisites
1. Follow the procedure in before working inside your computer.
2. Remove the base cover.
3. Remove the SIM card.
4. Remove the battery.
5. Remove the CAMM module or long CAMM module or memory module.
6. Remove the interposer board module.
7. Remove the solid-state drive.
8. Remove the secondary solid-state drive.
9. Remove the heat-sink for integrated graphics or heat-sink for discrete graphics.
10. Remove the inner frame.
11. Remove the system board.
About this task
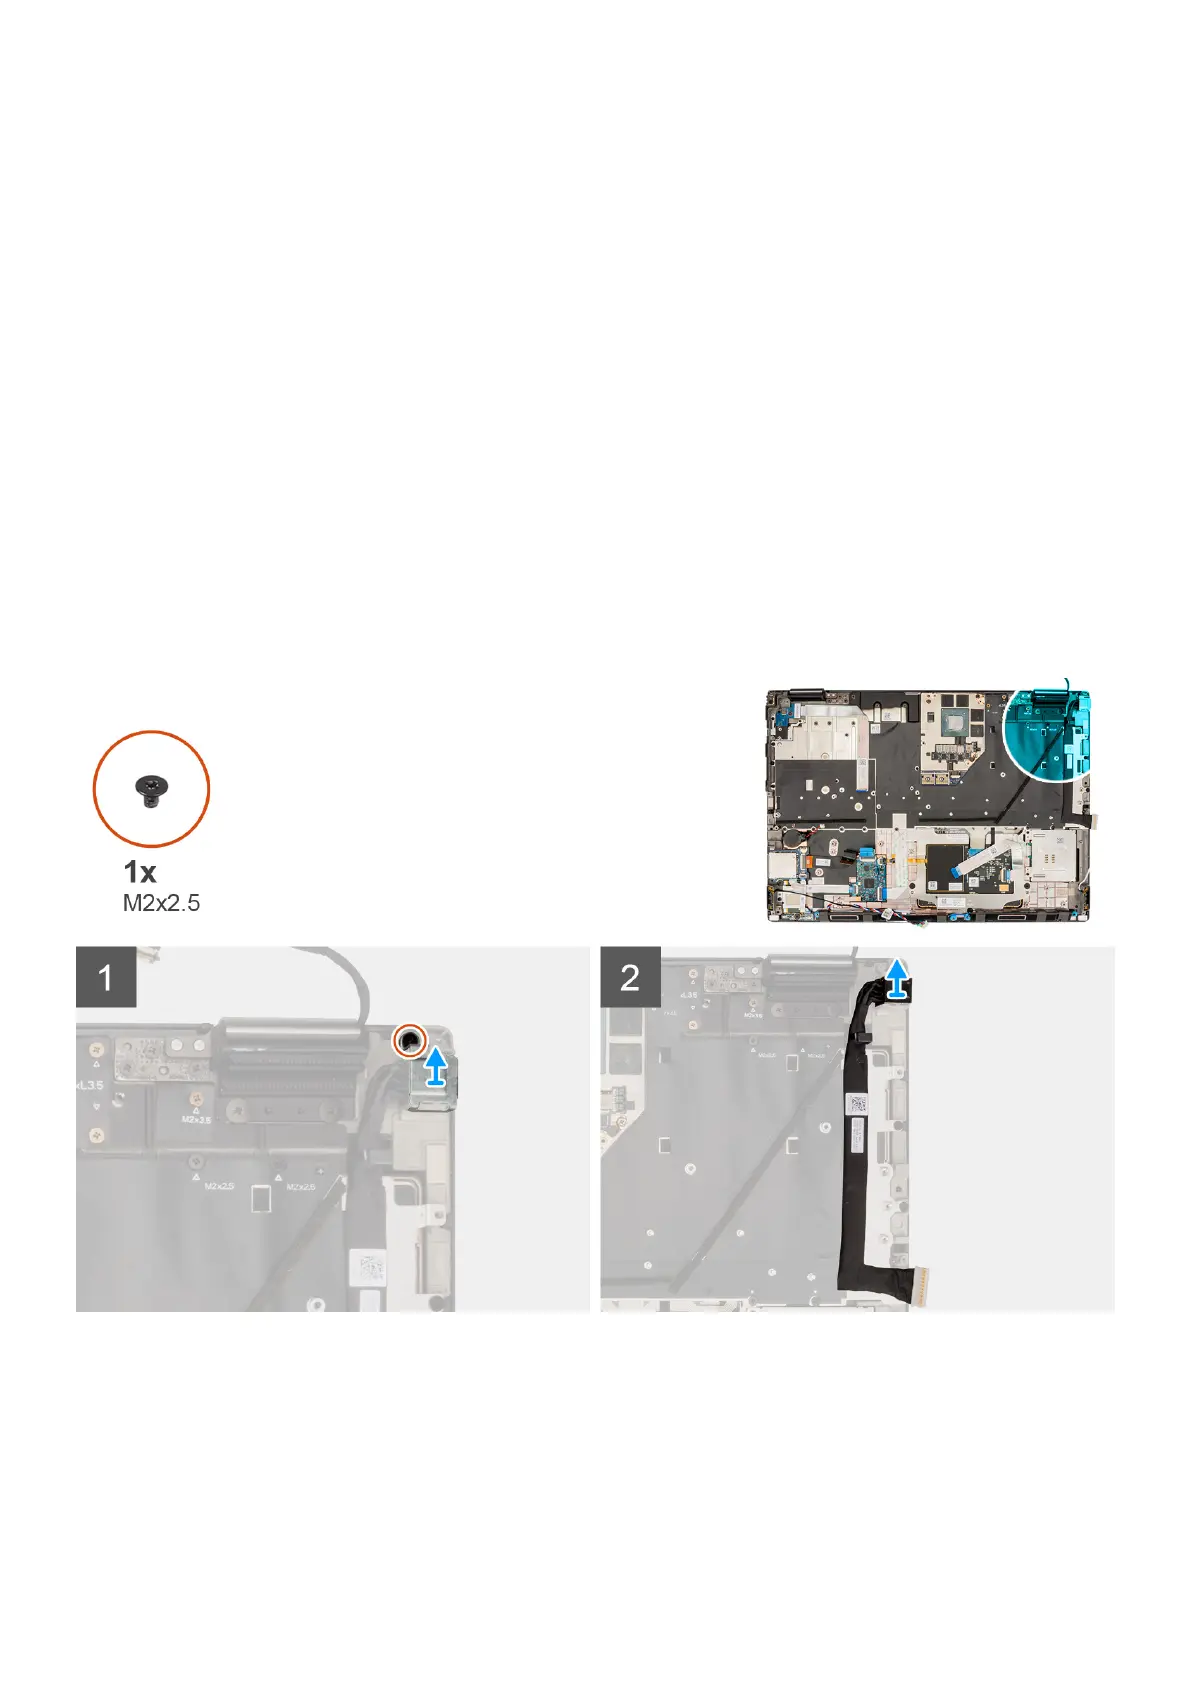
The figure indicates the location of the power-adapter port and provides a visual representation of the removal procedure.
Steps
1. Remove the (M2x2.5) screw that secures power-adapter port bracket.
2. Disconnect the power-adapter cable from the connector on the system board.
3. Remove the power-adapter port bracket from the computer.
4. Unroute the power-adapter cable from the routing guide on the computer chassis.
Removing and installing components
79
 Loading...