Steps
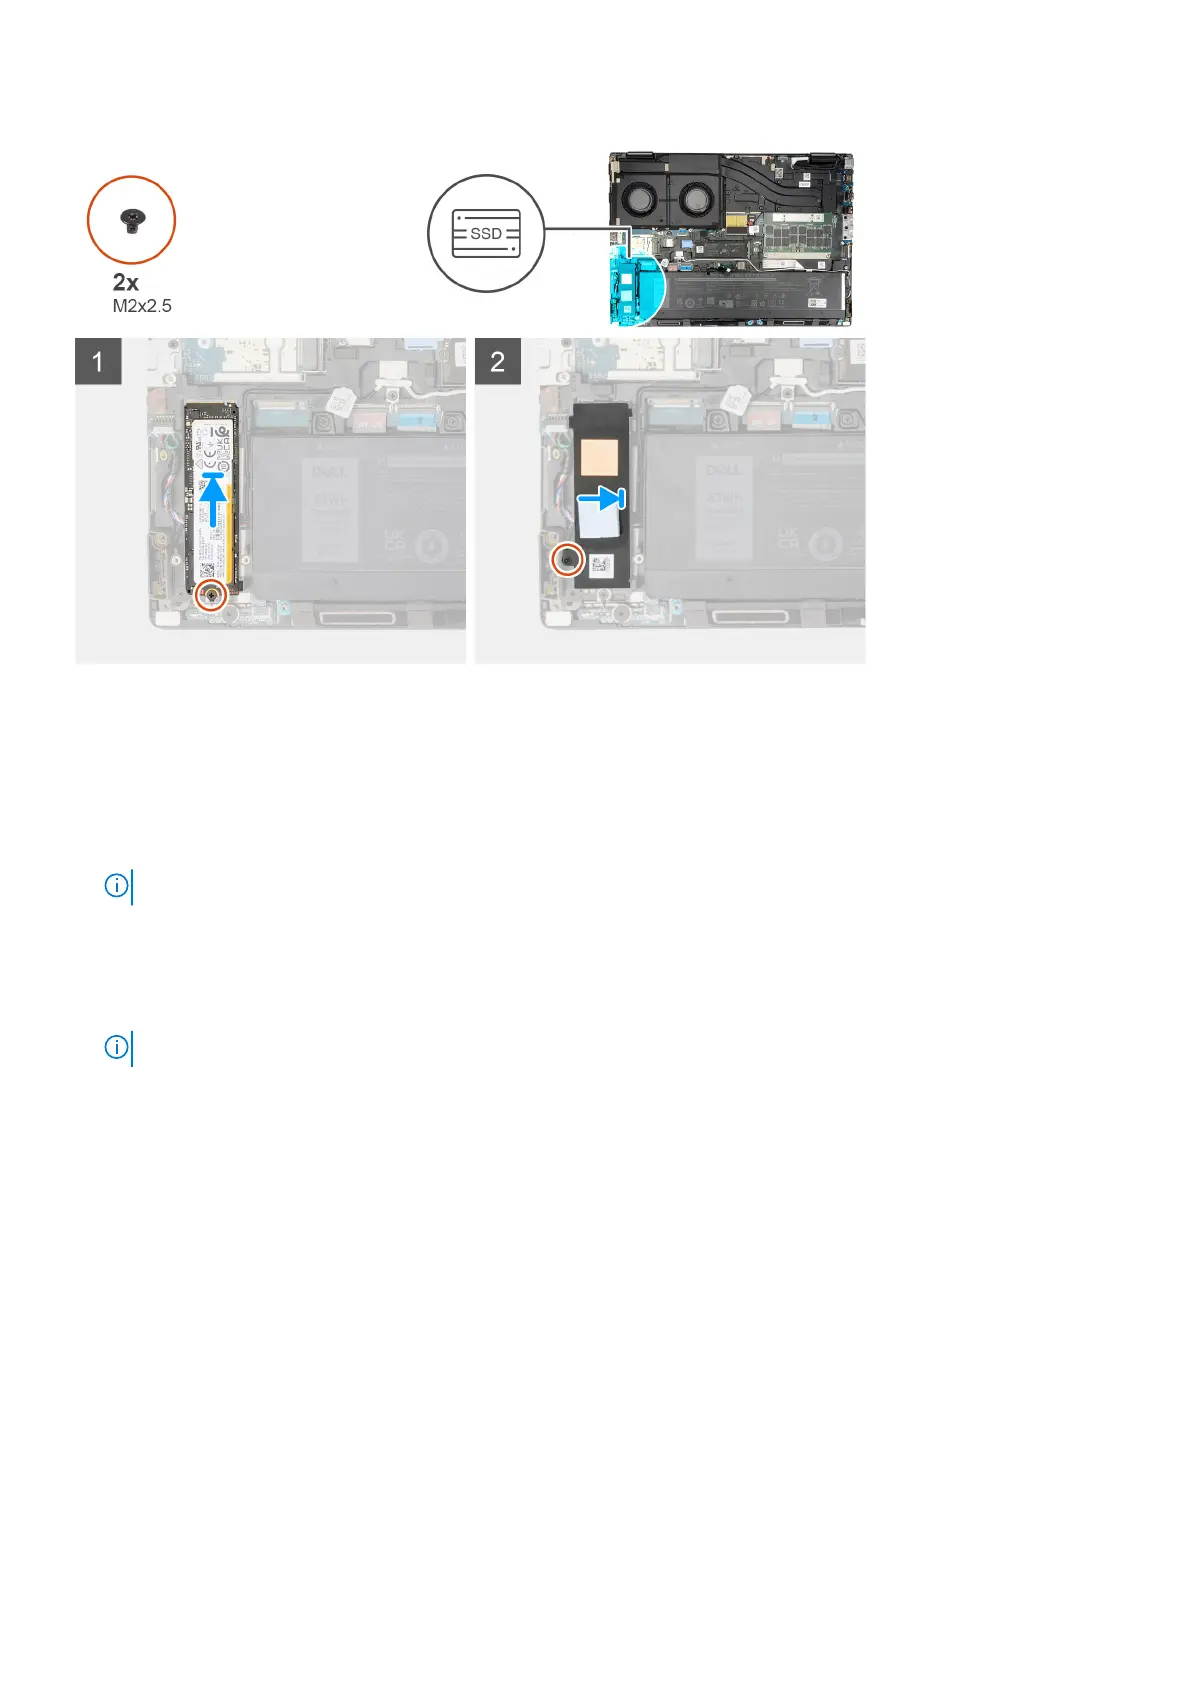
1. Place the M.2 2280 SSD onto its slot on the SSD carrier.
2. Replace the M.2 SSD module in its slot on the computer.
3. Replace the (M2x2.5) screw to secure the SSD module in place.
4. Align the tabs on the SSD thermal plate with the tab holes on the SSD carrier at an angle.
5. Place the SSD thermal plate above the M.2 SSD module.
NOTE: Carefully align the tab hole on the thermal plate near the screw hole with the tab on the SSD carrier.
6. Replace the (M2x2.5) screw to secure the SSD thermal plate to the M.2 SSD module.
Next steps
1. Install the base cover.
NOTE: Follow this procedure only if the computer is shipped without SSD door configuration).
2. Follow the procedure in after working inside your computer.
Heat sink
Removing the heat-sink for Integrated graphics
Prerequisites
1. Follow the procedure in before working inside your computer.
2. Remove the base cover.
About this task
The figure indicates the location of the heat-sink and provides a visual representation of the removal procedure.
Removing and installing components
41

 Loading...