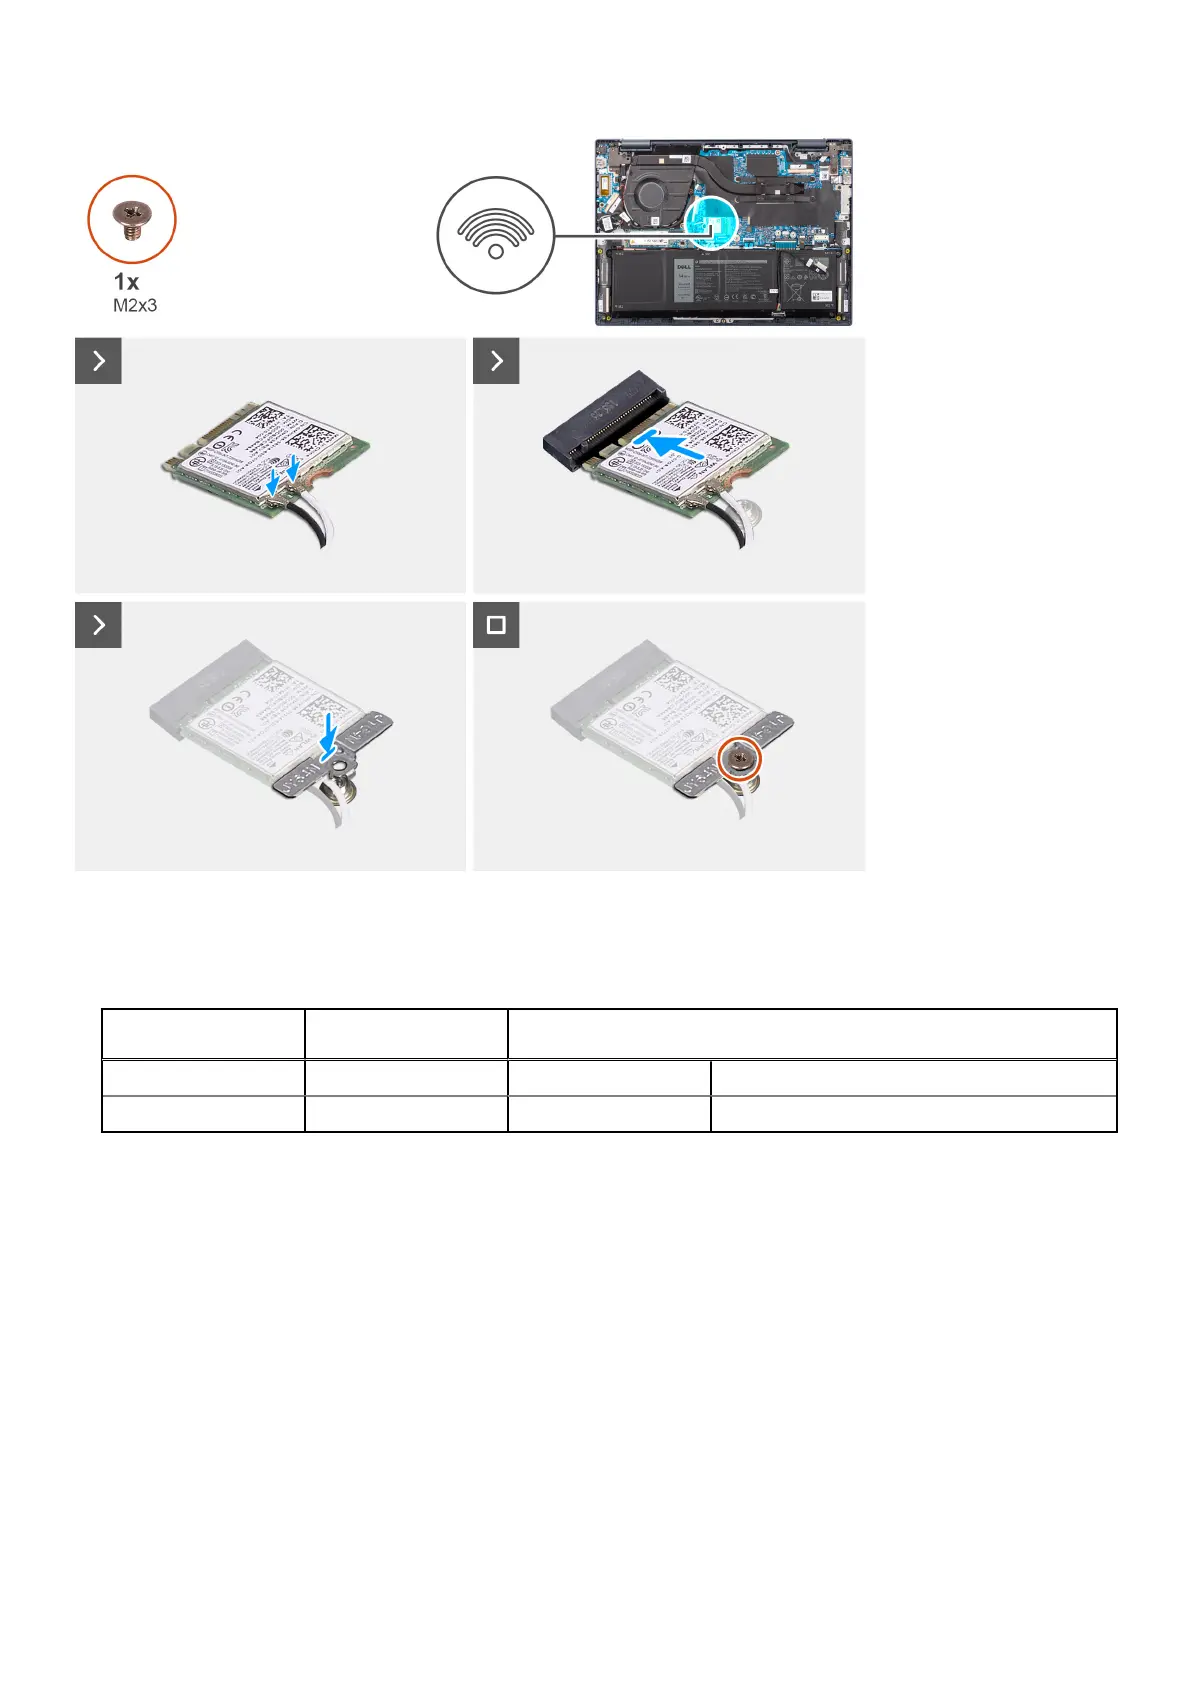
Steps
1. Connect the WLAN antenna cables to the connectors on the wireless card.
Table 26. Antenna-cable color scheme
Connectors on the
wireless card
Antenna-cable color Silkscreen marking
Main White MAIN △ (white triangle)
Auxiliary Black AUX ▲ (black triangle)
2. Align the notch on the wireless card to the tab on the wireless-card slot on the system board.
3. At an angle, slide the wireless card into the wireless-card slot on the system board.
4. Place the wireless-card bracket on the wireless card.
5. Align the screw hole on the wireless-card bracket to the screw hole on the system board.
6. Replace the screw (M2x3) to secure the wireless card and the wireless-card bracket to the system board.
Next steps
1. Install the base cover.
2. Follow the procedure in After working inside your computer.
46
Removing and installing Customer Replaceable Units (CRUs)