Steps
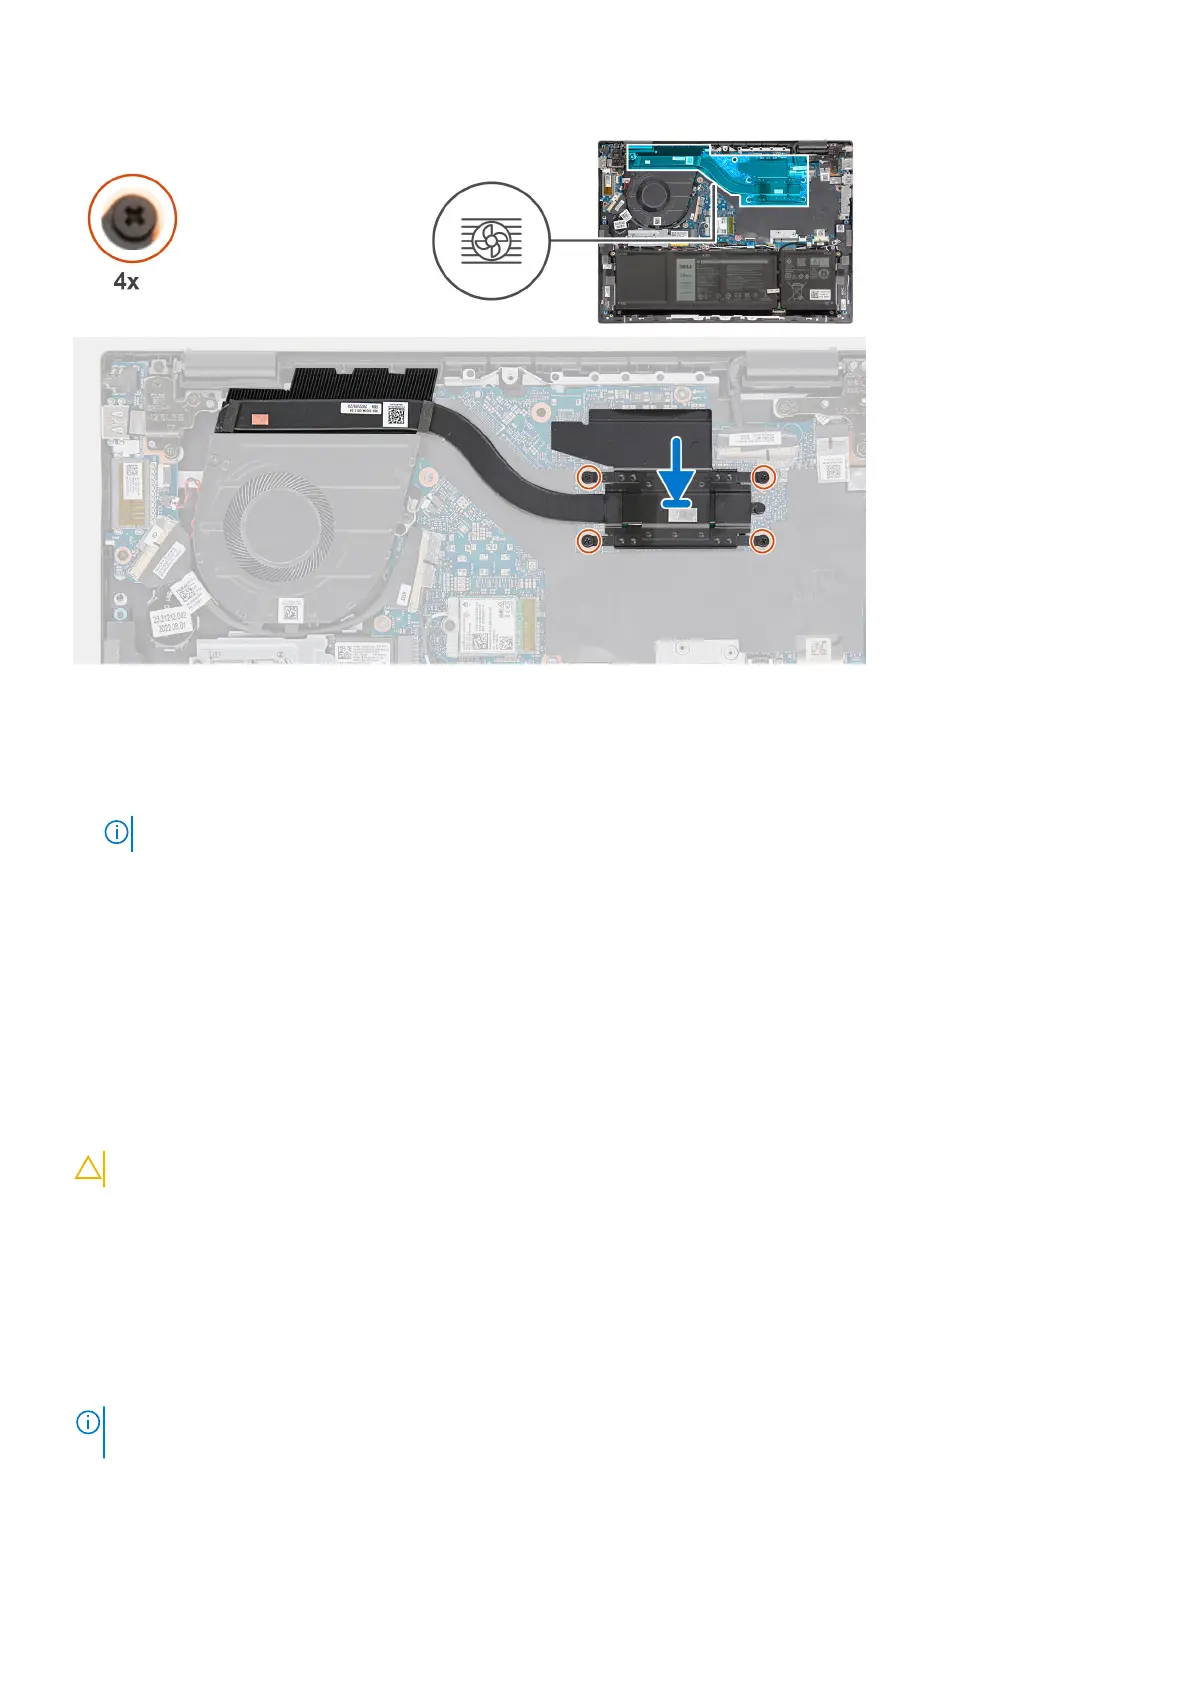
1. Place the heat sink on the system board.
2. Align the screw holes on the heat sink to the screw holes on the system board.
3. Tighten the four captive screws to secure the heat sink to the system board.
NOTE: Tighten the four captive screws in the sequential order mentioned on the heat sink [1 > 2 > 3 > 4].
Next steps
1. Install the base cover.
2. Follow the procedure in After working inside your computer.
Speakers
Removing the speakers
CAUTION: The information in this section is intended for authorized service technicians only.
Prerequisites
1. Follow the procedure in Before working inside your computer.
2. Remove the base cover.
3. Remove the wireless card.
4. Remove the 3-cell battery or the 4-cell battery, whichever applicable.
About this task
NOTE:
The wireless-card antennas are attached to the speakers as an assembly and cannot be separated for individual
replacement. Services will replace the speakers and the wireless antennas as an assembly part.
The following images indicate the location of the speakers and provide a visual representation of the removal procedure.
Removing and installing Field Replaceable Units (FRUs)
55