4. Follow the instructions from step 5 to step 21 in Replacing the System Board.
5. Replace the battery (see Replacing the Battery).
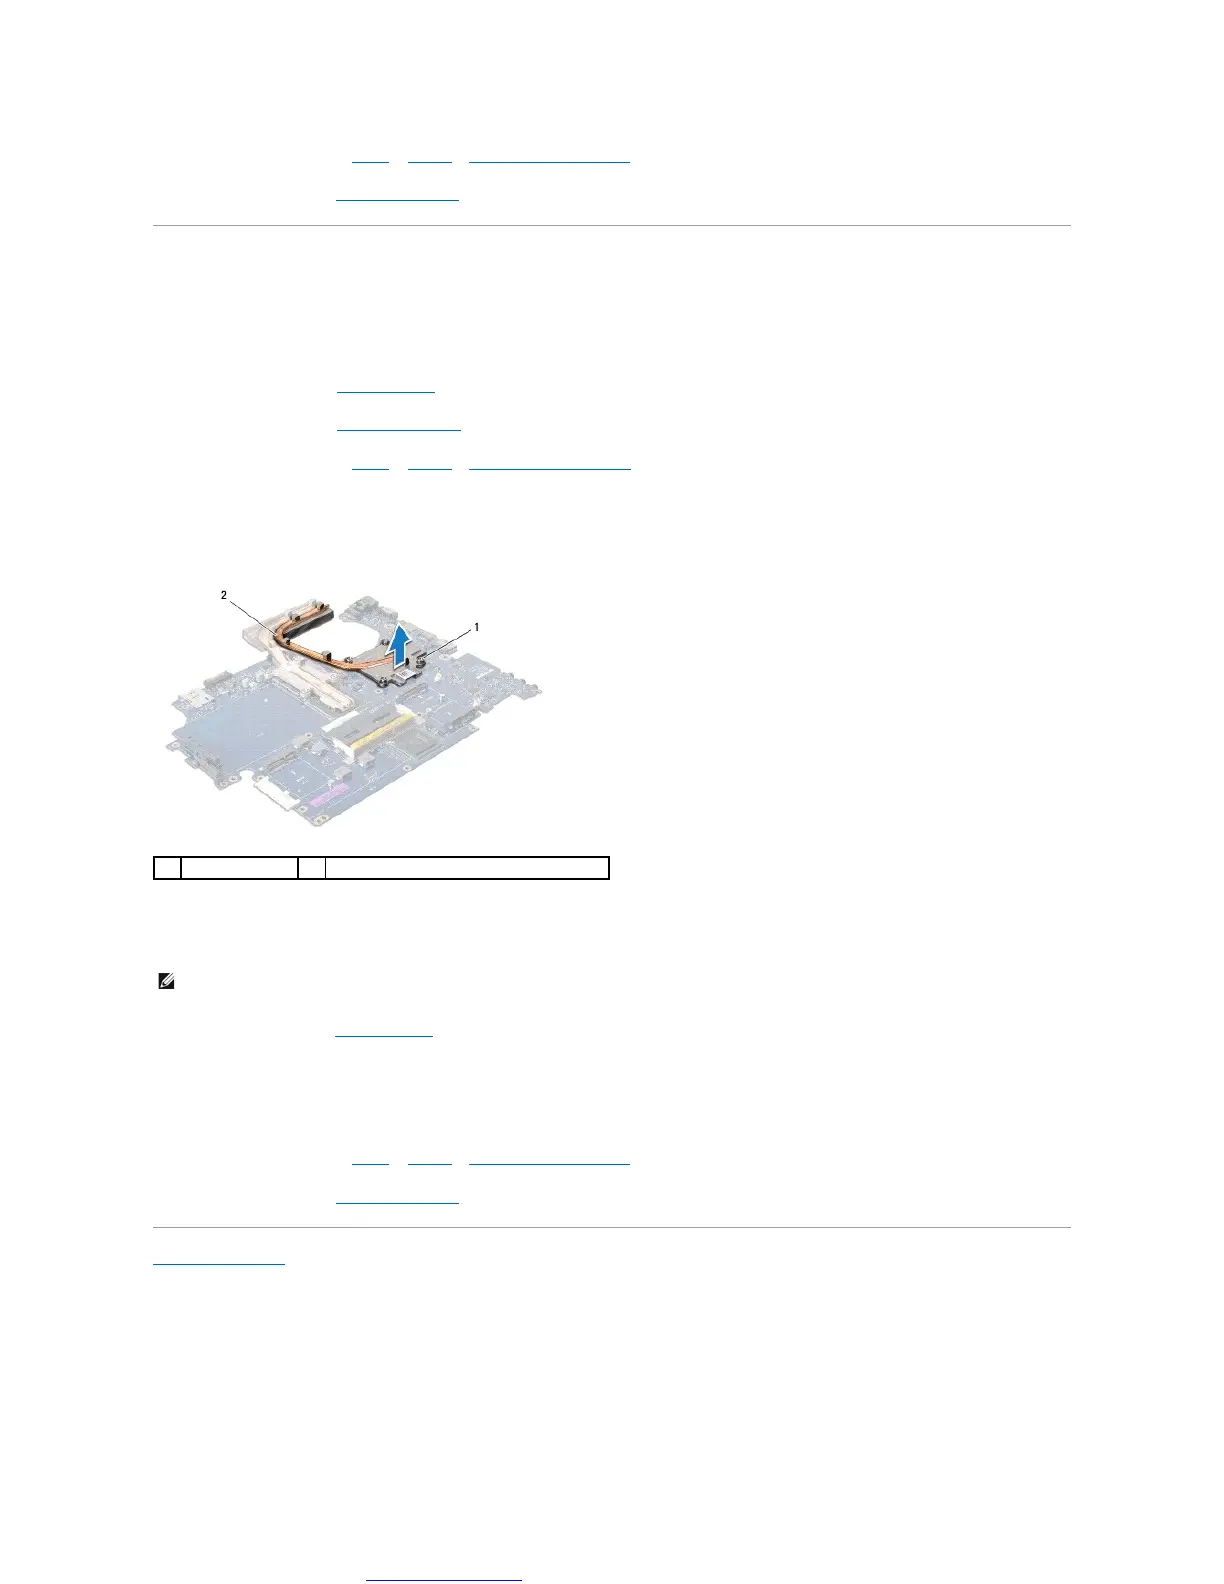
Graphic Processor Heat Sink
Removing the Graphic Processor Heat Sink
1. Follow the instructions in Before You Begin.
2. Remove the battery (see Removing the Battery).
3. Follow the instructions from step 2 to step 20 in Removing the System Board.
4. In sequential order (indicated on the processor heat sink), loosen the four captive screws that secure the processor heat sink to the system board.
5. Lift the graphic processor heat sink off the system board.
Replacing the Graphic Processor Heat Sink
1. Follow the procedures in Before You Begin.
2. Place the graphic processor heat sink on the system board.
3. Align the four captive screws on the graphic processor heat sink with the screw holes on the system board and tighten the screws in sequential order
(indicated on the processor heat sink).
4. Follow the instructions from step 5 to step 21 in Replacing the System Board.
5. Replace the battery (see Replacing the Battery).
Back to Contents Page