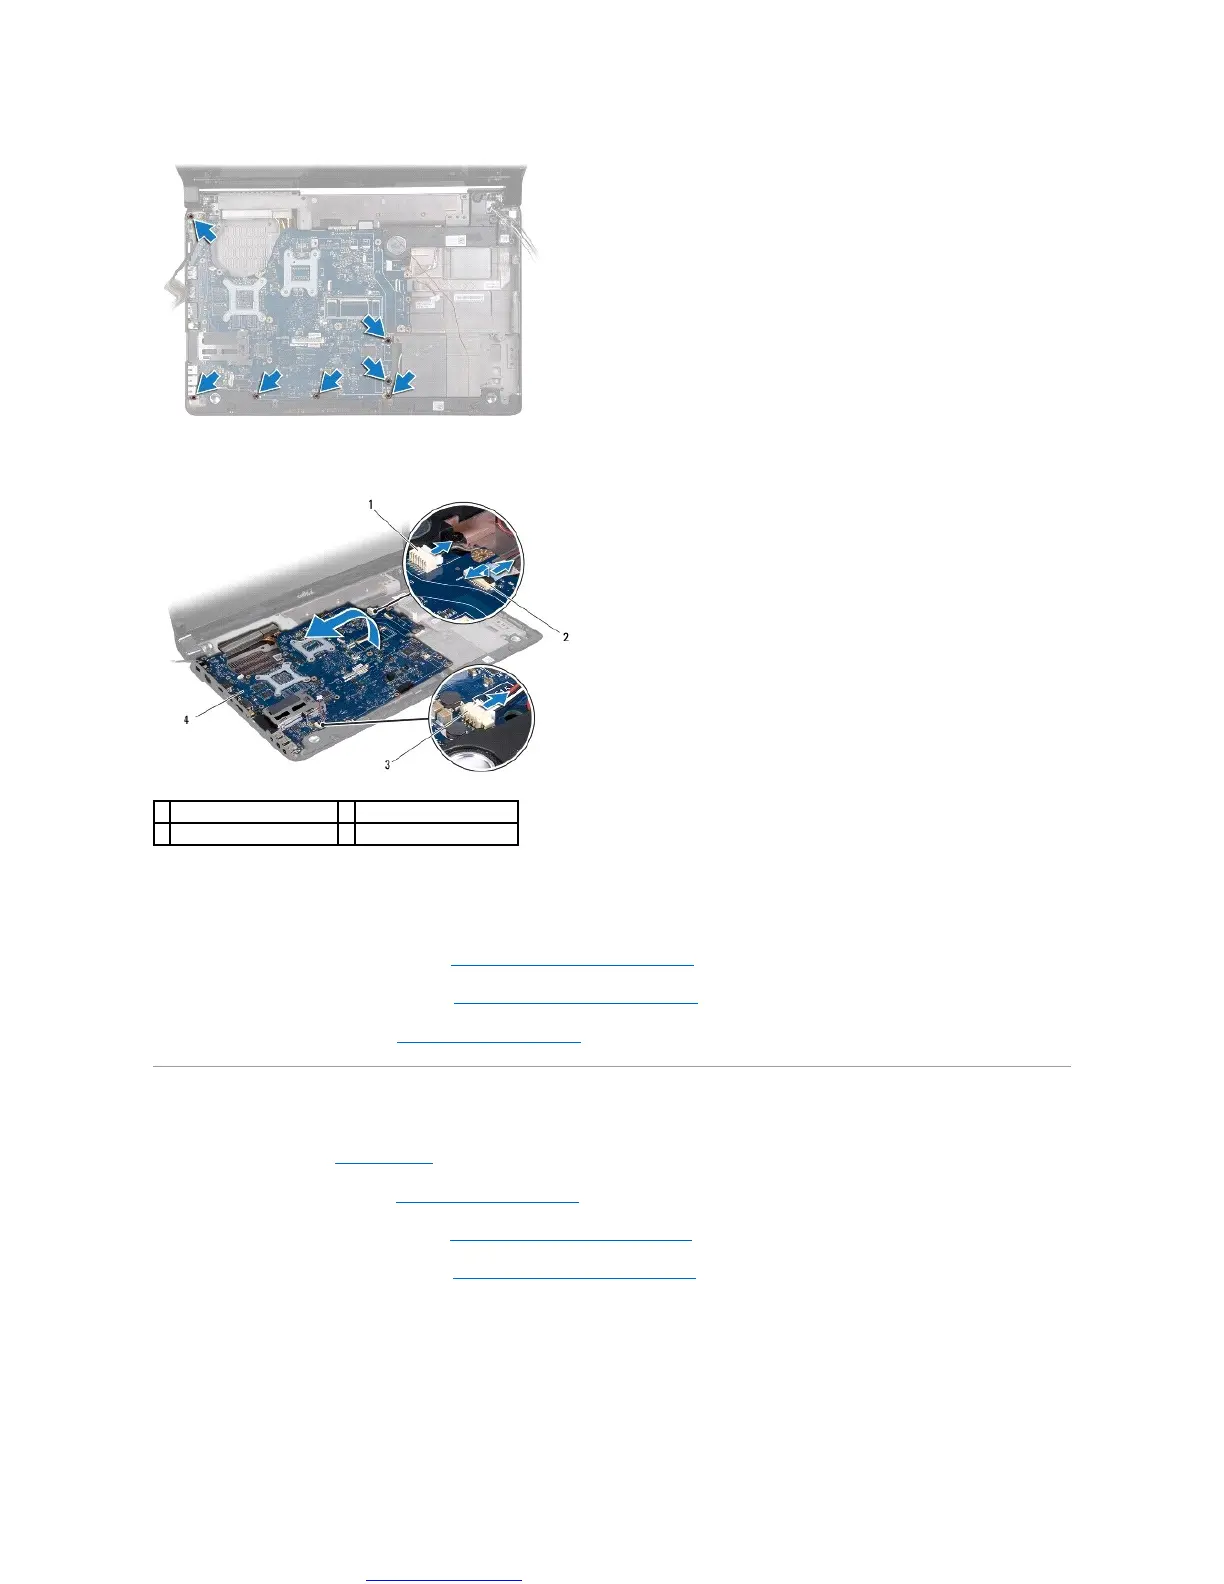
18. Disconnect the speaker cable, USB board cable, and the AC adapter cable from the connectors on the system board.
19. Lift the system board assembly at an angle toward the side of the computer and out of the computer base.
20. Turn the system board assembly over.
21. Remove the central processor heat sink (see Removing the Central Processor Heat Sink).
22. Remove the graphic processor heat sink (see Removing the Graphic Processor Heat Sink).
23. Remove the processor module (see Removing the Processor Module).
Replacing the System Board
1. Follow the procedures in Before You Begin.
2. Replace the processor module (see Replacing the Processor Module).
3. Replace the central processor heat sink (see Replacing the Central Processor Heat Sink).
4. Replace the graphic processor heat sink (see Replacing the Graphic Processor Heat Sink).
5. Turn the system board assembly over.
6. Place the system board assembly on the computer base.
7. Connect the speaker cable, USB board cable, and the AC adapter cable to the connectors on the system board.
8. Replace the seven screws that secure the system board assembly to the computer base.