Back to Contents Page
Replacing the I/O Panel
DellStudioXPS™435T/9000ServiceManual
1. Follow the procedures in Before You Begin.
2. Remove the computer cover (see Replacing the Computer Cover).
3. Remove the front panel (see Replacing the Front Panel).
4. Remove the top cover (see Replacing the Top Cover).
5. Disconnect the cables connected to the I/O panel from the system board.
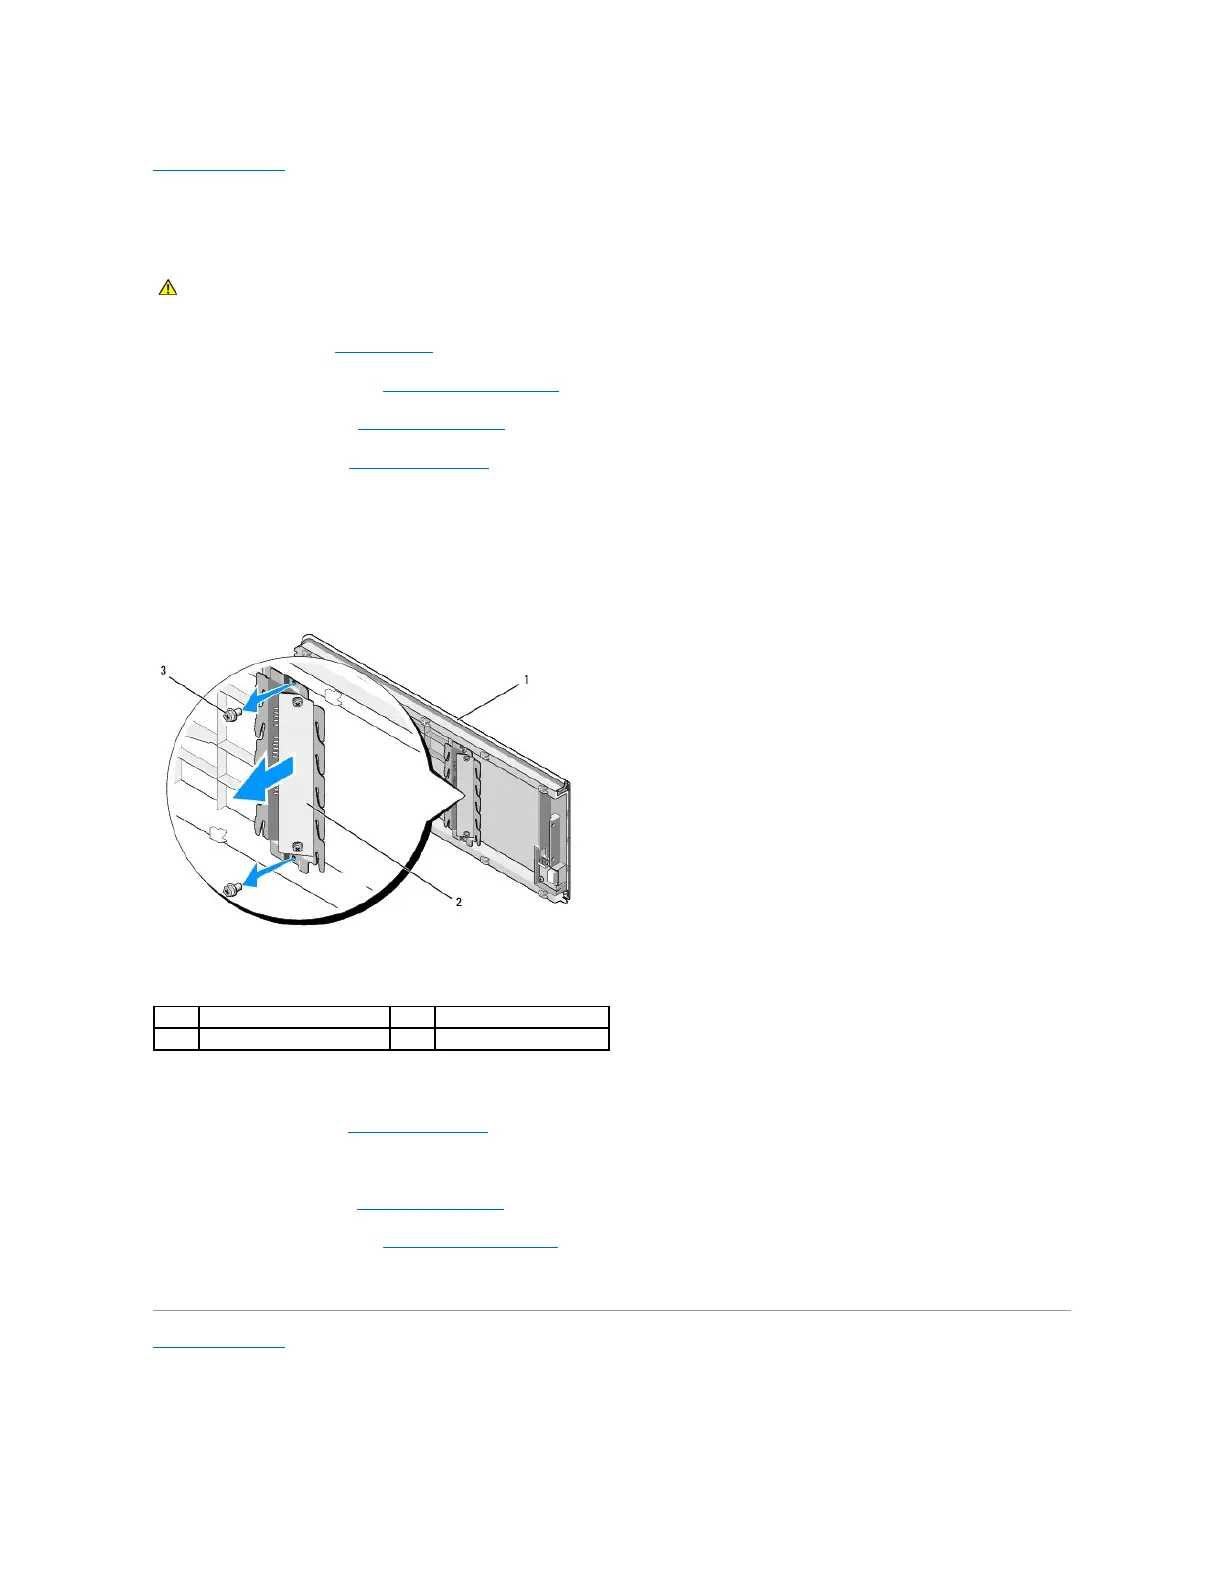
6. Remove the two screws that secure the I/O panel to the top cover.
7. Carefully remove the I/O panel from the computer.
8. To replace the I/O panel, replace the screws that secures the I/O panel to the top cover.
9. Replace the top cover (see Replacing the Top Cover).
10. Replace the cables.
11. Replace the front panel (see Replacing the Front Panel).
12. Replace the computer cover (see Replacing the Computer Cover).
13. Connect your computer and devices to electrical outlets, and turn them on.
Back to Contents Page
WARNING: Before working inside your computer, read the safety information that shipped with your computer. For additional safety best
practices information, see the Regulatory Compliance Homepage at www.dell.com/regulatory_compliance.

 Loading...