Steps
1. Align the screw holes on the system board with the screw holes on the display-assembly base.
2. Replace the nine screws (M3x5) to secure the system board to the display-assembly base.
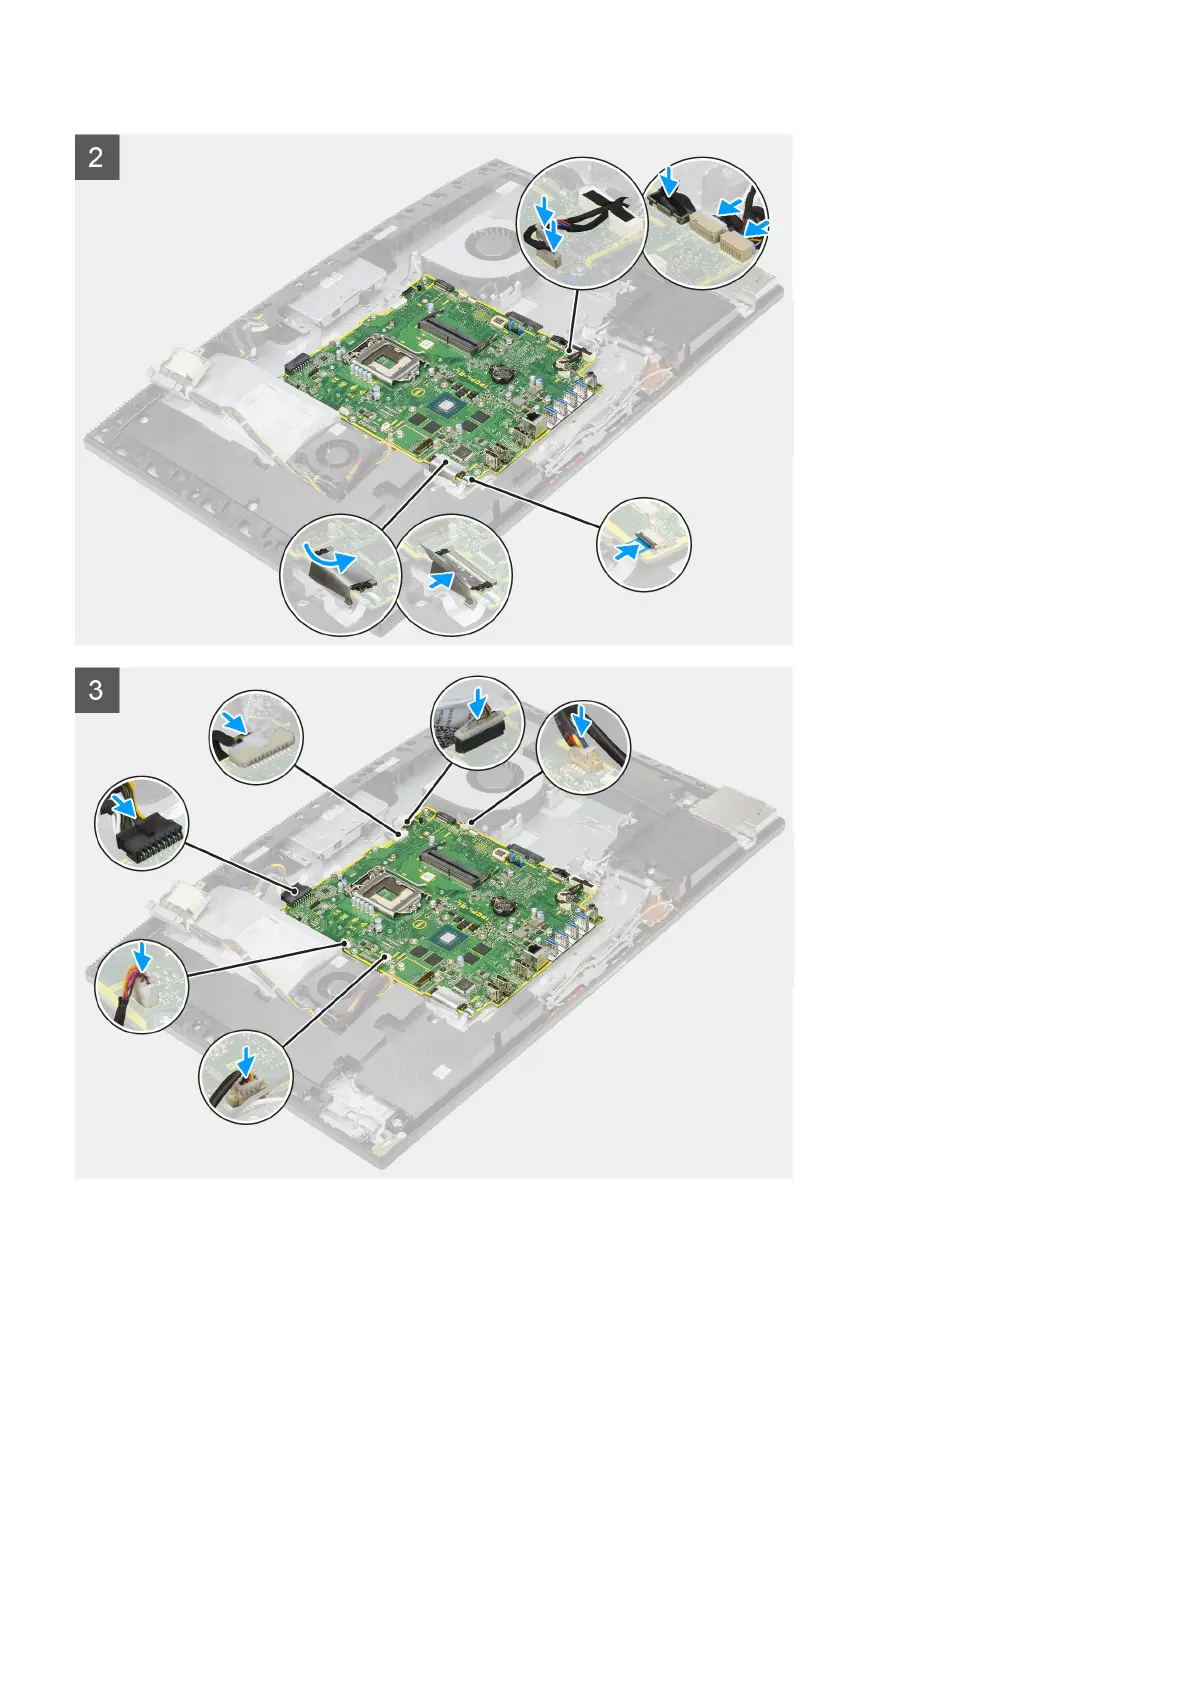
3. Connect the camera cable to the connector system board.
4. Connect the touchscreen cable to the system board.
5. Connect the system fan cable to the system board.
6. Connect the audio-board cable to the system board.
7. Connect the SIO-power cable to the system board.
8. Connect the SIO-signal cable to the system board.
9. Connect the microphone-module cable to the system board.
10. Connect the speaker cable to the system board.
11. Connect the power-button board cable to the system board and close the latch to secure the cable.
64
Removing and installing components