43
5/16"5/16"
3
1/8"1/8"
2
1
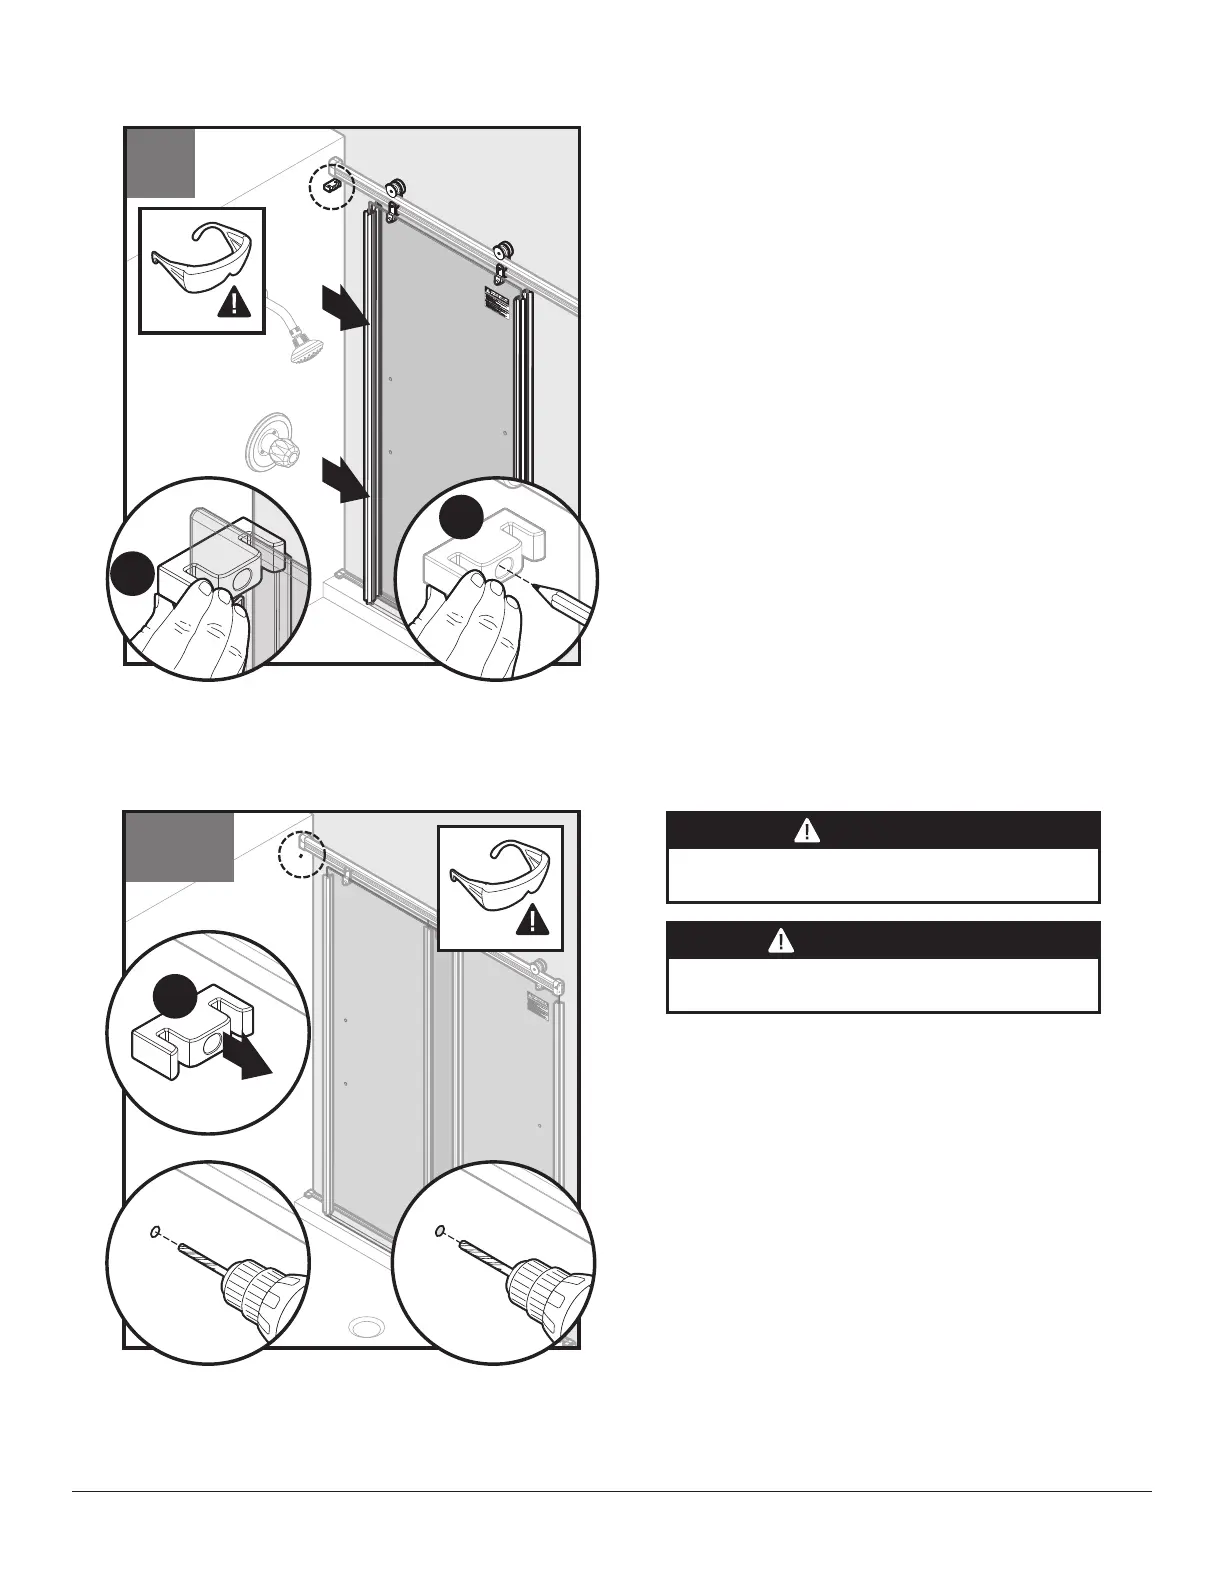
60a
Z1
While holding grab bumper (Z1) in place against the side
wall, disengage inner and outer door panels.
Mark center of the grab bumper hole (Z1) with a pencil.
For acrylic enclosures, proceed to steps 60a-61a.
For tile enclosures, proceed to steps 60b-61b.
Mientras se sostiene el asidero (Z1) en posición correcta
contra la pared lateral, desenganche los paneles interior y
exterior de la puerta.
Marque el centro del orificio del asidero (Z1) con un lápiz.
Para recintos acrílicos, prosiga con los pasos 60a-61a.
Para recintos de baldosas, prosiga con los pasos
60b-61b.
2
2
1
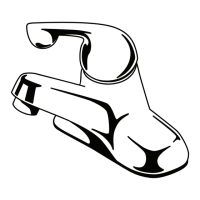
59
Z1
Z1
CAUTION
PRECAUCIÓN
CAUTION
PRECAUCIÓN
CAUTION
To avoid risk of injury or product damage, make sure that
you drill into studs.
PRECAUCIÓN
Para evitar el riesgo de lesiones o daños al producto,
asegúrese de perforar en los montantes.
CAUTION
Wear safety glasses and gloves when drilling or cutting
to avoid risk of injury.
PRECAUCIÓN
Use gafas de seguridad y guantes cuando perfore o corte
para evitar lesiones.
Use cut-resistant gloves with appropriate grip to avoid
risk of injury from sharp edges or corners.
Use guantes resistentes a los cortes con el agarre
apropiado para evitar el riesgo de lesiones por los bordes
y esquinas afiladas.
To avoid risk of injury or product damage, DO NOT remove
corner protectors on the glass panel(s) until the panels are
installed.
Para evitar el riesgo de lesiones o danos al producto NO quite
los protectores de las esquinas en el panel o paneles de vidrio
hasta que estos esten instalados.
After removing grab bumper (Z1) from the wall, drill a 1/8"
pilot hole at location marked in the previous step.
Next, redrill a 5/16" hole at each location.
Después de quitar el asidero (Z1) de la pared, perfore un
orificio guía de 1/8” en la ubicación marcada en el paso
anterior.
A continuación, vuelva a perforar un orificio de 5/16” en
cada ubicación.