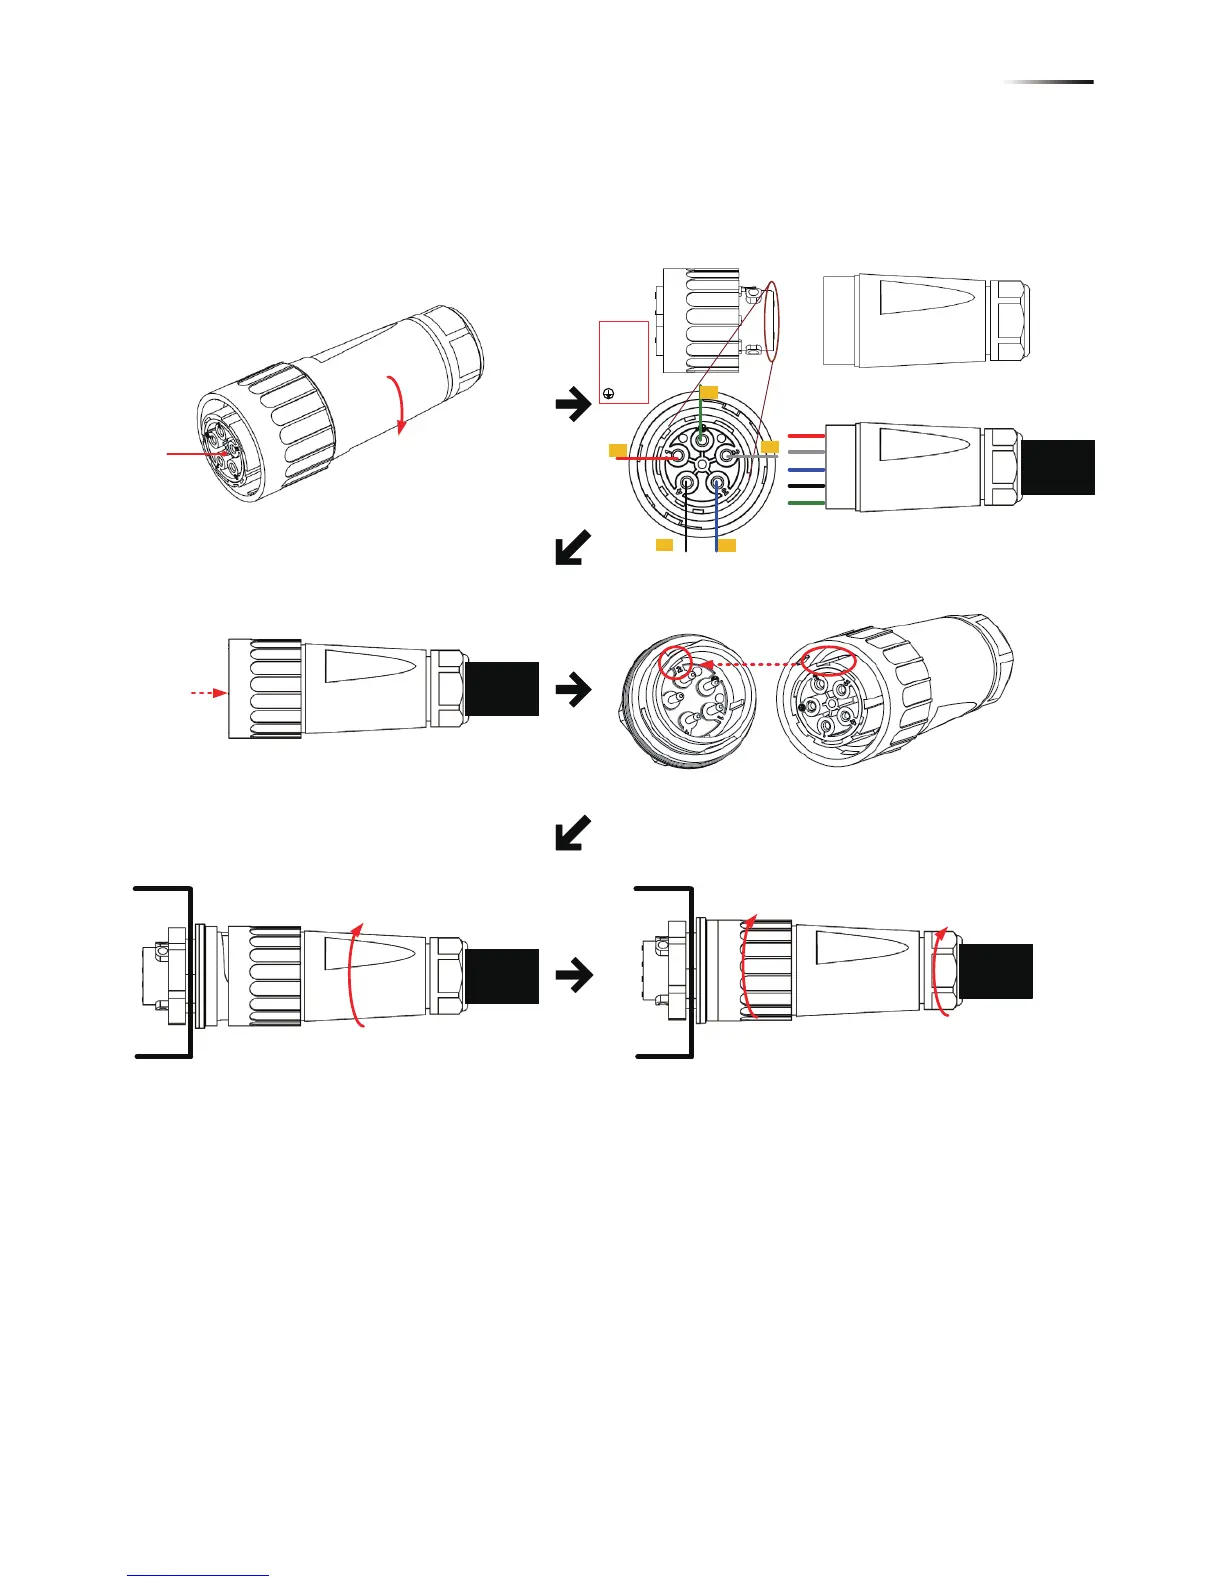
RPI M6A/ M8A/ M10A use Amphenol AC connector with part number
C016 20E004 800 2. Assemble the AC plug and wires as the procedures shown
in Figure 4-4. The sequence of L1~ L3 can be random. However, N and PE must
be connected correctly.
After wiring, installer should choose the AC connection type on the control panel.
About setting, please refer to 5.3.6 Install Settings.
The AC voltage should be as followings:
3P3W 3P4W
L1-L2: 400 Vac
±
10% L1-N: 230 Vac
±
10%
L1-L3: 400 Vac
±
10% L2-N: 230 Vac
±
10%
L2-L3: 400 Vac
±
10% L3-N: 230 Vac
±
10%
L1
L2
N
PE
L3
Inverter
Fix it
Rotate to loose the AC plug
Inverter
Rotate to tighten the inserter
Rotate to tighten the plug
Rotate gland to
fix cable
Cable
AC Plug
AC plug
1 : L1
2 : L2
3 : L3
4 : N
: PE
Cable
Cable
Cable
L1
L2
L3
N
PE
Socket
Align the biggest latch of the AC plug and the socket
Figure 4-4 AC plug illustration for RPI M6A/ M8A/ M10A.
17
Wiring
 Loading...