EasyManua.ls Logo

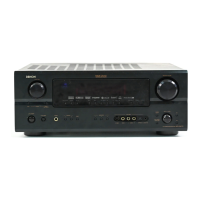
Denon AVR-2310CI User Manual

Denon AVR-2310CI
78 pages
To Next Page IconTo Next Page
Page #1 background imageLoading...
Page #1 background image
bThe illustrations used for explaining operations in this manual show the buttons of
the main remote control unit.
The same operations can be performed using the buttons with the same names on
the main unit panel.
b Les illustrations des boutons présentes dans ce manuel servent à expliquer le
fonctionnement de la télécommande principale.
Vous pouvez contrôler l’appareil à l’aide du bouton portant le même nom sur la
façade de l’appareil.
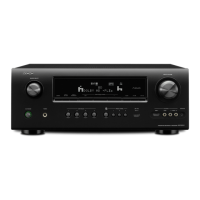
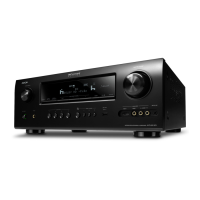
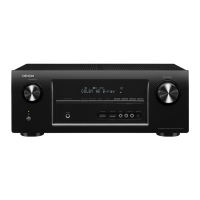
AV SURROUND RECEIVER
AVR-2310CI
Owner’s Manual
Manuel de l’Utilisateur
GraphicalUserInterface
English
Use this manual in combination with the
operating guide displayed on the GUI screen.
Menu Map (vpage 21)
Examples of GUI Menu Screen Displays (vpage 22)
Remote Control Unit Operations (vpage 57)
Français
Utilisez ce manuel en même temps que le guide
d’utilisation affiché sur l’écran GUI (Interface
graphique).
Plan du menu (vpage 21)
Exemples d’affichage sur écran et d’affichage avant
(vpage 22)
Fonctionnement de la télécommande (vpage 57)
Table of Contents

Questions and Answers:

Denon AVR-2310CI Specifications

General IconGeneral
BrandDenon
ModelAVR-2310CI
CategoryReceiver
LanguageEnglish

Summary

SAFETY PRECAUTIONS

CAUTION: RISK OF ELECTRIC SHOCK DO NOT OPEN

Warning against opening the unit to prevent electric shock.

CAUTION: REDUCE RISK OF ELECTRIC SHOCK

Warning about electrical shock and the need for qualified service personnel.

WARNING: EXPOSURE TO RAIN OR MOISTURE

Warning against exposure to rain or moisture.

Power Disconnection Instructions

Instructions for completely disconnecting the product from mains power.

Connections

Installing/Setting the Speakers

Guides on setting up and connecting speakers to the receiver.

Settings

Audyssey Auto Setup

Automates speaker setup and room calibration for optimal audio.

Cautions on Handling

Remote Control Unit

Sub Remote Control Unit (RC-1119)

Video Signal Conversion

Installing/Setting the Speakers

Determine the Speaker Layout

Introduces examples of speaker layouts for various channel configurations.

Installing All the Speakers

Illustrates the physical placement of speakers for setup.

Connecting the Speakers

Set the "Amp Assign" Mode According to the Speaker Layout

Explains how to assign amplifier channels based on speaker configuration.

Connecting the Speaker Cables

Connecting Devices Equipped with HDMI terminals

Connecting Devices not Equipped with HDMI terminals

Playback Components

Recording Components

SIRIUS Connector

External Controller

Once Connections are Completed

Selecting the Input Source

Methods for selecting the desired input source for playback.

Audyssey Auto Setup

Audyssey Auto Setup Flow

Step-by-step guide for performing the automatic speaker setup.

Important Information

Key notes and recommendations for the Audyssey Auto Setup procedure.

When using Front Height Speakers

Specific setup advice when using front height speakers.

Audyssey Auto Setup Preparations

STEP1 Preparation

Initial setup steps before starting Audyssey Auto Setup.

Changing the amplifier assignment (Amp Assign)

How to assign amplifier channels for surround modes.

Set the channel to be measured (Channel Select)

How to select which channels to measure during setup.

Perform Audyssey Auto Setup

STEP2 Speaker Detection

The process of detecting connected speakers.

STEP3 Measurement

The measurement phase of the Audyssey Auto Setup.

STEP4 Calculation

The analysis and calculation phase after measurements.

STEP5 Check

STEP6 Store

Exiting the GUI Menu

Error Messages

Check Audyssey Auto Setup Measurement Results (Parameter Check)

Reviewing detailed measurement results and speaker configuration.

To perform the Audyssey Auto Setup procedure again

How to restart the setup if errors occurred.

Making detailed settings (Manual Setup)

Making the speaker settings (Speaker Setup)

Manually configure speaker parameters like size and levels.

Making the HDMI settings (HDMI Setup)

Configure HDMI output and control settings.

Making the speaker settings (Speaker Setup)

Setting items

Details on setting Amp Assign, Speaker Config, Bass Setting, etc.

Distance

Sets speaker distance from the listening position.

Channel Level

Crossover Frequency

Front Speaker Setup

Making the HDMI settings (HDMI Setup)

Making the audio settings (Audio Setup)

Making the ZONE2 settings (ZONE2 Setup)

Making the Input Settings (Input Setup)

Changing the Input Sources Assigned to the Input Terminals (Input Assign)

Assigns input sources to specific input terminals.

Making the video settings (Video)

Configures video output settings for different sources.

Changing the Input Source's Input Mode and Decoding mode (Input mode)

Sets audio input modes and decoding for sources.

Making the video settings (Video)

Changing the Input Source's Input Mode and Decoding mode (Input Mode)

Input Mode

Sets audio input modes for different input sources.

Decode Mode

Sets the input source's decoding mode for digital signals.

Changing the Input Source's Display Name (Rename)

Correcting the Input Source's Playback Level (Source Level)

Setting the iPod Playback Mode (iPod Playback Mode)

Presetting Radio Stations (Auto Preset)

Setting Radio Reception Restrictions (Parental Lock)

Check the SIRIUS Radio Reception Sensitivity (Antenna Aiming)

Playing Blu-ray Disc / DVD Players

iPod® Playback

Selecting the Surround Mode

Adjusting the Sound and Picture Quality (Audio/Video Adjust)

Adjusting the Sound (Audio Adjust)

Fine-tunes sound parameters like mode, Cinema EQ, and dynamic range.

Stereo Playback

Playing the Pure Direct Mode

Surround playback of multichannel sources (Dolby Digital, DTS, etc.)

Playing in a DENON Original Surround Mode

Direct Playback

Adjusting the Sound (Audio Adjust)

Audyssey Settings (MultEQ, Dynamic EQ, Dynamic Volume)

MultEQ

Optimizes frequency response of speakers based on room acoustics.

Dynamic EQ

Adjusts sound quality based on volume level and room acoustics.

Dynamic Volume

Solves volume variations between programs and passages.

Adjust Tonal Quality for Each Speaker Using Graphic Equalizer (Manual EQ)

Allows manual EQ adjustment for individual speakers.

Restoring Compressed Audio (RESTORER)

Adjusting the Audio Delay Time (Audio Delay)

Adjusting the Picture Quality (Picture Adjust)

Adjust the Volume of the Different Speakers

Saving Frequently Used Settings (Quick Select Function)

Playing 2-Channel Sound in ZONE2 (Multizone Function)

Operating the Connected Devices by Remote Control Unit

Main Remote Control Unit (RC-1117)

Dolby Digital

Dolby Digital Plus

Dolby TrueHD

Dolby Pro Logic II

Dolby Pro Logic IIx

Dolby Digital EX

Dolby Pro Logic IIz

Surround

DTS-EST™ Discrete 6.1

DTS NEO:6TM Surround

DTS 96/24

Audyssey

Audyssey MultEQ®

Room equalization solution for optimal audio system performance.

Audyssey Dynamic EQ ™™

Adjusts sound quality based on volume level and room acoustics.

Audyssey Dynamic Volume™™

Troubleshooting

General

Troubleshooting for general unit operation issues.

Symptom: Power switches off suddenly

Addresses power shutoff due to internal temperature rise or impedance issues.

Symptom: No sound is produced

Troubleshooting for issues related to no sound output from speakers.

Symptom: No sound is produced from center speaker

Symptom: No sound is produced from surround speakers

Symptom: HDMI audio signals are not output from speakers

Symptom: No picture appears with HDMI connections

Restoring Settings to Factory Defaults

Specifications

Power amplifier

Restoring All the Settings to as They were at the Time of Purchase (Resetting the Microprocessor)

List of preset codes

Related product manuals