13
ENGLISH
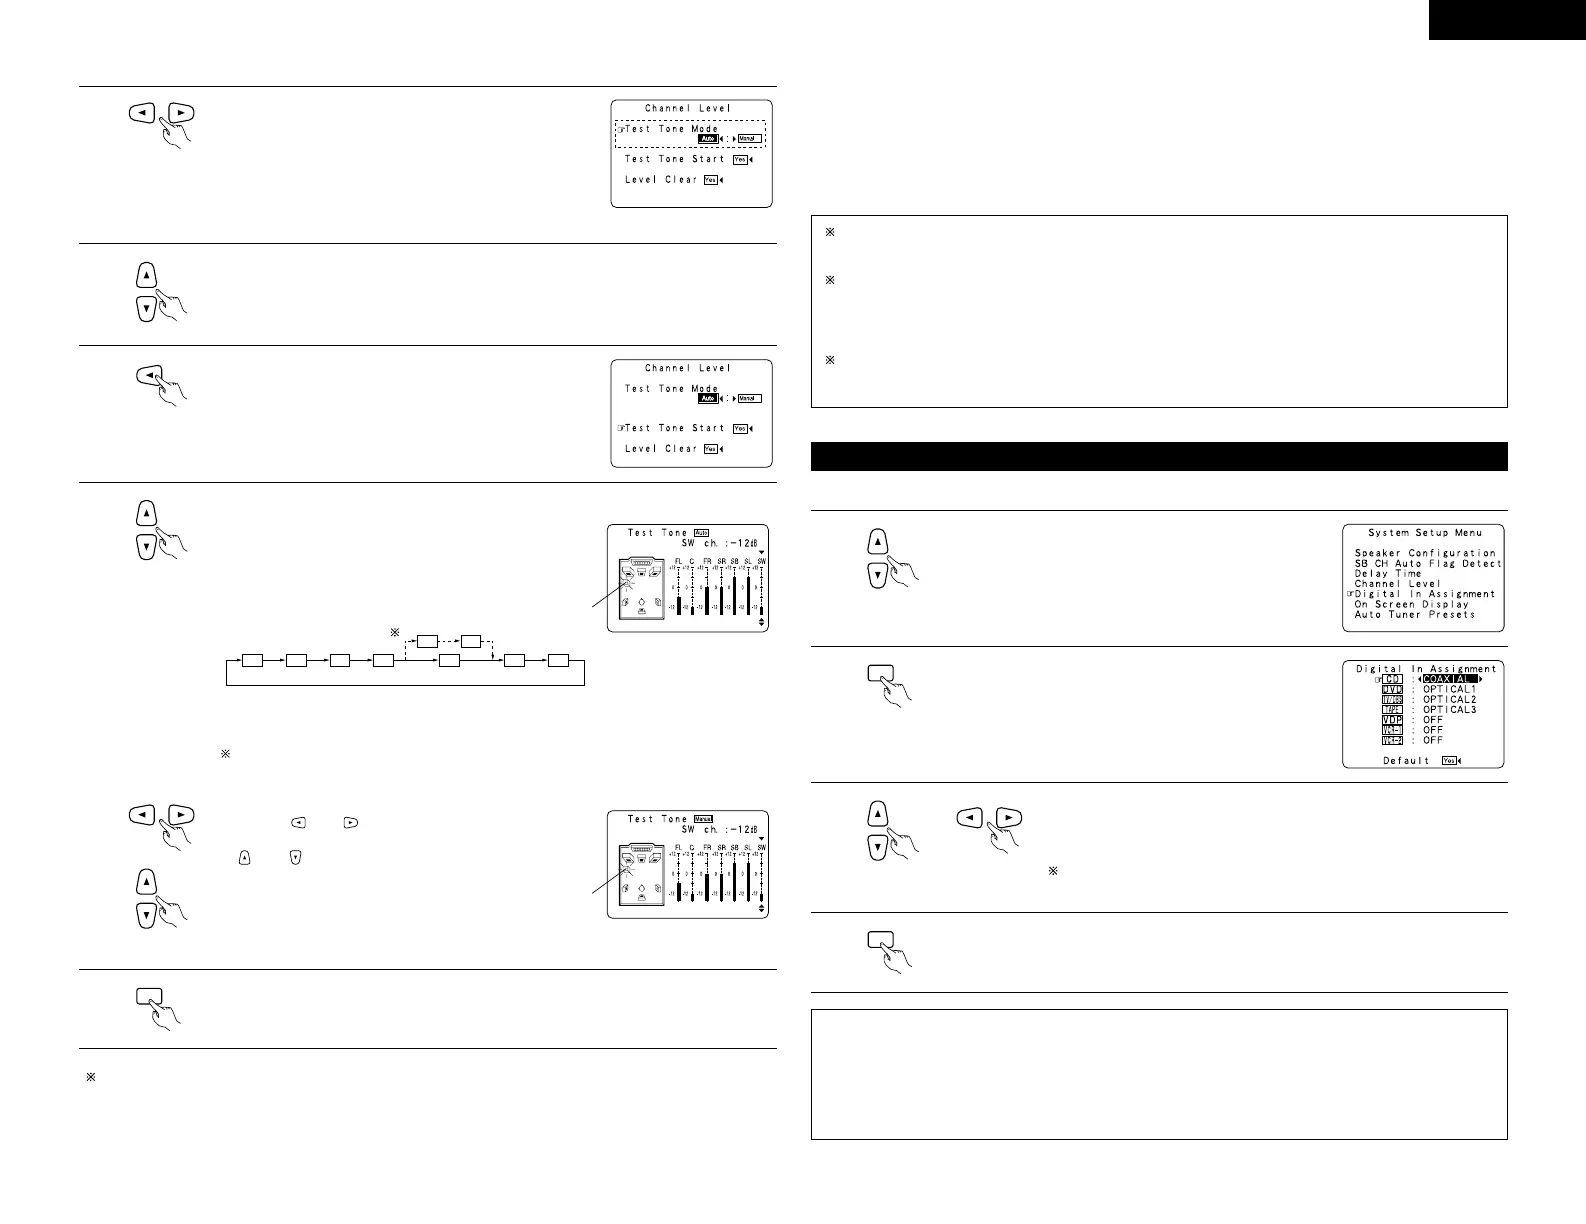
Example: When the “Auto” mode is selected
4
Select the mode.
Select “Auto” or “Manual”.
• Auto:
Adjust the level while listening to the test tones produced
automatically from the different speakers.
• Manual:
Select the speaker from which you want to produce the
test tone to adjust the level.
5
Select “Test Tone Start”.
Use the CURSOR buttons to adjust all the speakers to the same volume.
The volume can be adjusted between –12 dB and +12 dB in units of 1 dB.
When the surround back speaker setting is set to “2spkrs” for “Speaker
Configuration”, this is set to “SBR”, “SBL”.
Example: When the volume is set to
–12 dB while the test tone
is being produced from the
subwoofer
6
Select “Ye s”.
7
a. If the “Auto” mode is selected:
Test tones are automatically emitted from the different
speakers.
The test tones are emitted from the different speakers in
the following order, at 4-second intervals the first time and
second time around, 2-second intervals the third time
around and on:
Flashing
Example: When the volume is set to
–12 dB while the
subwoofer is selected
b. When the “Manual” mode is selected
Use the and cursor buttons to select the speaker
for which you want to output test tones, then use the
and cursor buttons to adjust so that the volume of
the test tones from the various speakers is the same.
Flashing
8
After the above settings are completed, press the ENTER button.
The “Channel Level” screen reappears.
Press the ENTER button again, the “System Setup Menu” screen reappears.
To cancel the settings, select “Level Clear” and “Yes ” on the “Channel Level” screen, then make the
settings again.
The level of each channel should be adjusted to 75 dB (C-weighted, slow meter mode) on a sound level meter
at the listening position.
If a sound level meter is not available adjust the channels by ear so the sound levels are the same. Because
adjusting the subwoofer level test tone by ear is difficult, use a well known music selection and adjust for natural
balance.
NOTE: When adjusting the level of an active subwoofer system, you may also need to adjust the subwoofer’s
own volume control.
When you adjust the channel levels while in the SYSTEM SETUP CHANNEL LEVEL mode, the channel
level adjustments made will affect ALL surround modes. Consider this mode a Master Channel Level
adjustment mode.
After you have completed the SYSTEM SETUP CHANNEL LEVEL adjustments, you can then activate the
individual surround modes and adjust channel levels that will be remembered for each of those modes.
Then, whenever you activate a particular surround sound mode, your preferred channel level adjustments
for just that mode will be recalled. Check the instructions for adjusting channel levels within each
surround mode on page 24.
You can adjust the channel levels for each of the following surround modes: DIRECT, STEREO, 5/6 CH
STEREO, DOLBY/DTS SURROUND, ROCK ARENA, JAZZ CLUB, VIDEO GAME, MONO MOVIE, and
MATRIX.
• This setting assigns the digital input jacks of the AVR-2802 for the different input sources.
Setting the Digital In Assignment
1
At the System Setup Menu select “Digital In Assignment”.
2
Switch to the Digital In Assignment screen.
3
Select the digital input jack to be assigned to the input source.
• To select the input source
• To select the digital input jack
Select “OFF” for input sources for which no digital input jacks are used.
If “Yes” is selected for “Default”, the settings are automatically reset
to the default values.
4
Enter the setting.
The System Setup Menu reappears.
NOTES:
• The OPTICAL 3 jacks on the AVR-2802’s rear panel are equipped with an optical digital output jack for
recording digital signals on a CD recorder, MD recorder or other digital recorder. Use this for digital recording
between a digital audio source (stereo - 2 channel) and a digital audio recorder.
• Do not connect the output of the component connected to the OPTICAL 3 OUT jack on the AVR-2802’s rear
panel to any jack other than the OPTICAL 3 IN jack.
•“PHONO” and “TUNER” cannot be selected on the Digital In Assignment screen.
 Loading...