8
Preparations Connection MIDI Control
Playback
Troubleshooting Specifications Index
Others Settings
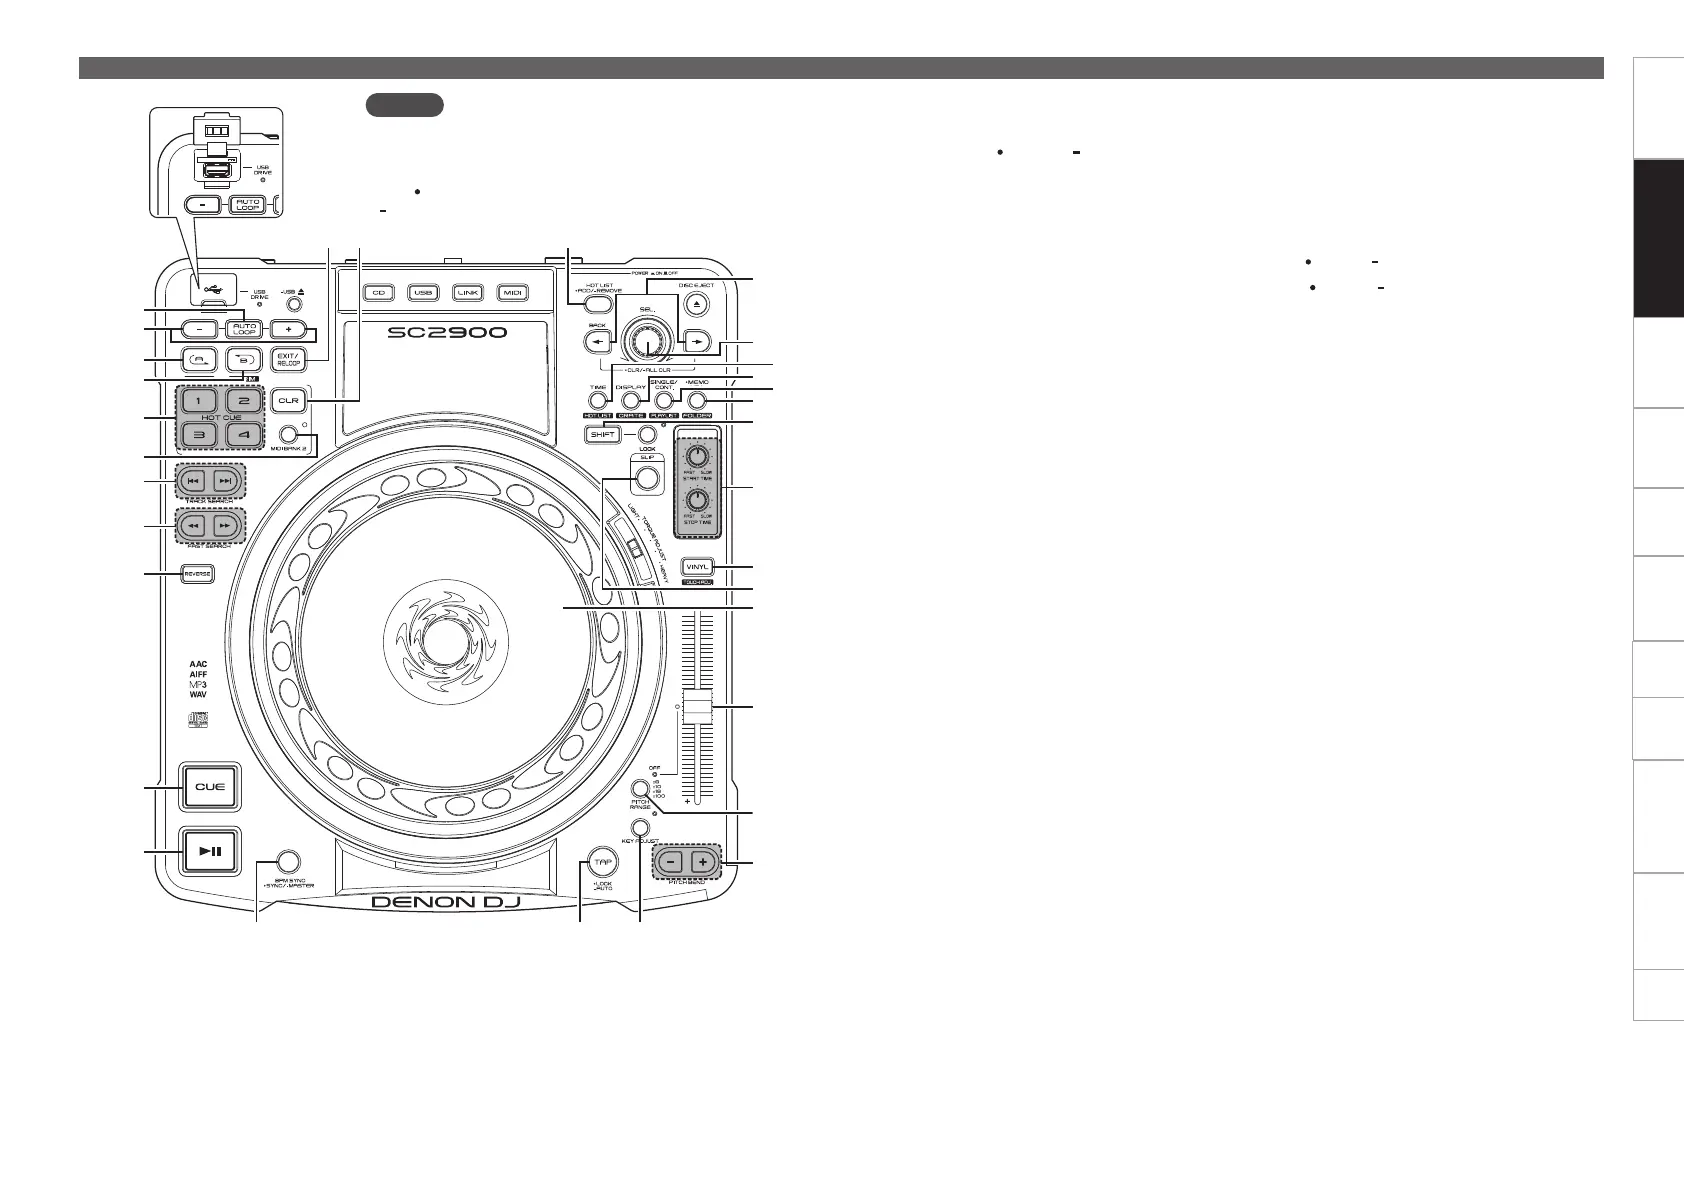
Part names and functionsGetting started
Top panel
Q9 SINGLE/CONT. /PLAYLIST button
Shift modifier for sample slot 3.
W0 Memo/Utility ( MEMO/ UTIL.)/
FOLDER button
Shift modifier for sample slot 4.
W1 SHIFT button
W2 START TIME knob:
Adjust the cut off frequency of the sample slot.
STOP TIME knob:
Adjust the volume of the sample slot.
W3 VINYL button
ON: Switches to VINYL mode.
•The touch sensor is enabled when in VINYL
mode.
OFF: Switches to BEND mode.
•The touch sensor is disabled when in BEND
mode.
W4 SLIP button
Switches the sample slot filter ON/OFF.
•Hold down Q7 TIME and press this button to
switch the sample slot 1 filter ON/OFF.
•Hold down Q8 DISPLAY and press this button
to switch the sample slot 2 filter ON/OFF.
•Hold down Q9 SINGLE/CONT. and press this
button to switch the sample slot 3 filter ON/
OFF.
•Hold down W0 MEMO-UTIL. and press this
button to switch the sample slot4 filter ON/
OFF.
W5 Jog wheel
Performs the search operation or bend operation.
•Hold down W1 SHIFT and turn to scroll through
the list.
W6 Pitch slider
Adjusts the playback pitch.
•Move the knob toward the “–” direction to
slow down the pitch and the “+” direction to
speed up the pitch.
W7 PITCH RANGE button
Switches pitch range.
W8 PITCH BEND button (+/–)
Adjust the pitch temporarily.
W9 KEY ADJUST button
With this ON, the key does not change even if
you adjust the tempo during playback.
E0 TAP LOCK/ AUTO button
E1 BPM SYNC/ MASTER button
Performs auto beat matching.
•Hold W1 SHIFT and press this button to set
the currently selected deck to the beat sync
master deck.
Q5
Q6
W0
Q9
Q7
Q8
W2
W1
Q1
Q0
o
i
y
u
t
r
e
w
q
Q2
Q3 Q4
5V 500mA
W3
W6
W8
W7
W4
W5
E0E1 W9
NOTE
Note that there are many buttons that have two different
functions that are selected by pushing the buttons for a short
time or long time (1 second or more).
The “
” mark indicates a short time push function, and the
“ ” mark indicates a long time push function.

 Loading...