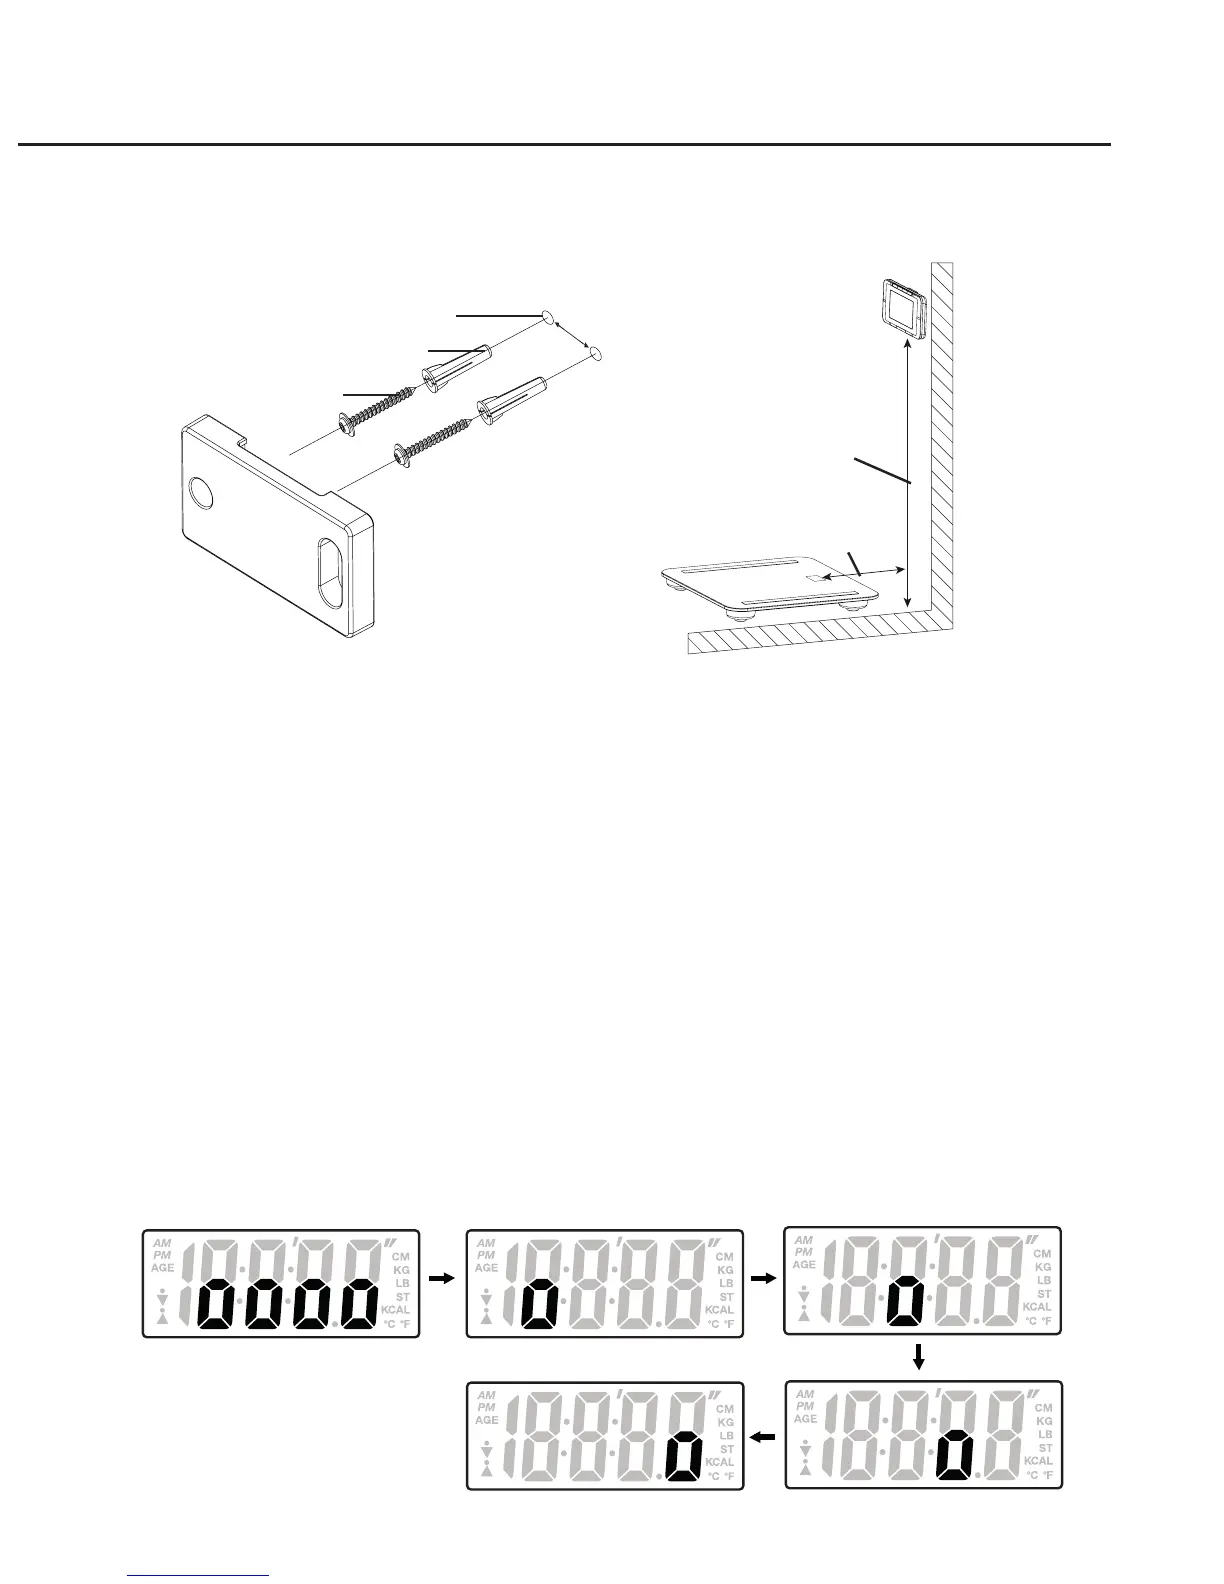
a. Drill two holes on the wall with the distance in between two holes is 58mm (Fig.1)
Make sure the height of the holes is between 140cm and 180cm from floor (Fig.2).
b. Insert two plastic wall plugs into the holes until they are flush with the wall. Place the
bracket against the wall and insert two M3x25 screws through the holes into the wall
plug. Use screwdriver to tighten the screws (Fig.1).
c. Hang the remote display unit in the bracket on the wall.
Use the scale on a flat and hard floor surface. And make sure the scale in front of the remote
with the distance from 15cm to 55cm (Fig.2).
Press lightly on the scale platform to start-up the scale, the display shows “0000” and will
cyclic show on screen. Then display returns to clock mode. The scale is ready for use.
7
Hole on the wall
58mm
140-180cm
15-55cm
Wall plug
M3 x 25 screw
Wall bracket
1. Fix the Wall Mounting Bracket
3. Set the Right Position
4. Start-up the Scale
(Fig. 2: First auto zero)
1. Having inserted the battery in remote device, the remote state is still in clock mode. After insert
the battery for base scale, tap on the base scale, it asks the remote displays “oooo” and then
step off the scale, it ask the remote to display running “o” to indicate that it is measuring the zero
weight (Fig.2).
OPERATION