EN - 8
NOTE– If the audible signal alarms but the unit is not operating, there is no power to the unit. Refer to the Minor Troubleshooting chart on page 9 and contact your
Drive DeVilbiss provider if necessary.
NOTE– If an audible low-frequency vibration sound is detected, the unit is not operating properly. Refer to the Minor Troubleshooting chart on page 9, and contact
your Drive DeVilbiss provider if necessary.
2. Check the ow meter to make sure that the ow meter ball is centered on the line next to the prescribed number of your ow rate.
CAUTION
It is very important to follow your oxygen prescription. Do not increase or decrease the ow of oxygen – consult your physician.
NOTE– Your Drive DeVilbiss provider may have preset the ow meter so that it cannot be adjusted.
NOTE– If the ow meter knob is turned clockwise, the ow decreases (and eventually will shut off the oxygen ow). If the knob is turned counterclockwise, the ow
increases.
NOTE– For prescriptions of 10 LPM, be sure the ball is centered on the 10 liter line. The ball should not touch the red line. Setting the ow higher than 10 may cause
the oxygen purity level to drop.
NOTE– The low-ow alarm may activate if the ow meter ball is set below 2 lpm. The unit will continue to run; however, the Service Required light will come on
accompanied by an audible alarm. Adjust the ow meter to your prescribed ow.
IMPORTANT
Do not use a low-output ow meter with this concentrator.
3. Your Drive DeVilbiss concentrator is now ready for use, properly position the cannula with the nasal prongs facing upward, insert the
prongs into nose. Wrap the cannula tubing over the ears and position in front of body (Figure 4). Allow 15 minutes for the oxygen
concentrator to reach stated performance.
DeVilbiss OSD
®
Operation
The OSD (Oxygen Sensing Device) is a device within your concentrator that monitors the oxygen produced by your unit.
The OSD lights on the top panel are dened as follows:
• Green Normal Oxygen light–acceptable oxygen level.
• Yellow Low Oxygen light– below an acceptable oxygen level.
If the oxygen purity falls below the acceptable level, the green Normal Oxygen light will shut off, and the yellow Low Oxygen light will illuminate. Switch to your reserve oxygen
system. Refer to the Minor Troubleshooting section in this guide on page 9 and contact your Drive DeVilbiss provider.
As an added safety feature, should the oxygen purity continue to drop, an intermittent audible signal will sound. Contact your Drive DeVilbiss provider immediately. Do not
attempt any other maintenance.
RESERVE OXYGEN SYSTEM
As a precaution, your Drive DeVilbiss provider may supply you with a reserve oxygen system. If your unit loses electrical power or fails to operate correctly, the Patient Alert
System will sound to signal you to switch to your reserve oxygen system (if provided) and contact your Drive DeVilbiss provider.
CARING FOR YOUR DEVILBISS OXYGEN CONCENTRATOR
Drive DeVilbiss recommends using only original DeVilbiss parts and lters in order to guarantee reliable operation of the product.
WARNING
Do NOT use lubricants, oils or grease.
Before attempting any cleaning procedures, turn the unit “Off.”
Cannula/Mask, Tubing and Humidifier Bottle
Clean and replace the cannula/mask, tubing and humidier bottle according to the manufacturer’s instructions.
Air Filter
The air lter should be inspected periodically and cleaned as needed by the user or caregiver. Replace if torn or damaged. To clean, these
steps should be followed:
NOTE – Frequency of inspection and cleaning of lter may be dependent upon environmental conditions like dust and lint.
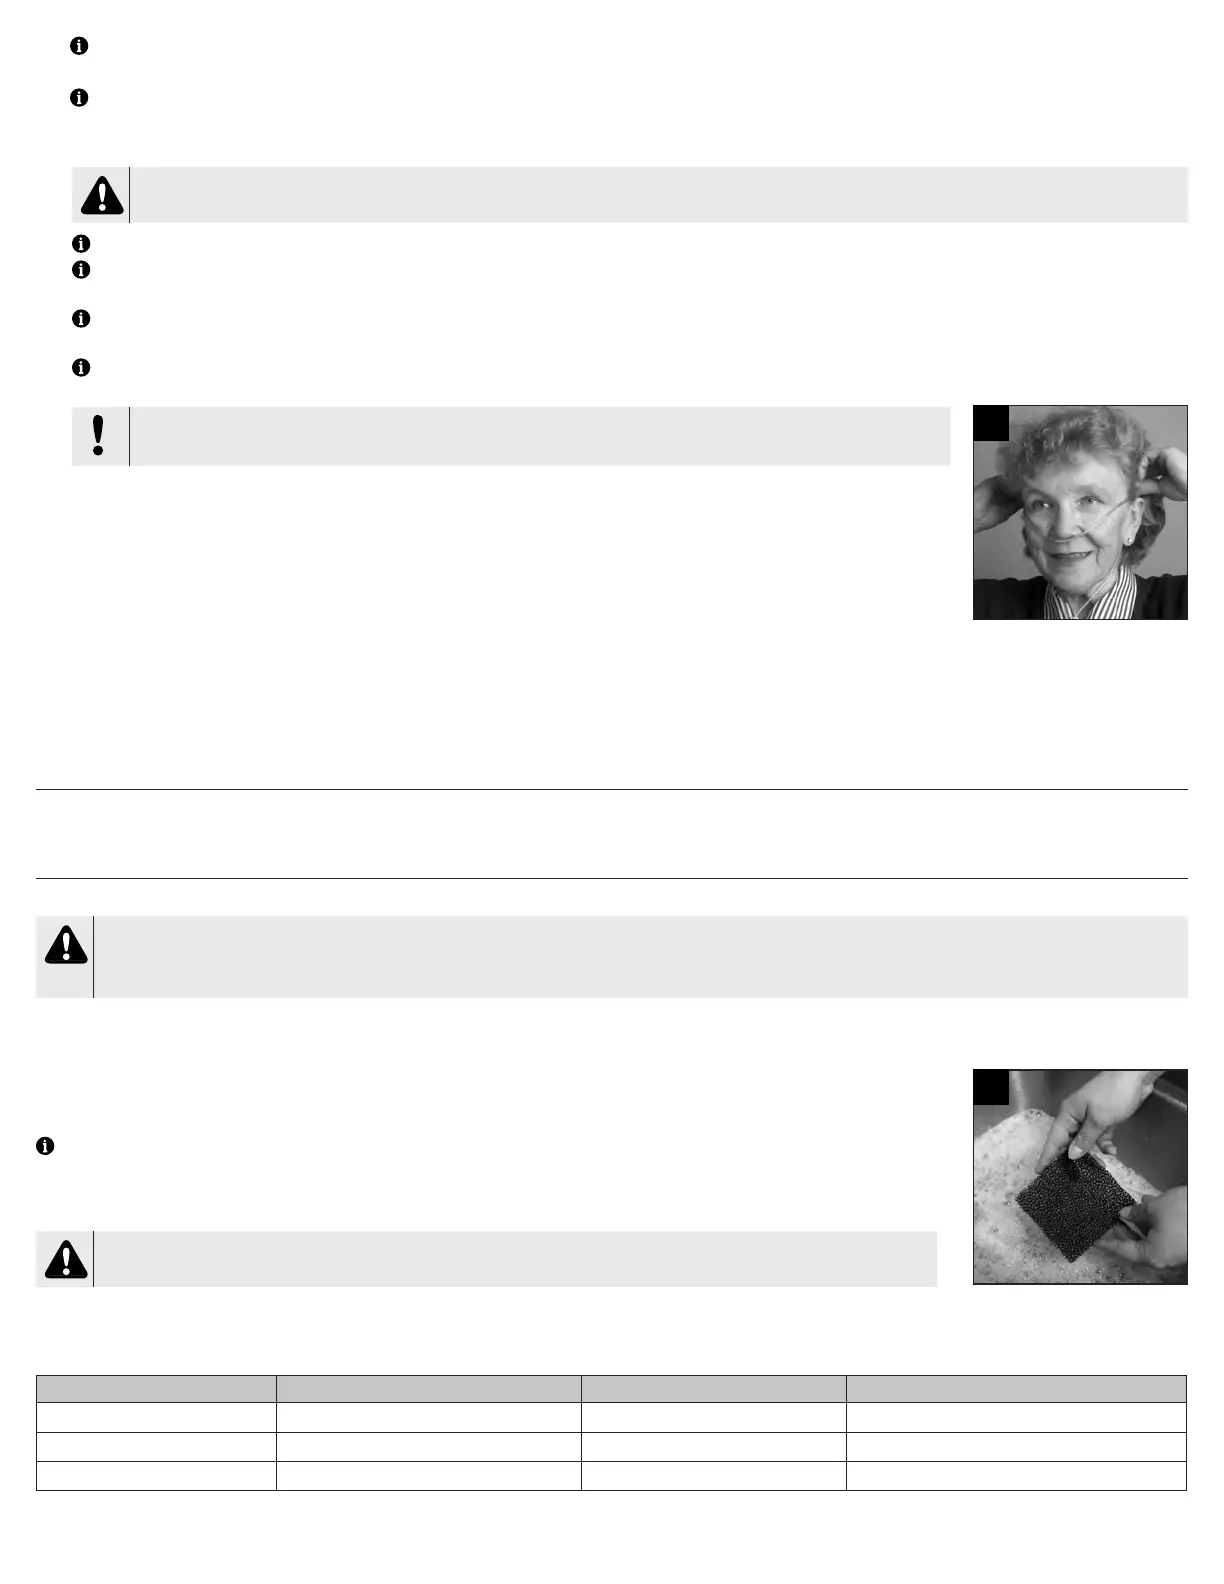
1. Remove the air lter, located on the back of the unit.
2. Wash in a solution of warm water and dishwashing detergent (Figure 5).
3. Rinse thoroughly with warm tap water and towel dry. The lter should be completely dry before reinstalling.
CAUTION
To prevent product damage, do not attempt to operate the unit without the air lter or while the lter is still damp.
Exterior Cabinet
Clean the concentrator exterior cabinet weekly by using a damp cloth and wiping dry.
Cleaning
Recommended cleaning interval Number of cleaning cycles * Compatible cleaning method
Outer Cabinet 7 days 260 Water, use only a damp cloth
Air Filter 7 days 104 Mild dish soap (2 tbsp) and warm water (2 cups)
Oxygen Outlet Connector 7 days 104 Mild dish soap (2 tbsp) and warm water (2 cups)
* number of cleaning cycles determined by recommended cleaning interval and expected service life
4
5
SE-1025-1
 Loading...