EN - 7SE-DV57-1
OPERATION
1. Fully insert the power cord into the back of the device. Plug the other end of the power cord into the AC wall outlet.
WARNING
Ensure the mains power cord is fully inserted into the CPAP and the power cord plug is completely inserted into a
fully functioning AC wall outlet. Failure to do so may cause an electrical safety hazard.
2. Attach air supply tubing to air supply port in the back of the device.
3. Prepare the mask (supplied by your equipment provider) by referring to the mask’s instruction guide.
4. Connect the air supply tubing to the mask.
NOTE–The air supply tubing supplied with the device is specially designed to prevent kinking and allow you to receive
optimal airow. Use only the 22 mm diameter, smooth-bore, kink-resistant tubing supplied with this device or an air supply
tubing recommended by your equipment provider.
Start-up
Put on your mask and press the ON/OFF button on the keypad OR put on your CPAP mask and take a few breaths to turn
onairowautomatically.Thepressureinyourmaskwillrisetothesetpressureinabout10seconds.
NOTE–If the device does not automatically start after taking 2-3 breaths, this feature may have been disabled. If Auto ON/
OFF is disabled, you must manually press the ON/OFF button to start and stop the device.
The keypad display shows the actual mask pressure while the device is in use. Because this is the actual pressure, the
device pressure reading may vary slightly as you breathe.
IfyourDeVilbissSleepCubesystemincludesahumidier,itsheatercontrolsandstatusaredisplayed.
NOTE– If the display on your device is not similar to those listed above, refer to the section entitled “Patient Messages” on
page EN-9.
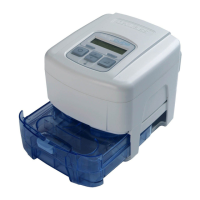
Controlling the Humidity (optional)
Theheatersettingcanbeadjustedwithinarangeof1to10.Theoptimaltemperaturesettingisdependentontheambient
temperature and humidity of your room. If your room temperature is low and/or the relative humidity is high, then a lower
temperature setting may be necessary to prevent excess condensation in the air supply tubing. If the room temperature is
high and/or the relative humidity is low, then a higher temperature setting may be necessary for optimal comfort.
Theheatersettingof1resultsinaheaterplatetemperatureofapproximately84˚F(29˚C).Theheatersettingof10results
inaheaterplatetemperatureofapproximately149˚F(65˚C).
NOTE–Always allow at least 10 minutes of cooling time after turning the device off before removing the water chamber
from the humidier cradle.
WARNING
Do not attempt to ll the humidier while it is attached to the humidier cradle. Damage to the humidier cradle
may occur.
CAUTION– Use only distilled water that is at room temperature. Do not add any medication or other additives to the water.
CAUTION– For proper operation, ensure the ow generator is OFF before inserting humidier chamber.
WARNING
Never touch the heater plate on the humidier cradle. Never touch the heat transfer plate on the bottom of the
water chamber. These plates can reach temperatures as high as 149˚F (65˚C) during operation.
Do not operate the heater if the water chamber is empty. The heater plate may be turned off using the keypad
heater control when being used without water.
SmartCode and Adherence Score Information
Your homecare provider may contact you to retrieve SmartCode and Adherence Score information. To display the
SmartCode, press the LEFT arrow key once. Use the UP arrow or DOWN arrow keys to change the SmartCode reporting
period. Press the LEFT arrow key again to display the Adherence Score.
NOTE–To ensure accurate SmartCode information, the CPAP should remain plugged in and powered during the day. Do
not unplug daily.
The Quick View Menu shows a summary of information which is reported in the SmartCode data. Information in the Quick
View includes: Number of days used more than 4 hours (or can be set to 5 hours by clinician), AHI (Apnea/Hypopnea
Index), High Leak percent (percent of time at leak >95 L/m) and Daily Usage (average hours per day used). Each
parameter can be viewed in any of four time periods: 1 day, 7 days, 30 days and 90 days.