13
ENGLISH
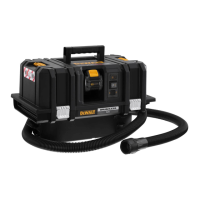
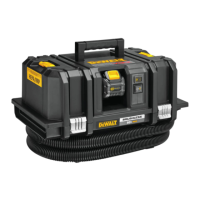
Dust Extractor Cleaning
To Empty Tank (Fig. A, F, H)
WARNING: Appropriate personal protective equipment
like a dusk mask and gloves should be used while cleaning
the dust extractor and emptying thetank.
WARNING: Emptying and maintenance, including
disposal of the dust collection container, may be carried
out only by trained and qualified specialists. Wear the
appropriate protective equipment.
The buzzer sounds and suction is reduced when the tank isfull.
1. Press the three position switch
3
to the Off (O) position and
remove thebattery
7
.
2. Close the twist-lock hose inlet with the hose inlet plug
9
.
3. Remove the dust extractor head
6
from thetank
21
.
4. Dispose of collection bag in appropriate container according
to statutoryprovisions.
5. Clean or change filters
17
. Refer to Filter section of
thismanual.
6. Inspect machine for damage by foreign objects. Contact the
nearest
authorized service centre for replacement
of damaged or missingparts.
7. Replace dust extractor head onto the tank and
latchsecurely.
Stacking Using the
TSTAK Stacking
Latches (Fig. A)
WARNING: When stacking, always place the dust
extractor on thebottom.
The DEWALT TSTAK stacking latches
10
l allow for other
TSTAK products to securely stack one on top of the other for
convenience andportability.
To use the TSTAK stacking latches
10
, place a TSTAK
compatible unit on top of the dust extractor and flip up the two
TSTAK stacking latches so that they clip securely to the bottom
of theunit.
Filters
WARNING: The filters must always be in place
whilevacuuming.
Filter Care
The filters included with this dust extractor are long life filters. To
be effective in minimizing dust recirculation, the filters MUST be
installed correctly and in goodcondition.
Automatic Filter Cleaning System
This dust extractor has a highly effective filter cleaning system
which minimizes filter clogging. Every 20 seconds, one of the
two filters gets automatically cleaned. The cleaning process
alternates between the filters and continues through the life of
theunit.
NOTE: It is normal to hear a clicking sound during thisprocess.
NOTE: After many hours of operation the automatic filter
cleaning system may not be effective. When this happens the
filters will need to be cleaned or replaced.
To Remove Filters (Fig. A, H, I)
WARNING: Appropriate personal protective equipment
like dust mask and gloves should be used while handling
thefilters.
1. Press the three position switch
3
to the Off (O) position and
remove thebattery
7
.
2. Release tank latches
4
and remove dust extractor head
6
from canister. Place dust extractor head on a level surface
upsidedown.
3. Turn each filter
17
counterclockwise, and carefully remove
from dust extractor head, ensuring debris does not fall into
mountinghole.
NOTE: Use care to not damage filtermaterial.
4. Inspect filters for wear, tears or otherdamage.
NOTE: If there is any doubt on the condition of the filters,
they MUST be replaced. DO NOT continue use if filters
aredamaged.
WARNING: Never use compressed air or a brush to clean
filters, otherwise damage to the filter membrane will
occur which will allow dust to pass through the filter.
If needed, rinse with room temperature water and let
air dry. Cleaning of the filters is typically unnecessary.
Even if the filter is covered with dust, the automatic filter
cleaning system will maintain maximum performance
and continue to function. If visual damage to the filter
membrane exists, replace filters. Filters typically last
between six and twelve months, depending on use
andcare.
NOTE: Dispose of filter in appropriate container according to
statutoryprovisions.
To Install Filters (Fig. E, F, I)
WARNING: The filters must always be in place
whilevacuuming.
1. Ensure filter seal is in place and isclean andsecure.
2. Line up the tabs on the filter
17
to the notches on the dust
extractor head and using moderate force, turn clockwise
until the filter issecure.
NOTE: Use care to not damage filtermaterial.
3. Place the dust extractor head
6
onto the tank
21
and
secure it by closing the tank latches
4
.
MAINTENANCE
The appliance must be subjected to a technical inspection
by D
WALT Service or a trained person at least once a year to
check, damage to the filter, air leakage, and to ensure correct
operation of controlling devices.
WARNING: For vacuum cleaners of the class M, please
note: The exterior of the dust extractor should be
decontaminated by dust extraction and wiped clean
or seal it in a suitable container or material before
being removed from an area contaminated with
hazardous substances; All parts of the dust extractor
must be considered contaminated when taken out of the
hazardous area and appropriate measures must be taken
to avoid dust distribution.