ENGLISH
11
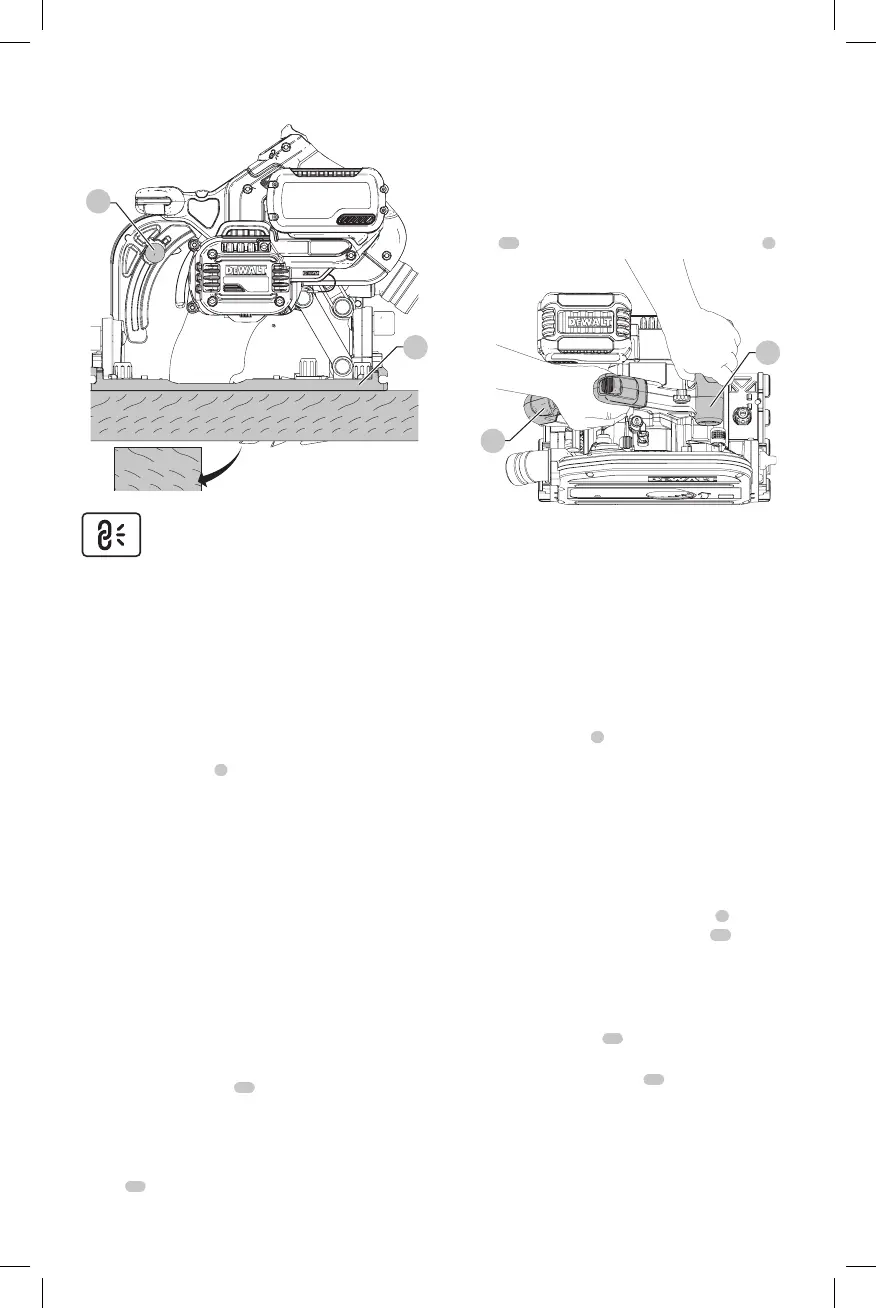
NOTE: For optimal results, allow the saw blade to protrude
from the workpiece by about 1/8” (3 mm) (Fig.F).
4
8
Fig. F
Wireless Tool Control (Fig. A)
(Available on some units)
CAUTION: Read all safety warnings, instruction and
specifications of the appliance which is paired with
this tool.
This tool is equipped with a Wireless Tool Control transmitter
which allows it to be wirelessly paired with another Wireless
Tool Control device, such as a dustextractor.
To pair your tool using Wireless Tool Control, press and
hold the on/off switch
1
and the Wireless Tool Control
pairing button on the separate device. An LED on the
separate device will let you know when your tool has been
successfullypaired.
OPERATION
WARNING: To reduce the risk of serious personal
injury, turn unit off and remove the battery pack
before making any adjustments or removing/
installing attachments or accessories. An
accidental start-up can causeinjury.
Installing and Removing the Battery Pack
(Fig. A1)
NOTE: For best results, make sure your battery pack is
fullycharged.
To install the battery pack
14
into the tool handle, align the
battery pack with the rails inside the tool’s handle and slide
it into the handle until the battery pack is firmly seated in
the tool and ensure that it does notdisengage.
To remove the battery pack from the tool, press the release
button
15
and firmly pull the battery pack out of the tool
handle. Insert it into the charger as described in the charger
section of thismanual.
Proper Hand Position (Fig. G)
WARNING: To reduce the risk of serious personal injury,
ALWAYS use proper hand position as shown.
WARNING: To reduce the risk of serious personal
injury, ALWAYS hold securely in anticipation of a
suddenreaction.
Proper hand position requires one hand on the front
handle
11
, with the other hand on the main handle
3
.
11
3
Fig. G
Instructions for Use
WARNING: Always observe the safety instructions
and applicableregulations.
WARNING: To reduce the risk of serious personal
injury, turn tool off and disconnect battery pack
before making any adjustments or removing/
installing attachments or accessories. An
accidental start-up can causeinjury.
Switching On and Off (Fig. A1)
Press the on/off switch
2
to turn the track sawon.
Guiding the Tool (Fig. A1, G, H)
WARNING:
• ALWAYS secure the workpiece in such a manner
that it cannot move whilesawing.
• ALWAYS push the machine forward. NEVER pull
the machine backward towardsyou.
• ALWAYS use the track saw with both hands.
Put one hand on the main handle
3
and the
second hand on the front handle
11
as shown
in FigureG.
• ALWAYS use the clamp to hold the rail to
theworkpiece.
• Use proper hand position to guide the sawproperly.
• The cutting indicator
27
displays the cutting line for 0°
and 47° cuts (without guide rail).
• The blade position indicator
29
shows the blade
position for fullplunge.
• For optimum results, clamp the workpiece bottomup.