38
ENGLISH
Mode Selection
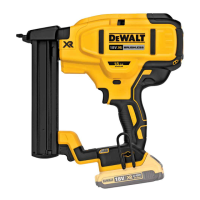
The finish nailer is capable of firing nails using bump actuation
or sequential actuation. Before operating this tool, look at the
selector switch to determine the actuation mode. Read all
instructions before selecting actuationmode.
WARNING: Keep fingers AWAY from trigger when not
driving nails to avoid accidental fastener discharge.
NEVER carry tool with finger on trigger. In bump mode
tool will drive a nail if contact trip is bumped while trigger
isdepressed.
Sequential Action (Fig. D)
Use sequential actuation mode for intermittent nailing where
very careful and accurate placement and depth control is
desired. The sequential actuation mode provides the maximum
delivery of power for driving the longestnails.
To operate the nailer in sequential actuation mode:
1. Slide the selector switch
8
to expose the single nail
icon .
2. Fully depress nosepiece against the work surface (motor
willstart).
3. Pull trigger (nail will drive into worksurface).
4. Releasetrigger.
5. Lift nosepiece off worksurface.
6. Repeat steps 2 through 4 for nextapplication.
NOTICE: The contact trip needs to be depressed followed
by a trigger pull for each nail followed by a release of both
the contact trip and trigger after eachnail.
Bump Action (Fig. D)
Bump action is intended for rapid nailing on flat, stationary
surfaces and typically most effective for applications that require
driving shorternails.
When the tool is set in the bump actuation mode, two
methods of tool operation are available: place actuation and
bumpactuation.
Slide the selector switch
8
to expose the triple nail icon .
To operate the tool using the place actuation method:
WARNING: A nail will be driven each time the trigger is
depressed as long as the contact trip remainsdepressed.
1. Depress the contact trip against the worksurface.
2. Depress thetrigger.
To operate the tool using the bump actuation method:
1. Depress thetrigger.
2. Push the contact trip against the work surface. As long as
the trigger is depressed, the tool will drive a nail every time
the contact trip is depressed. This allows the user to drive
multiple nails insequence.
WARNING: Do not keep trigger depressed when tool is
not in use. Keep the trigger lock-off in the locked position
when the tool is not inuse.
WARNING: When the tool’s motor is running, pulling
the trigger or depressing the contact trip will cause a nail
tobedriven.
Preparing the Tool
WARNING: NEVER spray or in any other way apply
lubricants or cleaning solvents inside the tool. This can
seriously affect the life and performance of thetool.
NOTE: The battery pack is not fully charged out of the carton.
Follow instructions outlined (see Charging aBattery).
• Read the Safety Instruction section of thismanual.
• Wear eye and earprotection.
• Ensure magazine is empty of allfasteners.
• Check for smooth and proper operation of contact trip and
pusher assemblies. Do not use tool if either assembly is not
functioning properly. NEVER use a tool that has the contact
trip restrained in the actuatedposition.
• Keep tool pointed away from yourself andothers.
• Insert fully charged batterypack.
Using the Trigger Lock-off (Fig.E)
WARNING: To reduce the risk of serious personal injury,
do not keep trigger depressed when tool is not in use. Keep
the trigger lock-off switch LOCKED (Fig.E) when the tool
is not inuse.
WARNING: To reduce the risk of serious personal injury,
lock off trigger, disconnect battery pack from tool and
remove nails from magazine before makingadjustments.
Each
nailer is equipped with a trigger lock-off
2
which
when pushed to the right as shown in FigureE, prevents the
tool from firing a nail by locking the trigger and bypassing
power to themotor.
When the trigger lock-off is pressed to the left, the tool will be
fully operational. The trigger lock-off should always be locked
off whenever any adjustments are made or when tool is not in
immediateuse.
NOTICE: Do not store tool with battery pack installed. To
prevent damage to the pack and to ensure best battery
life, store battery packs out of the tool or charger in a cool,
drylocation.
Loading the Tool (Fig.F)
WARNING: Keep the tool pointed away from yourself and
others. Serious personal injury mayresult.
WARNING: Never load nails with the contact trip or
trigger activated. Personal injury mayresult.
WARNING: Always remove battery pack before loading or
unloading nails. Serious personal injury mayresult.
Load and Draw Method (Fig. A)
1. Press magazine latch
16
and open sliding magazine
7
fully.
2. Insert fasteners into the side of magazine; fasteners should
be loaded with chisel tip against front ofmagazine.
3. Close sliding magazine until the magazine latch
clipssnuggly.
 Loading...
